PCB Repair Logs Aliens: Difference between revisions
mNo edit summary |
mNo edit summary |
||
| (3 intermediate revisions by the same user not shown) | |||
| Line 5: | Line 5: | ||
<tr class="> | <tr class="> | ||
<td colspan="2" class="" style="text-align:center;">[[Image:marquee_aliens.png|200px]]</td> | <td colspan="2" class="" style="text-align:center;">[[Image:marquee_aliens.png|200px]]</td> | ||
</tr> | |||
<tr class=""> | |||
<th scope="row" style="text-align:left; white-space: nowrap;">Manufacturer</th> | |||
<td class="" style="">[[PCB_Manufacturers_Konami|Konami]]</td> | |||
</tr> | |||
<tr class=""> | |||
<th scope="row" style="text-align:left; white-space: nowrap;">Year</th> | |||
<td class="" style="">1990</td> | |||
</tr> | </tr> | ||
<tr class=""> | <tr class=""> | ||
| Line 12: | Line 20: | ||
<tr class=""> | <tr class=""> | ||
<th scope="row" style="text-align:left; white-space: nowrap;">Pin Out</th> | <th scope="row" style="text-align:left; white-space: nowrap;">Pin Out</th> | ||
<td class="" style=""> | <td class="" style="">[http://wiki.aussiearcade.com.au/index.php/File:Jamma_pinout.png Jamma Pinout]</td> | ||
</tr> | </tr> | ||
</table></p> | </table></p> | ||
| Line 191: | Line 199: | ||
The scrap Aliens board is still scrap, have found and bridged 5 open circuit tracks around the CPU and it is still firmly dead, I may get back to it one day but I may not. | The scrap Aliens board is still scrap, have found and bridged 5 open circuit tracks around the CPU and it is still firmly dead, I may get back to it one day but I may not. | ||
<br> | |||
<br> | |||
===Board 4=== | |||
<br> | |||
'''Repairer:''' [http://www.aussiearcade.com.au/member.php/11905-retroyoda retroyoda]<br> | |||
'''Forum Thread:''' [http://www.aussiearcade.com.au/showthread.php/56573-Konami-Aliens-%281990%29-repair-log-no-blue-red-video-output-bad-audio Aliens PCB Repair]<br> | |||
<br> | |||
Hi chaps, | |||
I recently bought a set of 4 "untested" arcade boards which included a 1990 Konami Aliens board. This one looked to be in the best condition, so thought this would be ideal for my first attempt at an arcade board repair. | |||
I started by inspecting the board, and noted that there were some deep scratches on the underside of the board, and I noticed a bent pin on one of the custom Konami surface-mount ICs which was shorting out against the pin beside it, and a large capacitor in the corner of the board which was bulged and leaking. | |||
I used a needle to straighten the bent pin on the custom IC, and decided to ignore the capacitor for the time being since I figured it was probably just part of the audio circuitry. After testing the scratched traces on the underside of the board with a digital multimeter, I concluded that although the scratches looked nasty, they weren't affecting the continuity of the traces. | |||
After powering up the board, it proceeded to perform a quick self-test and then moved on to the title screen albeit only in green! | |||
I started a game and all sprites and backgrounds were fine, music and sound effects were ok but very crackly. | |||
I powered off again and started tracing my way back from the JAMMA connector to figure out why there were absolutely no red or blue video signals being displayed. The first components I came to were some flat component packs labelled Konami 052535 which had no visible damage. All solder connections and surrounding traces and components tested checked out ok so I had a look on the internet to see if I could find what the mysterious 052535 parts were. | |||
I found somewhere selling them for £7 each, also found a couple of repair logs noting that missing colour output problems had been resolved by replacing these parts, and after yet more searching finally found someone who had disassembled one of these components for analysis: | |||
http://mrsportysrb.blogspot.co.uk/20...52535-joy.html | |||
I went back to the board to take some readings off these components while it was running and noted that all three parts appeared to be receiving similar input signals, yet there were no output signals on two of the three parts. This pretty much assured me that I'd found the source of the problem, so after looking at the breakdown of this component again I figured that the problem would most likely be caused by a failed transistor. I decided to bridge pins 2 and 3 with a 200 Ohm resistor on the blue channel and give it a try. | |||
I powered up the board and all the blue colours were back! I did the same again for the red video channel, and replaced the faulty audio cap and now all colours are working, and audio is working properly again. | |||
Recommended fix for a totally missing colour on this board is to replace the relevant Konami 052535 part.<br> | |||
<br> | |||
[[PCB_Repair_Index|Back to PCB Repair Index]] | [[PCB_Repair_Index|Back to PCB Repair Index]] | ||
Latest revision as of 06:52, 5 February 2013
Aliens
 |
|
| Manufacturer | Konami |
|---|---|
| Year | 1990 |
| PCB Image | Aliens PCB |
| Pin Out | Jamma Pinout |
Board 1
Repairer: VectorGlow
Forum Thread: Aliens PCB Repair
Symptom: Main sprites are either breaking up and parts randomly appearing all over the place, or main sprites okay but whole or complete pieces of other sprites randomly popping up
Diagnosis: Self test didn’t indicate a RAM or ROM problem, but determined that the outputs of the 6116 ‘skinny’ RAM at location I3 were intermittently flaky. That RAM later started to show up in the self test as faulty
Cure: Replaced 6116 RAM at location I3
Symptom: Parts of the letters missing on the text of the self test screen, plus ‘sparkles’ appearing in the graphics along with variable sprite faults
Cure: Some poorly connected pins on the surface mount Konami custom ( 051962 ) at location J16
Info:
CA324 amp at location C11 is for the in game music
CA324 amp at location C6 is for the speech and sound f/x
Board 2
Repairer: Womble
Forum Thread: Aliens PCB Repair
Picked up a couple of faulty Aliens boards recently...
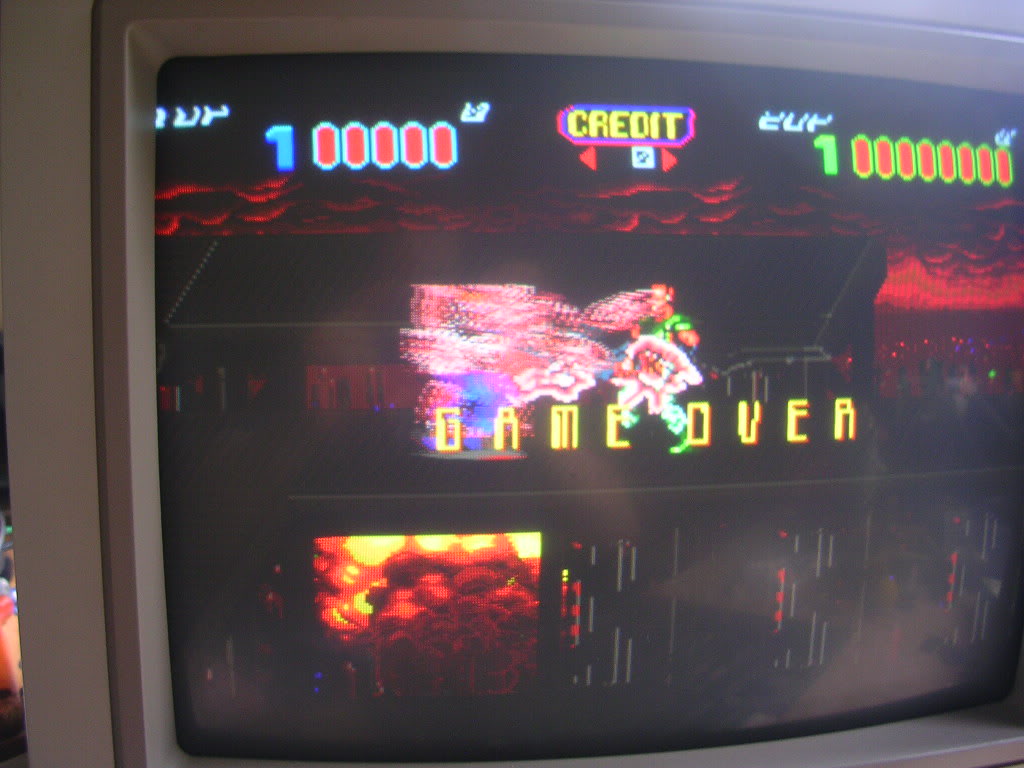
... I had a faulty Aliens in my scrap pile that I paid far too much for so I was keen to get another couple to compare with it. The first board was almost fully working, the only fault was that the sprite graphics were a mess.
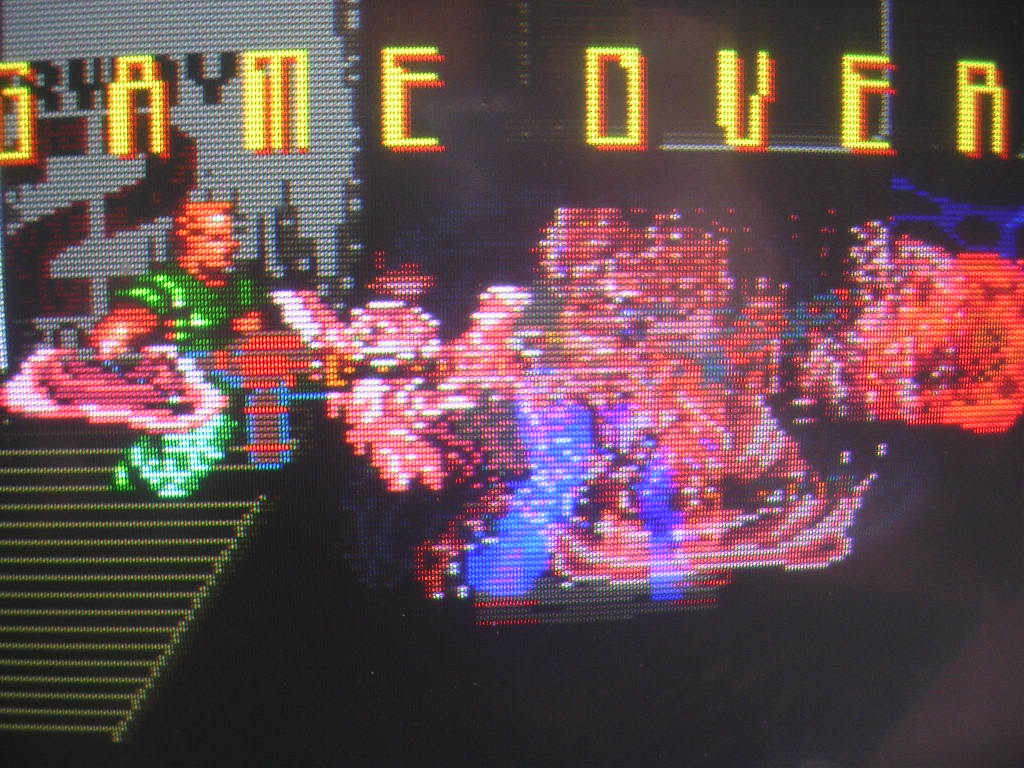
By far the most likely candidate was the mask ROMs, so I flipped switch 3 on Dip Bank 3 and put it into test mode. The test it performs on boot up is only a quick test of system RAM and ROM, it ignores the mask ROMs entirely. After a few minutes thinking about it the board came back with the report that K2 was bad.
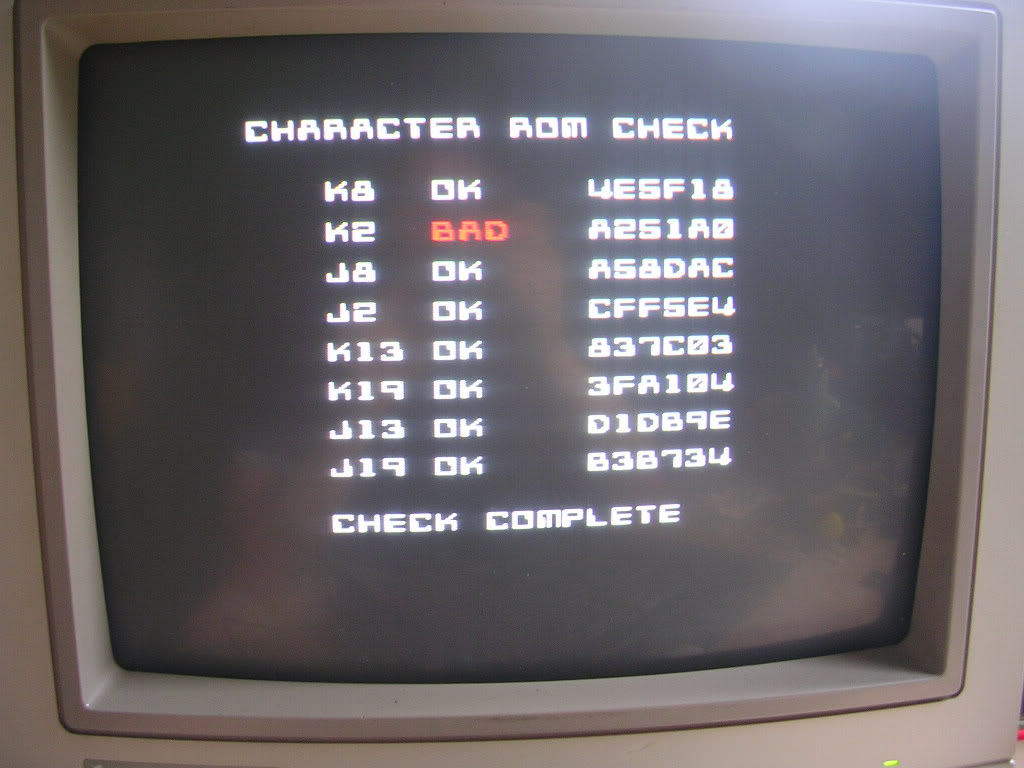
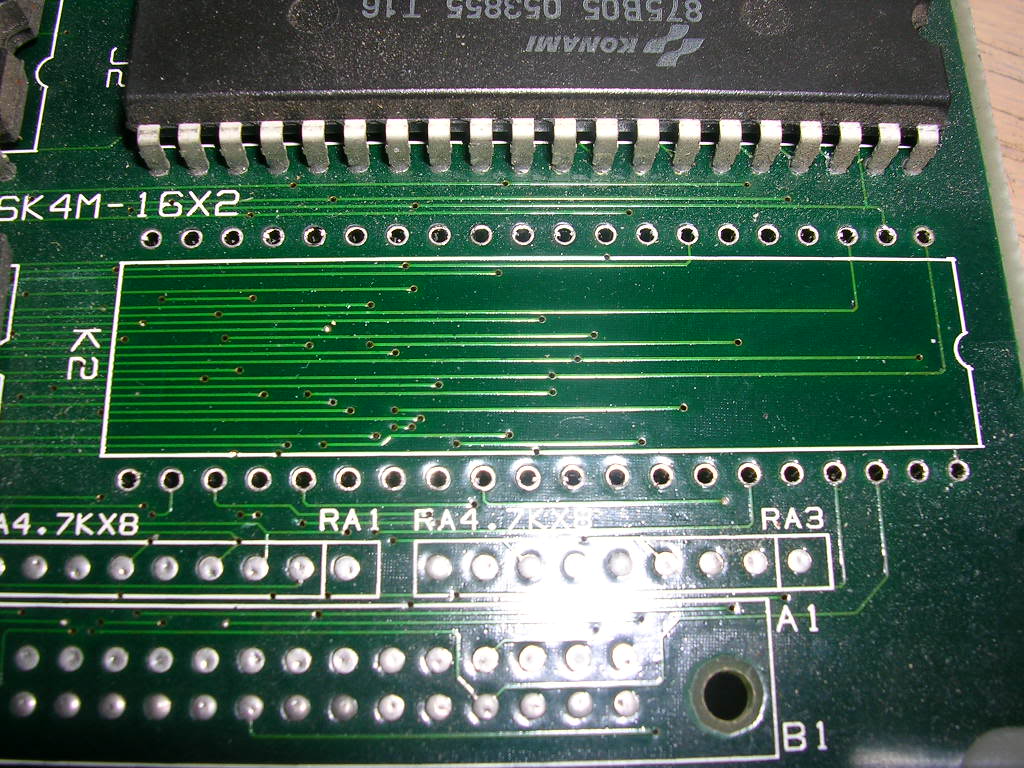
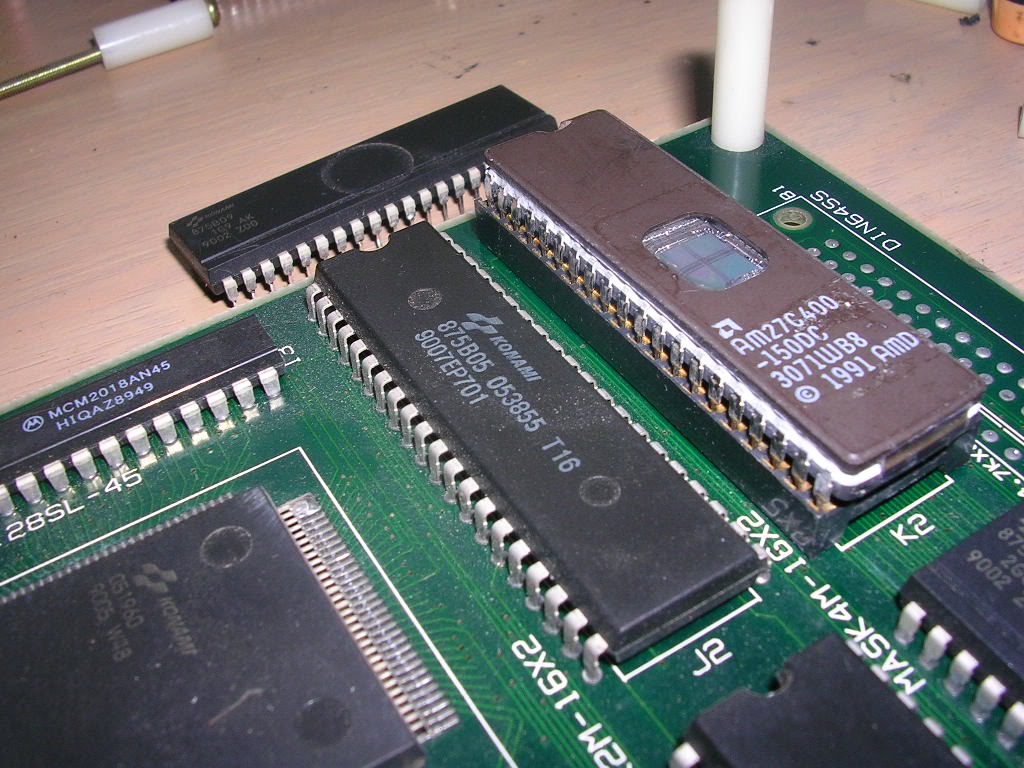
...and as I know these are pin compatible with 27c400 eproms I tried to dump on my eprom reader, it reported that a number of pins were AWOL and the resulting dumped data was not recognisable. So in went a 40 pin socket and a 27c400 EPROM burnt with the data k02_b09.bin from the MAME set.
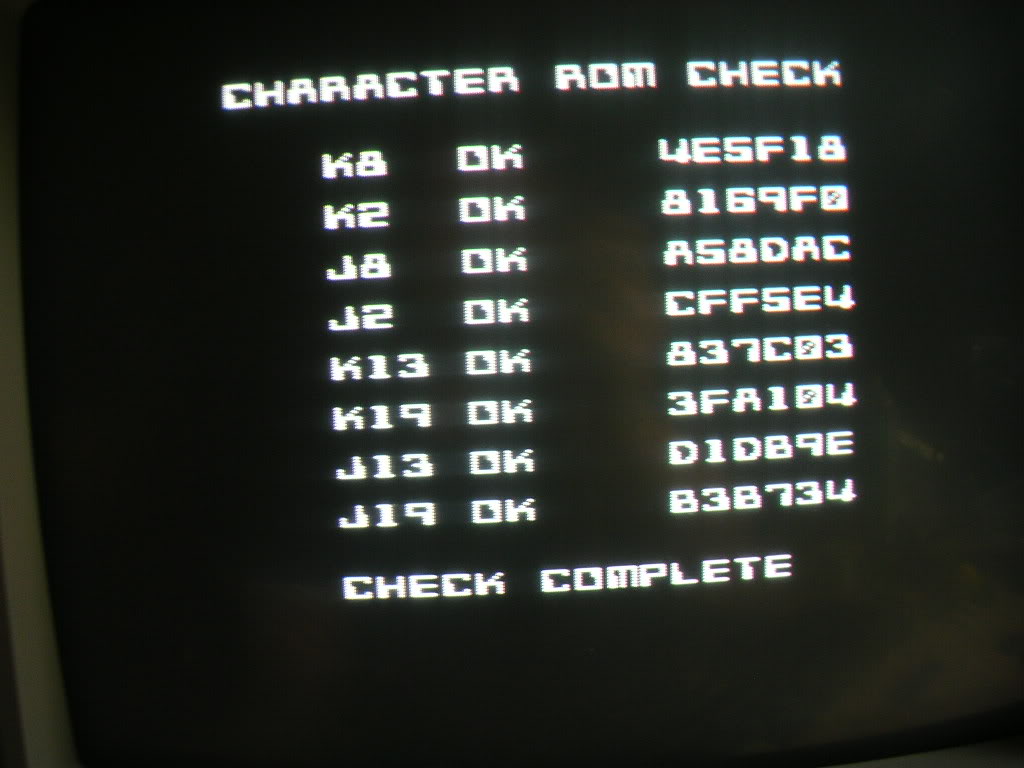
Fired the board up and let it run through the diagnostics again and this time everything passed.
After setting the test switch back to "off" and rebooting the game it ran perfectly.
Board 3
Repairer: Womble
Forum Thread: Aliens PCB Repair
The second board was properly dead, it gave a blank white screen that flashed every second or so, which is the watchdog timer circuit constantly bumping the CPU's reset line to try and get the board to boot. Its purpose is to monitor the buses and if there is no activity after a certain period of time it will briefly pull the /RESET line on the CPU low to initilalise a reboot. It is to stop a crashed board sitting in a cabinet unable to take money and burning whatever image is on the screen into the tube. On a faulty board however it will keep trying for ever even when the fault means it has no hope of success.
This board wasn't in quite as good a condition as the previous board, there were some scuff marks on the solder side and some scratches across some tracks. These all were superficial damage as none of the tracks had been cut. There was also some signs that someone had attempted a repair by the sprite SRAM chip in the top right corner of the board. There was a lot of scratching between one of the Konami custom chips and this SRAM chip, and what looked like an attempt to resolder the pins on the custom itself.
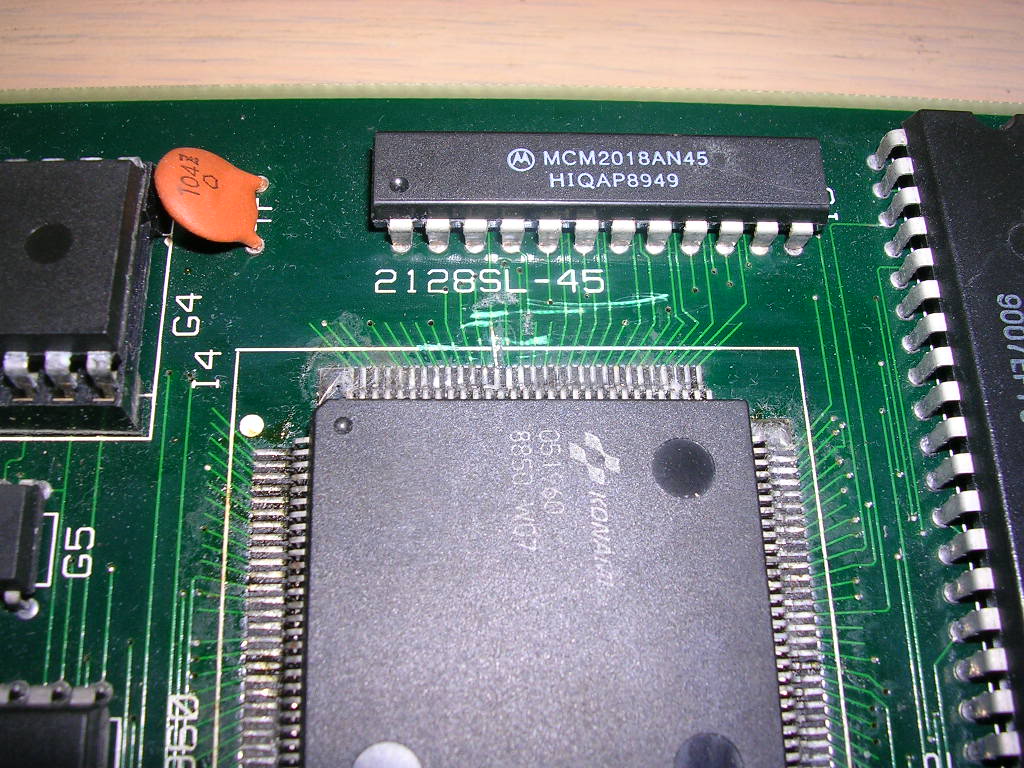
The pins on the custom chip looked like someone had run a dry soldering iron over them in an attempt to fix any dry joints. Although this looked ugly it wasn't going to stop the board from booting.
First thing to do was the dump the ROMs, on these boards the two system ROMs for the main CPU code are socketed and are a 27c1001 and a 25c512 chip, the 27c512 tested fine but the 27c1001 chip at C24 gave a bad read. I tested the same ROM off my really scrap Aliens and it read fine so I dropped it in. The fault remained unchanged.
Having a working board meant I could determine which RAM chips did what by shorting a couple of address bus lines together and watching what goes wrong.
If it turns out to be a graphics SRAM chip then the gfx gets corrupted, if its a palette SRAM chip then the colours go wonky, and if you hit the system SRAM then the board crashes.
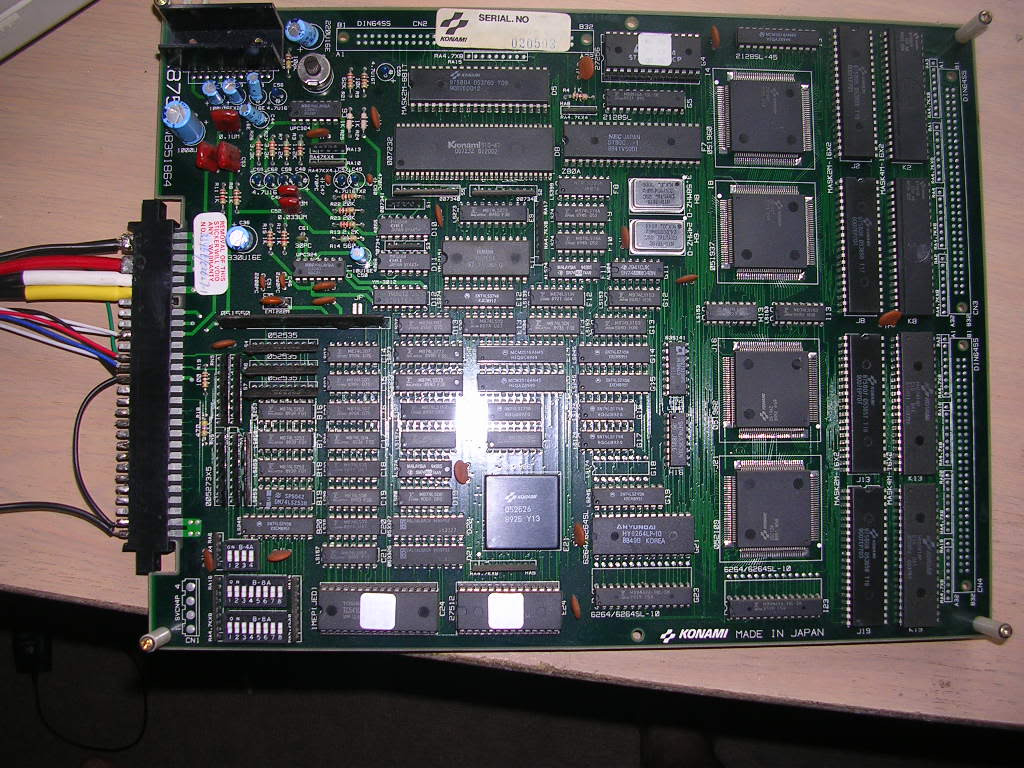
As the board was not booting then fault is likely to lie between the CPU and the system RAM, it could be the CPU itself, the system RAM itself or any of the logic and tracks that are involved in running the bare bones of the game code. The CPU on this board is a somewhat mysterious 64 pin Konami custom chip marked "052526". It's the black square FPGA chip by the two program ROMs.
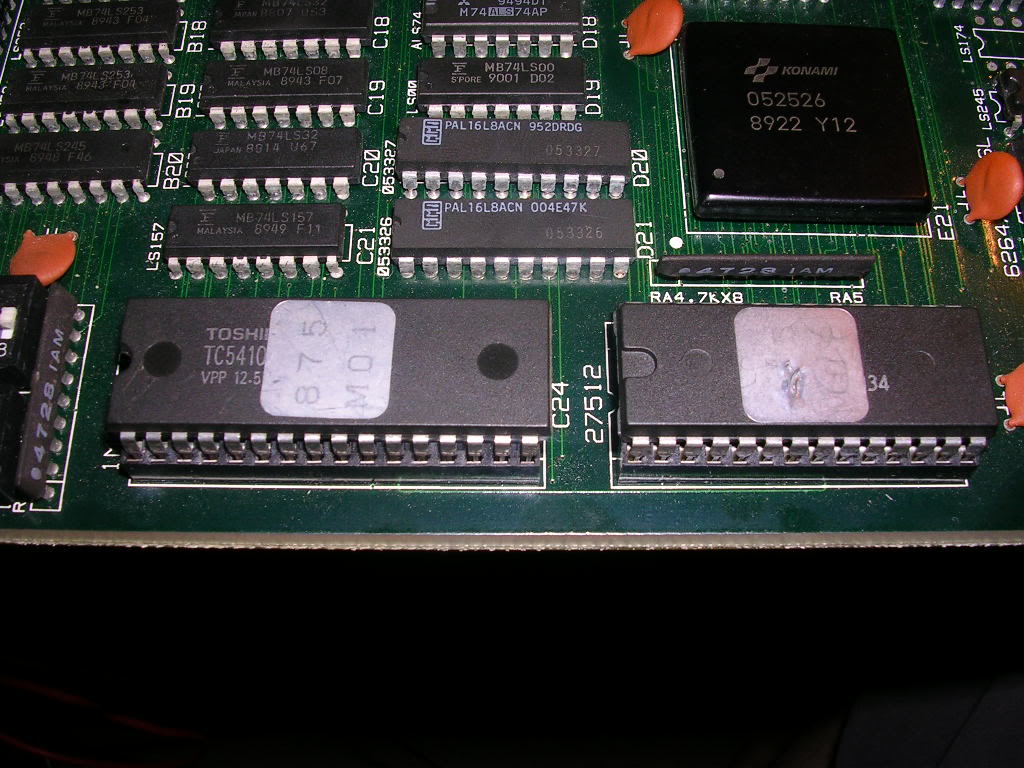
There is no pinout for this that I could find, and no schematics for this board, or any other Konami board that uses is. Quite what this chip is I don't know, the most obvious guess would be a 68000 core, possibly with a non standard pinout to confuse anyone trying to bootleg the board. Normally with a board stuck in watchdog you would hit certain CPU pins to confirm that the board was actually letting the CPU run, but without the pinout I was slightly stuck. All I could do was to go over the reverse of the board with the scope looking to find a clock signal on one of the pins and also trying to find the /RESET line which was going to be pulsing in sycn with the board resetting. Both of these I found and they looked health so it looked like the fault was not simply that the CPU had no clock or was actually stuck in reset. There are other lines to check but these I could not guess at so I had to assume they were OK and move on. What I could do was test the continuity between the System RAM and the CPU on all 16 address lines. As I knew the system SRAM was a 6265 chip I could work out where the address pins on the CPU were, and also confirm that they were all connected up, which they were.
So moving on the data pins of the system SRAM, thats where things started to look bad, on 5 of the 8 pins everything looked healthy, but on three the logic levels were often very low, nowhere near the 4-5v difference they should be. In most cases you would suspect the SRAM chip itself but upstream of this was a Fujitsu 74LS245 chip acting as the bus transceiver.
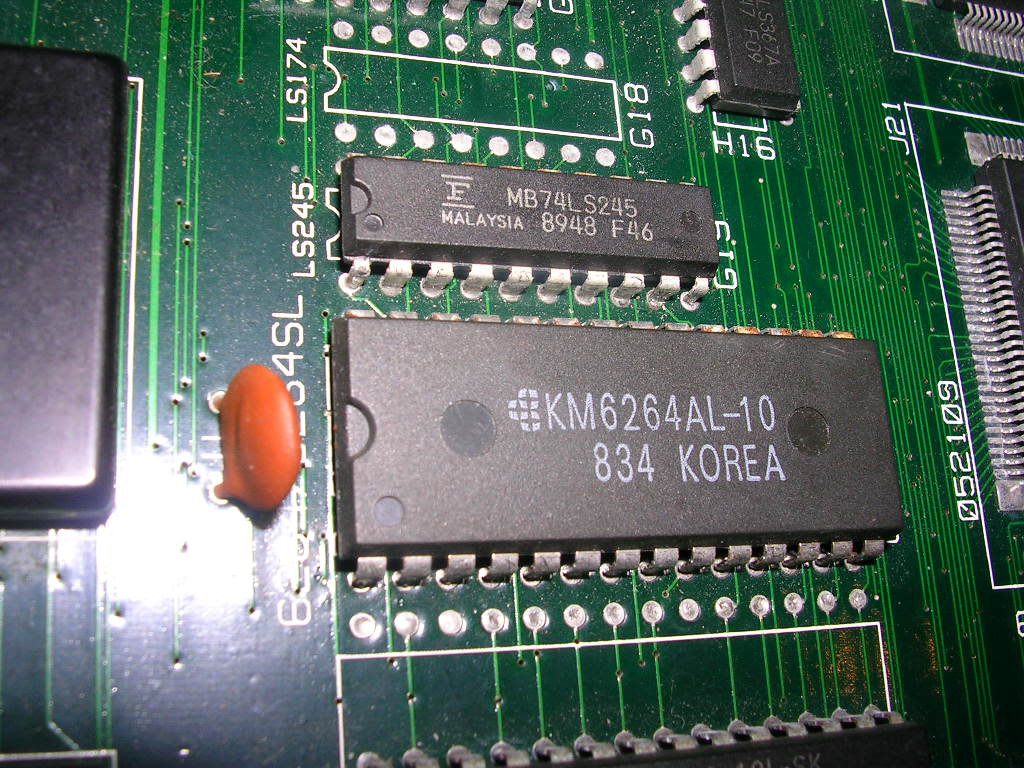
Even tho the DIR signal looked healthy and the B side of the chip seemed ok, the A side had the mangled signal on three of its pins. So it was either the 74LS245 or the SRAM. In this case the Fujitsu TTL was the more likely of the two, so I pulled it and tested in in my EPROM reader...
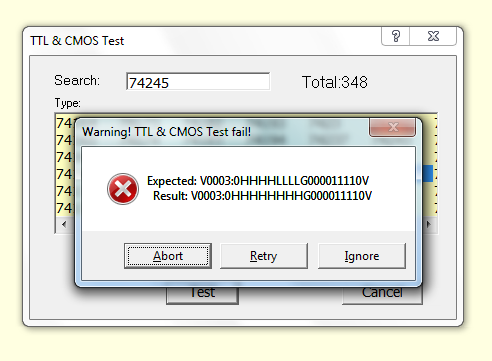
... Fail!
So I dropped in a salvaged 74LS245 and fired it up.
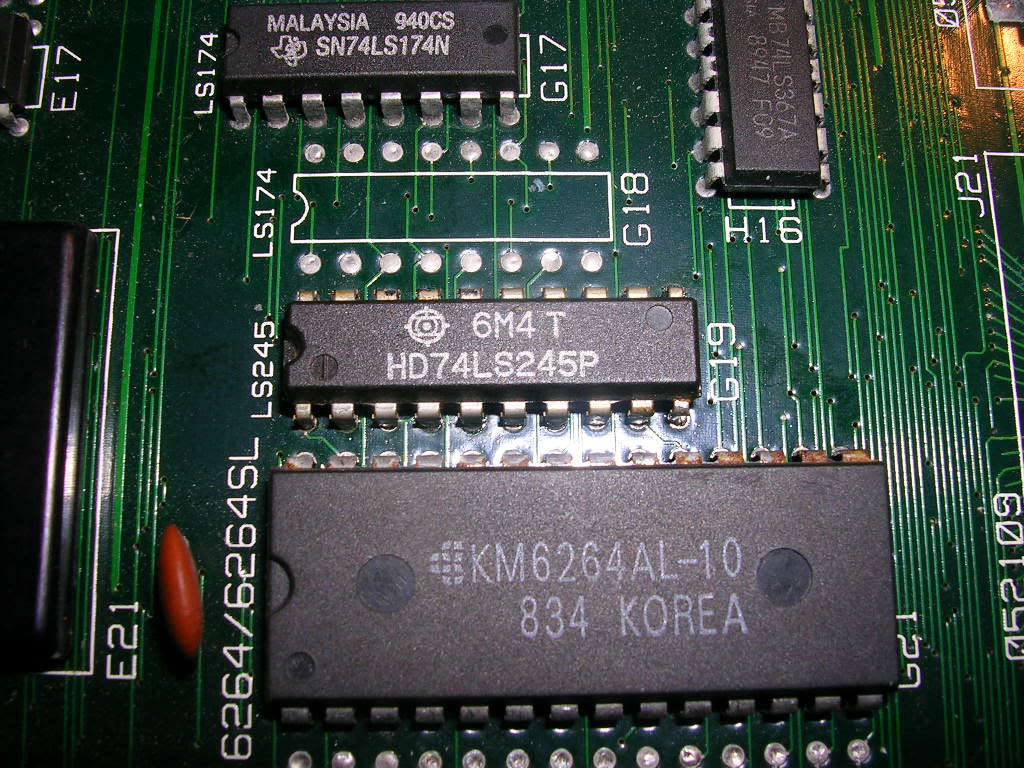
The board booted and promptly failed its RAM/ROM tests - on ROM C24 - the ROM I had taken off my scrap board and tested just before was now bad. I did a quick check of the ROM socket to see if there was 5V anywhere nasty which would explain the sudden death but it all looked fine. So I pinched the C24 ROM from the board I fixed beforehand and fired it up again.
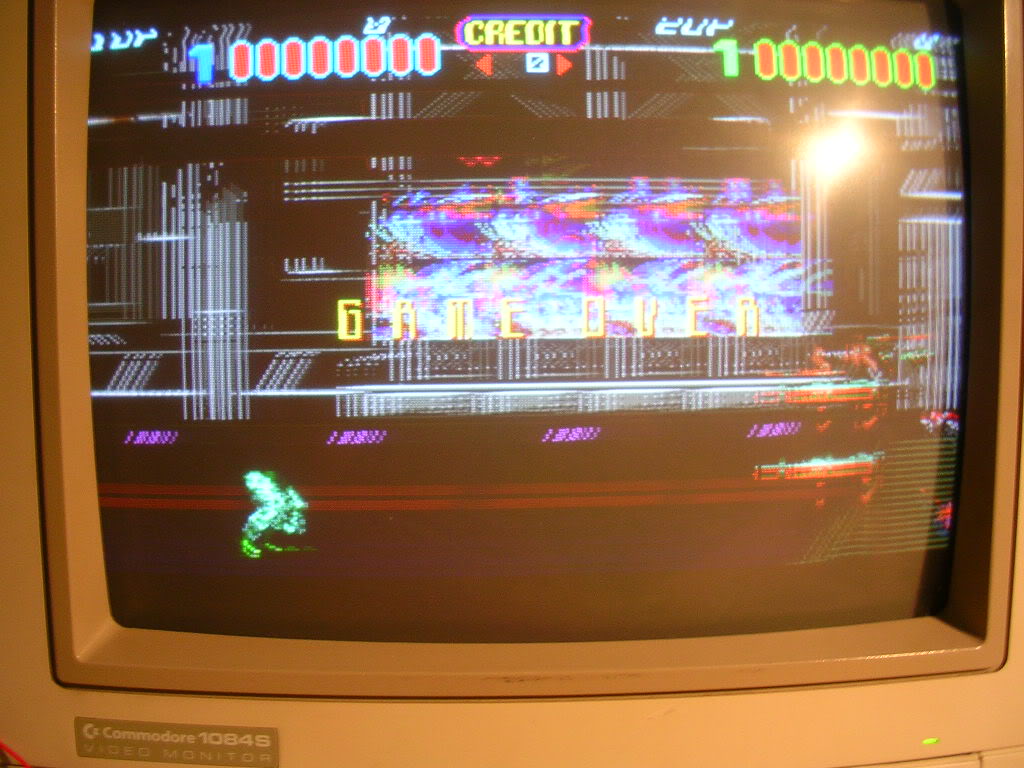
It booted and ran, but with some odd graphics issues..
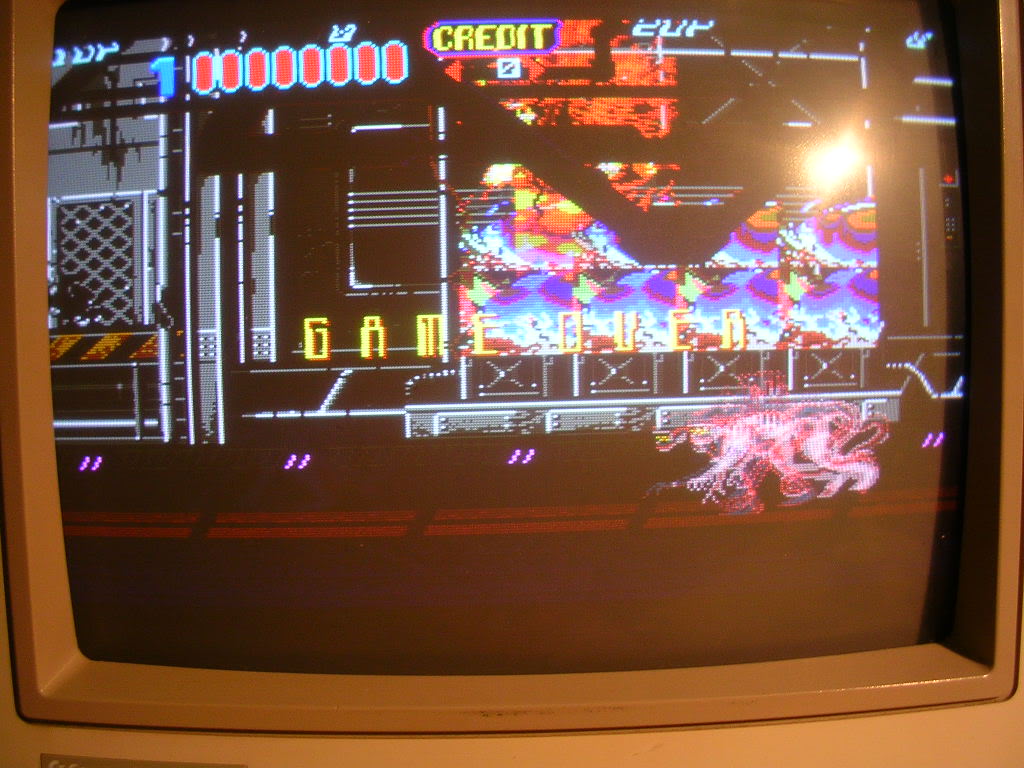
The main character was often only a pair of legs, the enemies where pretty messed up and any animated sections in the background that happened to be sprites were a mess.
The obvious place to start was with the scratches by the custom chip, the MCM2018 was also a fairly likely candidate itself so I took it off, firstly to test it and secondly so I could see where the tracks that went under it ended up. I had tried to buzz through to all the vias on the underside but a positive test proves you are in the right place, a negative means either you have a fault or are not where you think you are, or you can't get a good connection due to oxide or lacquer in the via.
The 2018 was fine, and there was a broken track, not where the scratches were, but at the point the track passed under the white silk screening.
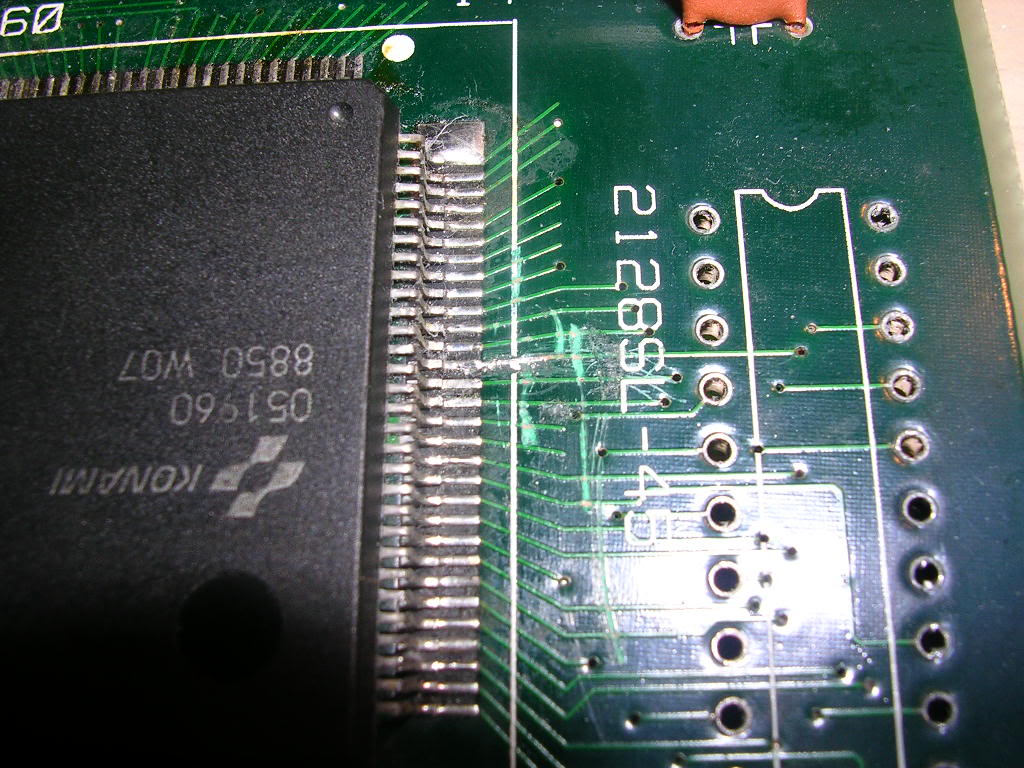
So I scratched away the lacquer on the upstream track to get some bare copper a soldered a section of wire from the custom chips pin pad to the track bridging the gap.
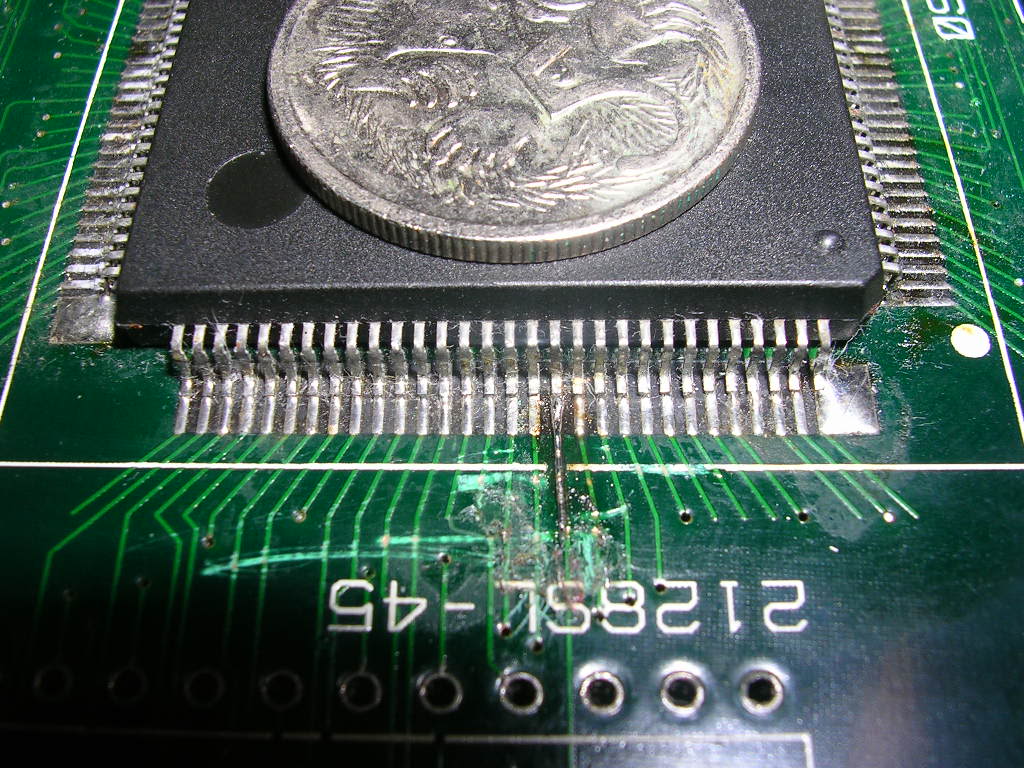
A bit fiddly, that's a 5 cent coin on the custom for some idea of the scale, but it's the neatest option.
The 2018 SRAM was soldered back in and I fired it up.
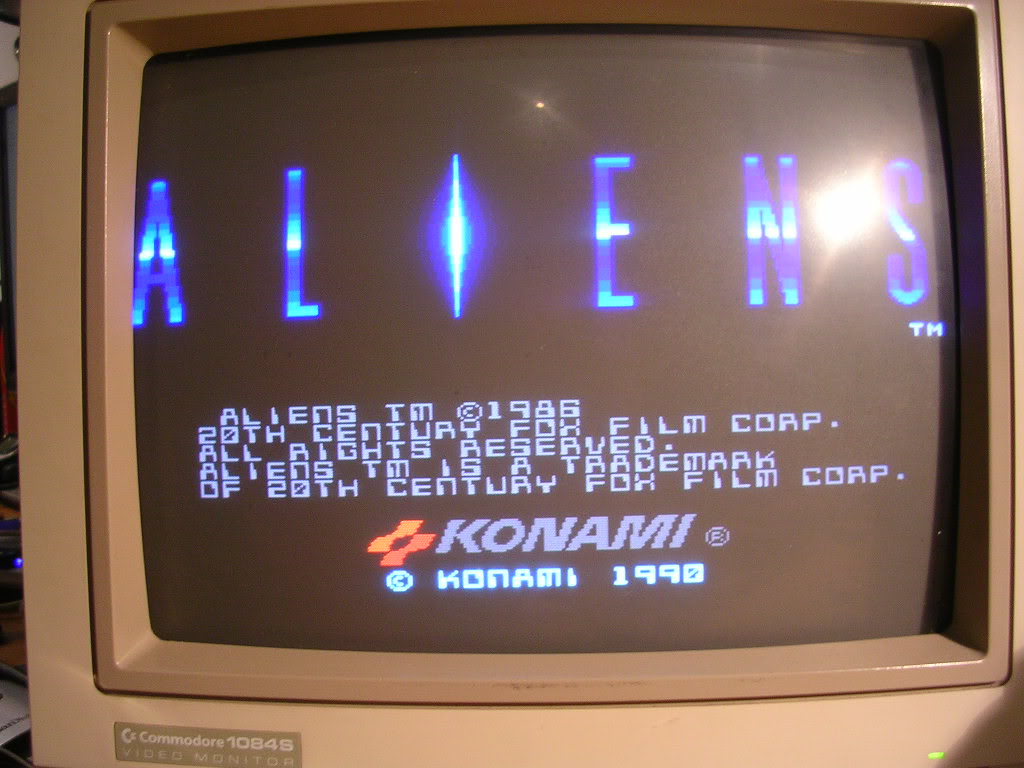
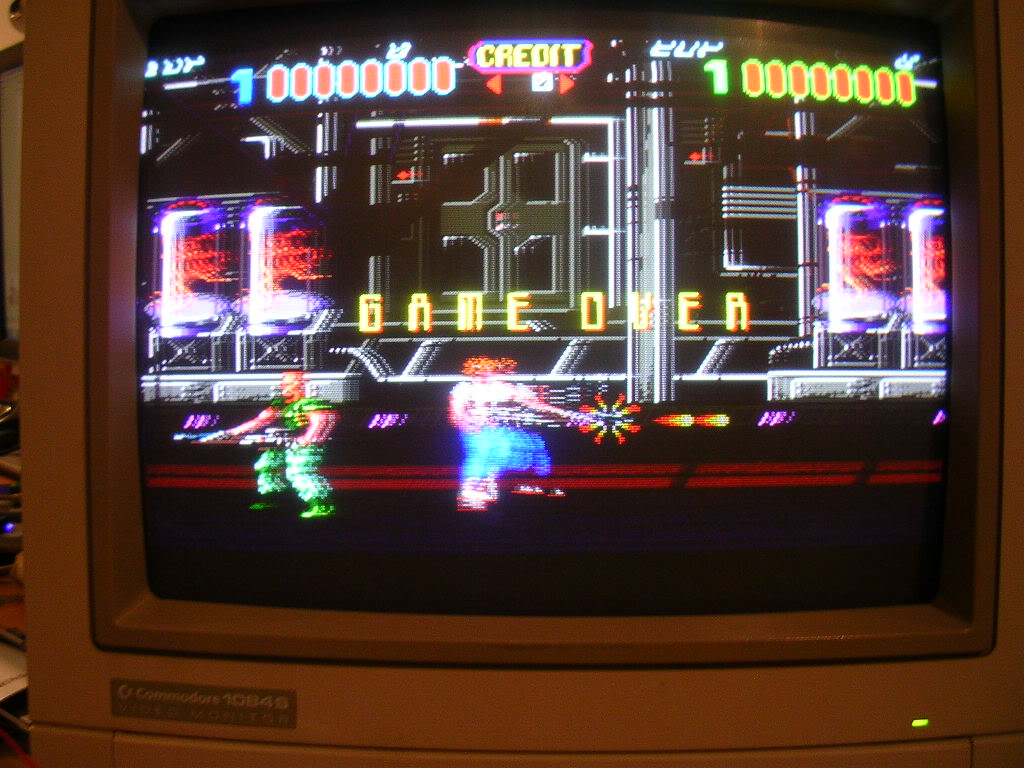
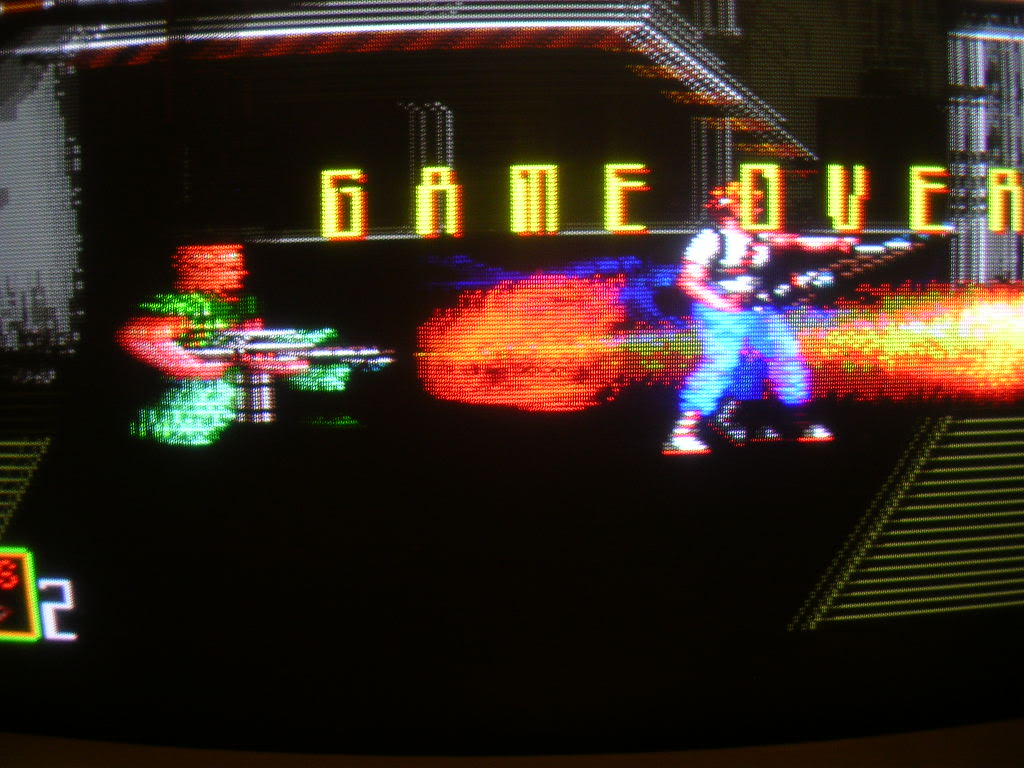
Fixed!
The scrap Aliens board is still scrap, have found and bridged 5 open circuit tracks around the CPU and it is still firmly dead, I may get back to it one day but I may not.
Board 4
Repairer: retroyoda
Forum Thread: Aliens PCB Repair
Hi chaps,
I recently bought a set of 4 "untested" arcade boards which included a 1990 Konami Aliens board. This one looked to be in the best condition, so thought this would be ideal for my first attempt at an arcade board repair.
I started by inspecting the board, and noted that there were some deep scratches on the underside of the board, and I noticed a bent pin on one of the custom Konami surface-mount ICs which was shorting out against the pin beside it, and a large capacitor in the corner of the board which was bulged and leaking.
I used a needle to straighten the bent pin on the custom IC, and decided to ignore the capacitor for the time being since I figured it was probably just part of the audio circuitry. After testing the scratched traces on the underside of the board with a digital multimeter, I concluded that although the scratches looked nasty, they weren't affecting the continuity of the traces.
After powering up the board, it proceeded to perform a quick self-test and then moved on to the title screen albeit only in green! I started a game and all sprites and backgrounds were fine, music and sound effects were ok but very crackly.
I powered off again and started tracing my way back from the JAMMA connector to figure out why there were absolutely no red or blue video signals being displayed. The first components I came to were some flat component packs labelled Konami 052535 which had no visible damage. All solder connections and surrounding traces and components tested checked out ok so I had a look on the internet to see if I could find what the mysterious 052535 parts were.
I found somewhere selling them for £7 each, also found a couple of repair logs noting that missing colour output problems had been resolved by replacing these parts, and after yet more searching finally found someone who had disassembled one of these components for analysis:
http://mrsportysrb.blogspot.co.uk/20...52535-joy.html
I went back to the board to take some readings off these components while it was running and noted that all three parts appeared to be receiving similar input signals, yet there were no output signals on two of the three parts. This pretty much assured me that I'd found the source of the problem, so after looking at the breakdown of this component again I figured that the problem would most likely be caused by a failed transistor. I decided to bridge pins 2 and 3 with a 200 Ohm resistor on the blue channel and give it a try.
I powered up the board and all the blue colours were back! I did the same again for the red video channel, and replaced the faulty audio cap and now all colours are working, and audio is working properly again.
Recommended fix for a totally missing colour on this board is to replace the relevant Konami 052535 part.
Back to PCB Repair Index
