PCB Repair Logs Raiden II: Difference between revisions
Created page with "==Raiden II== <p><table class="infobox vevent" style="width:22em;" cellspacing="5"> <caption class="summary" style=""><b>Raiden II</b></caption> <tr class="> <td colspan="2" c..." |
mNo edit summary |
||
| (One intermediate revision by the same user not shown) | |||
| Line 4: | Line 4: | ||
<tr class="> | <tr class="> | ||
<td colspan="2" class="" style="text-align:center;">[[Image:marquee_raiden_II.png|200px]]</td> | <td colspan="2" class="" style="text-align:center;">[[Image:marquee_raiden_II.png|200px]]</td> | ||
</tr> | |||
<tr class=""> | |||
<th scope="row" style="text-align:left; white-space: nowrap;">Manufacturer</th> | |||
<td class="" style="">[[PCB_Manufacturers_Seibu_Kaihatsu|Seibu Kaihatsu]]</td> | |||
</tr> | |||
<tr class=""> | |||
<th scope="row" style="text-align:left; white-space: nowrap;">Year</th> | |||
<td class="" style="">1989</td> | |||
</tr> | </tr> | ||
<tr class=""> | <tr class=""> | ||
| Line 11: | Line 19: | ||
<tr class=""> | <tr class=""> | ||
<th scope="row" style="text-align:left; white-space: nowrap;">Pin Out</th> | <th scope="row" style="text-align:left; white-space: nowrap;">Pin Out</th> | ||
<td class="" style=""> | <td class="" style="">[[PCB_Pinouts_Jamma|Jamma]]</td> | ||
</tr> | </tr> | ||
| Line 28: | Line 36: | ||
<br> | <br> | ||
<br> | <br> | ||
The battery had however leaked and though no damage was obvious upon removing the battery it was clear the tracks underneath it were quite damaged but the leakage. There are seven tracks under there and 5 of these were eaten through in places. | The battery had however leaked and though no damage was obvious upon removing the battery it was clear the tracks underneath it were quite damaged but the leakage. There are seven tracks under there and 5 of these were eaten through in places. | ||
| Line 37: | Line 44: | ||
<br> | <br> | ||
<br> | <br> | ||
I attached the first wire and.. life! | I attached the first wire and.. life! | ||
<br> | <br> | ||
| Line 47: | Line 53: | ||
<br> | <br> | ||
<br> | <br> | ||
Obviously I was onto something here. So I went ahead and jumped the rest of the traces one by one. | Obviously I was onto something here. So I went ahead and jumped the rest of the traces one by one. | ||
| Line 56: | Line 61: | ||
<br> | <br> | ||
<br> | <br> | ||
Almost there.. | Almost there.. | ||
<br> | <br> | ||
| Line 63: | Line 67: | ||
<br> | <br> | ||
<br> | <br> | ||
Just one more... | Just one more... | ||
<br> | <br> | ||
| Line 70: | Line 73: | ||
<br> | <br> | ||
<br> | <br> | ||
Success! | Success! | ||
<br> | <br> | ||
| Line 83: | Line 85: | ||
<br> | <br> | ||
<br> | <br> | ||
Game fixed! Just need to blob some hot glue on the points and leads to stop them getting yanked off. I should really get some resin for this.. | Game fixed! Just need to blob some hot glue on the points and leads to stop them getting yanked off. I should really get some resin for this.. | ||
Latest revision as of 07:09, 7 February 2013
Raiden II
 |
|
| Manufacturer | Seibu Kaihatsu |
|---|---|
| Year | 1989 |
| PCB Image | Reserved |
| Pin Out | Jamma |
Repairer: RetroRepair
Forum Thread: Raiden II PCB Repair
Symptom: Board appeared dead. Coining up gave the insert coin sound so the audio section was functioning.
Solution:
Raiden II/DX boards have a battery on board to save high scores. This was rumered to become a suicide battery also but Seibu Kaihatsu never got round to doing that (thankfully).
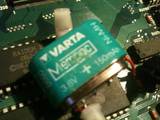
The battery had however leaked and though no damage was obvious upon removing the battery it was clear the tracks underneath it were quite damaged but the leakage. There are seven tracks under there and 5 of these were eaten through in places.
All I could do was run jumper wires from the vias to their destinations and hope for the best. I'd normally just bridge them with a piece snipped off a resistor leg but these traces were extra small and rather than fiddle about with that I decided wires was the way forward.
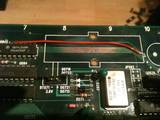
I attached the first wire and.. life!
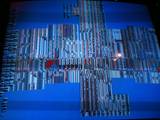
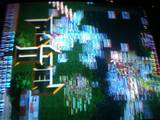
Obviously I was onto something here. So I went ahead and jumped the rest of the traces one by one.
Bit more like it..
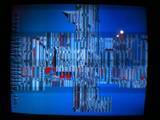
Almost there..
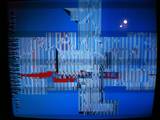
Just one more...
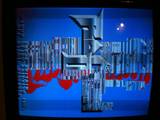
Success!
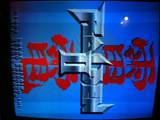
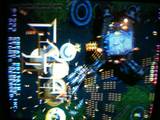
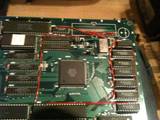
Game fixed! Just need to blob some hot glue on the points and leads to stop them getting yanked off. I should really get some resin for this..
Notes:
I was a little concerned when I noticed the game crash at the half way boss, and double checked my +5v on my PSU. It was a little under, about 4.89v. Adjusting to 5.05v got it stable. Been playing for hours, what a great game