PCB Repair Logs Defender: Difference between revisions
mNo edit summary |
mNo edit summary |
||
| Line 8: | Line 8: | ||
<tr class=""> | <tr class=""> | ||
<th scope="row" style="text-align:left; white-space: nowrap;">PCB Image</th> | <th scope="row" style="text-align:left; white-space: nowrap;">PCB Image</th> | ||
<td class="" style=""> | <td class="" style="">[http://wiki.aussiearcade.com.au/index.php/File:Pcb_repair_defender_1.JPG Defender PCB]</td> | ||
</tr> | </tr> | ||
<tr class=""> | <tr class=""> | ||
| Line 155: | Line 155: | ||
'''Repairer:''' [http://www.aussiearcade.com.au/member.php/1983-Womble Womble]<br> | '''Repairer:''' [http://www.aussiearcade.com.au/member.php/1983-Womble Womble]<br> | ||
'''Forum Thread:''' [http://www.aussiearcade.com.au/showthread.php/53460-Williams-Defender-Repair-Log-10 Defender PCB Repair]<br> | '''Forum Thread:''' [http://www.aussiearcade.com.au/showthread.php/53460-Williams-Defender-Repair-Log-10 Defender PCB Repair]<br> | ||
Brace yourselves, this ones a bit of a monster.... | |||
Anyone observant visiting the ACMI Game Masters exhibition in its first month may have noticed the lack of the Williams Defender cabinet that this displays mentioned. It was briefly on the floor next to the Robotron but it shat its board before it the doors opened to the public. Most cabinets on the floor have spare board sets waiting on a shelf to step in when the inevitable failures occur but this cab ate both boards within days. To avoid having dead games on opening day it was wheeled into the stores and there it sat... | |||
<br> | |||
<br> | |||
[[File:Pcb repair defender 2 1.jpg]] | |||
<br> | |||
<br> | |||
... and I was presented with a box containing two CPU boards, one ROM board, and spare sound and IO boards. | |||
The first problem was firing the board up, although the cabinet has 4 PCBs inside you only actually need two to boot the game up, the main CPU board and the ROM board. As my work bench is wired for JAMMA I had to build a harness that provided power and video outputs to the CPU board and power to the ROM board. Its common when firing up boards to only wire up the bare minimum to get it going, which is usually +5v, ground and video, but with stuff this early you need to be careful. | |||
Boards of this era have tri power DRAM chips eg 4116's, these take +5v, -5V and +12v, if one or more are missing at best it won't work, at worst you will destroy the RAM, all of it, instantly, which on this board is 24 chips giving a full 48KBs worth. There is an specific order to applying and removing the power feeds safely, if you lose the 5V rail or the 12V you will destroy them, this is the reason that plugging an interface into the back of an old ZX Spectrum blows the RAM if it causes the 5V rail to sag. | |||
With a harness made up I hit the first problem, video sync! The board sets I had were the "early" version of Defender that has some shortcomings, the main one is that it gives separate H and V Sync. My bench monitor wanted composite sync, you can kinda get comp sync by just joining the H and the V together but my monitor hated that, so I had to bodge in a 74LS86 chip... | |||
<br> | |||
<br> | |||
[[File:Pcb repair defender 2 2.jpg]] | |||
<br> | |||
<br> | |||
..to give me comp sync properly, even then the monitor is still slightly unhappy with the signal but I could at least see something. | |||
Hooking up one of the CPU boards to the only ROM board I had got me this... | |||
<br> | |||
<br> | |||
[[File:Pcb repair defender 2 3.jpg]] | |||
<br> | |||
<br> | |||
...a frozen screen of crap, not even a frozen "rug". A healthy defender board does a RAM, ROM and CMOS RAM test on power up during which it displays a dark red speckled screen that is called the "rug", a band should sweep across the screen twice from left to right, followed by a brief pause and the results of the test. | |||
This board looked like it was starting the process on the left side of the screen but failing instantly. The first point of call was to check if the CPU was getting clock. Defender uses a Motorola 6809e CPU which takes a clock feed from an external crystal (unlike the non-E version), a quick poke with the scope showed I was getting clock so no fault there. Next was the /RESET line, this should start low, go high, and stay high. It was pulsing so the board was watch dogging. Arcade boards usually have a watchdog circuit to stop the board spending hours in a cabinet in a crashed state. Not only would it burn an image into the CRT it would not take any money, so a watchdog circuit watches the CPU buses for activity, if nothing is going on then it yanks the /RESET line low, then releases it. If the board has simply crashed it will reboot, but in a fault condition the watchdog will bark constantly and the board will stay dead. Often you can hear a regular ticking on the audio of a board in this state, but without the audio board connected I had silence. | |||
In theory the fault could simply be within the watchdog circuit but I have never seen it, the fault is usually real and elsewhere, and on late 70s/early 80s boards there are a tonne of culprits. | |||
The build quality on early 80s gear is bad, really bad. Am not sure if this was just standard for the era, or if everything was done on the cheap. Boards 3 or 4 years younger are much better made. The problem is basically connectors, any joint on a conductor that is not soldered and relies on two bits of metal bring pressed together is a connector. So this means ribbon cables connectors, PCB edge connectors as well as IC sockets, all introduce points of weakness into a system and provide literally hundreds of possible points of failure on busy boards. Add in the early 80s fetish for having multiple boards and you have to have some way of connecting them all together. Defender has 4 boards, the CPU board that contains the CPU, the DRAM and the video generation circuitry. The ROM board that holds the game ROMs, the ROM paging logic and a controller that interfaces with the Audio board which has its own CPU, RAM, ROMs and amplifier. Then finally there is the I/O board which holds the logic and connection points for the controls and cabinet switches. All connected together with ribbons cables and peppered with sockets.Probably the biggest issue on these old boards are the sockets which in the early 80s means single wipe sockets. The contacts within the socket only press on one side of the IC leg, usually outwards trying to splay the legs of the chip. Over time these spring contacts either lose their spring or they end up pushing the chip legs apart to the point that the contact is only held together weakly. Modern sockets push on both the inner and outer sides of the chip leg, make better contact and prevent leg creep. | |||
Anyway - its far harder to troubleshoot a board with a barking watchdog circuit that is resetting everything twice a second than it is to troubleshoot a board that has quietly crashed so the watchdog had to be muzzled. On Defender early boards there is a pad on the solder side of the board in the shape of an hourglass. | |||
<br> | |||
<br> | |||
[[File:Pcb repair defender 2 4.jpg]] | |||
<br> | |||
<br> | |||
This needs to be cut in half and the upper side of it tied to ground to stop the barking, once that was done the board quietened down, the image on the screen didn't change tho. | |||
The most likely culprit on any board that locks up on boot is the RAM, this is pretty much true on any board from any era so its a good place to start. Defender has 48KB of DRAM provided by 24 4116 tri-power DRAM chips. As mentioned, the loss of a power connection on any chip from a crappy socket can destroy that chip, or the loss of an entire power rail to the whole board can destroy all the chips. | |||
Ideally I would hook up a Fluke 9010 6809e pod to the CPU socket and tell it to test the RAM in the address range 0h000-0hBFFF, but I didnt have a 6809e pod, but I did have a few Sinclair Spectrums handy. These take eight 4116 DRAM chips to provide the lower 16KB of RAM, on 16KB machines that is the only RAM in the system, the upper 32KB on machines with have 48KB is provided by another type of DRAM but the lower 16KB is critical to the machines ability to boot. These DRAMs are single bit chips, ie they have 2048 memory locations but can only hold a single bit in each one, ie either a 0 or a 1. These chips are usually ranged in rows of 8 where each row member contributes a single bit to the byte. So a quick test was to swap the 4116s into a Spectrum and see if it is able to boot. Any bad chip will blow a hole in every single byte in the lower 16KB of RAM and break the ability of the machine to even boot. | |||
<br> | |||
<br> | |||
[[File:Pcb repair defender 2 5.jpg]] | |||
<br> | |||
<br> | |||
So each of the three rows of eight was swapped in and in every case the spectrum was able to boot to its 1982 Sinclair Research prompt, therefore all the RAM was good despite a lot of pin corrosion. | |||
This didn't mean that the sockets on the Defender board are ok, just that any bad connection isn't likely to be on a power pin, but a single data pin with bad contact could still be causing the fault. The same applies to the CPU socket, the RAM sockets, and the video decode ROM socket, or the ribbon cables. | |||
To rule out a software issue I put the 11 ROMs through my reader and 2 did come back as bad. To be honest some of the EPROMs were in such a bad state I wasn't surprised, a couple had legs in the last stages of metal fatigue. My Wellon VP280 claims to support 27C16s and I had bought a batch of 12 on eBay, when it came to programming them it struggled. It does a very good impression of completely locking up with the progress indicator stuck at zero, after fighting with it and adjusting the programming voltage parameter for a while I kinda gave up and left it in its jammed state. After about 3 minutes of no activity the app woke up and gave a "programming error" and crashed to the desktop. On firing it up again I found that the chip it claimed it couldn't program had actually been programmed correctly as it verified fine. So it can program 27c16s but its a slow process and you have to ignore all the bad signs. After slotting in the two new ROMs nothing changed so I continued poking around with the scope. | |||
The outputs on the 74ls367A buffer chips that carry the address bus to the ROM board looked pretty nasty and I did briefly annoy the fault and get this output. | |||
<br> | |||
<br> | |||
[[File:Pcb repair defender 2 6.jpg]] | |||
<br> | |||
<br> | |||
But on reset it went back to the original faulty screen and I couldn't trigger it again. | |||
So I was faced with either a RAM or a ROM fault, possibly ROM paging. The CPU can only see 64KB of address space, and 48KB of this is DRAM which is always connected, this only leaves 16KB for the game ROMs. The board has eleven 27c16 EPROMs giving a total of 22KB for the game code, graphics and sound data. The ROM paging system swaps in ROMs or banks of ROMs into the address space, while disconnecting others allowing the game to access all the ROMs, as long as the game executable correctly controls the paging system. | |||
At this stage I swapped the second CPU board onto the bench and fired it up, and got a similar fault. | |||
I had been assured that the ROM board was in perfect condition (it was the unused ACMI spare), but it looked more likely that the ROM board I had was bad. The second ROM board was still bolted into the Defender cabinet and was also thought to be 100% as the cabinet had worked fine following the first CPU board failure when the spare CPU board was installed. After the second failure there was no real way to know whether the CPU board or the ROM board was the cause of that, but both CPU boards did roughly the same thing when plugged into the ROM board I had, which was assumed to be 100% working. After a night poking around on the CPU board and finding nothing wrong I dropped into ACMI and plugged the motherboard into the cabinet, primarily to test that the original fault hadn't just been caused by flaky connections in the RAM sockets that were behaving again. It failed to boot so I recovered the ROM board in the cabinet and brought the CPU board back home again. | |||
This repair rapidly gets harder to follow as I now had two CPU boards and two ROM boards. I paired the scruffy CPU board with the scruffy ROM board and the neater pair together also. Am going to have to refer to these as board sets A (neat) and set B (scruffy), or more specifically CPU board A, ROM board B etc etc. | |||
Anyway, still labouring under the misapprehension that the ROM boards were fine I opted to work on the neater pair, so hooking up CPU board A with the recently retrieved ROM board A got me the same fault. | |||
Going over the board with a scope showed a few possibilities, as a rule I hate removing parts to test them without a fair chance that they are bad so I decided to stop working blind and dropped some coin on a 6809e Pod for the Fluke 9010 trouble-shooter I had. | |||
<br> | |||
<br> | |||
[[File:Pcb repair defender 2 7.jpg]] | |||
<br> | |||
<br> | |||
I already had the Z80 and 68000 pod and on troublesome boards they had been insanely useful. The 6809/6809e pod is apparently the most sought after one these days, it probably wasn't a major seller when it was new as the 6809 CPUs were released very late in the 8 bit era and most people were moving onto using 16bit chips in their systems. The majority of pods are now virtually worthless, and the only real market for the 6809 pod now is the arcade and pinball repair community. | |||
This pod is somewhat unusual in the range in that it doesn't have a built in CPU, this one has a ZIF socket you install a known good CPU into and some dip-switches to set it up for a plain 6809 or a 6809e CPU. | |||
<br> | |||
<br> | |||
[[File:Pcb repair defender 2 8.jpg]] | |||
<br> | |||
<br> | |||
The main 9010A unit allows you to run tests on the board as it drives the CPU in the pod. It takes its instructions from the 9010 master unit rather than the ROMs on the board under test. So on a totally wedged board you get to play CPU and see what a normal CPU would see, without it being impacted by the fault itself. There is a button "Run UUT" that allows you to run the board using the CPU in the pod, the master unit steps out of the way and lets the CPU do what a CPU on the board would do, either crash or successfully run the board. | |||
In terms of testing you can thrash test RAM, read ROMs and check the drive-ability of the system control lines, very very useful, if you know the memory map. Thankfully the MAME drivers provide all you need to know buried in its depths. | |||
With the 9010 connected to the board... | |||
<br> | |||
<br> | |||
[[File:Pcb repair defender 2 9.jpg]] | |||
<br> | |||
<br> | |||
I got it to test the system buses, to confirm that all the lines were able to be driven high and low. Next came the RAM between 0h0000 and 0hBFFF which is the 3 banks of 8 4116 DRAMs, this test passed. | |||
As the video output was working correctly these tests had proven about 90% of the CPU board, so the fault was likely to be on the ROM board. | |||
<br> | |||
<br> | |||
[[File:Pcb repair defender 2 10.jpg]] | |||
<br> | |||
<br> | |||
A quick eyeball check of the board found this... | |||
<br> | |||
<br> | |||
[[File:Pcb repair defender 2 11.jpg]] | |||
<br> | |||
<br> | |||
... a smashed capacitor that looks like a diode. Its unlikely to cause any issues as its just there to provide some stability to the power feed local to the ROM it is next too. I replaced it with a 104K ceramic capacitor anyway, but it didn't change anything. | |||
Using the Fluke and memory map from the MAME driver I was able to get correct checksums back for ROMs 1 through to 4, but beyond that the ROMs require the CPU to control the paging system for them to appear on the bus. So this system was the last major system suspected, digging through the schematics the enable signal for these comes from a 7442 binary to decimal converter chip. Its outputs were suspiciously quiet, all held high, so I removed it and tested it in my EPROM reader - it failed. Fitting a 7442 borrowed from the faulty Missile Command board I have (also from ACMI) I got it to "rug" | |||
<br> | |||
<br> | |||
[[File:Pcb repair defender 2 12.jpg]] | |||
<br> | |||
<br> | |||
The problem was it would just "rug" over and over again getting nowhere, sometimes falling over and giving this screen... | |||
<br> | |||
<br> | |||
[[File:Pcb repair defender 2 13.jpg]] | |||
<br> | |||
<br> | |||
..with all 4 ROM board LEDs lit. | |||
<br> | |||
<br> | |||
[[File:Pcb repair defender 2 14.jpg]] | |||
<br> | |||
<br> | |||
Having dealt with boards this old before I have met a few that are very voltage sensitive so I poked the multimeter at the 5V rail and went for a ride on the voltage adjust knob. Amazingly enough at the very lowest point the board would actually work, giving this after completing its "rug" | |||
<br> | |||
<br> | |||
[[File:Pcb repair defender 2 15.jpg]] | |||
<br> | |||
<br> | |||
Followed by... | |||
<br> | |||
<br> | |||
[[File:Pcb repair defender 2 16.jpg]] | |||
<br> | |||
<br> | |||
...and attract mode. All this at the 4.58volts.. | |||
<br> | |||
<br> | |||
[[File:Pcb repair defender 2 17.jpg]] | |||
<br> | |||
<br> | |||
...which is right at the lowest edge of the happy zone for TTL. I wouldn't trust the board to be stable long term at that voltage so I needed to find which chip was struggling at normal voltages. At this stage I was fairly confident the issue would be on the ROM board. I went over the board with the logic comparator clip but it didn't find anything, and as there were only 11 chips left as options I went on a desoldering mission and tested them off board in my tester, it didn't take long to find a bad 7432. After soldering in a salvaged 74LS32 the voltage sensitivity was gone and the board was finally able to run at 5V. On the second ROM board two of the four original 7432s had been replaced so as I had take most of the 7432s off this board before hitting the bad one I chose not to put them back, all four were replaced with tested 74LS32s from a scrap board. | |||
With these off the board... | |||
<br> | |||
<br> | |||
[[File:Pcb repair defender 2 18.jpg]] | |||
<br> | |||
<br> | |||
...I finally had a working Defender set - Set A. All Signetics brand ICs - hmmmm, hold that thought! | |||
With a working CPU and ROM board I could now use them to work out which boards in the B set were bad, as it turned out both of them were. | |||
Faced with another CPU board awash with single wipe sockets I opted to sort out the B ROM board first, | |||
<br> | |||
<br> | |||
[[File:Pcb repair defender 2 19.jpg]] | |||
<br> | |||
<br> | |||
...plugging the B ROM board into the now confirmed working A board got me this... | |||
<br> | |||
<br> | |||
[[File:Pcb repair defender 2 20.jpg]] | |||
<br> | |||
<br> | |||
... so I hooked up the Fluke pod and repeated the ROM tests, again I could get good reads from ROMS 1 to 4, but beyond always gave the same wrong checksum, another paging fault. This was the ROM board with two of the original 7432s already replaced so I went over those first, with a scope and with a comparator, they seemed fine. However the Fairchild 7404 next door however had a stuck output pin on one of its gates. Some TTLs are tricky to debug with a scope or logic probe, others are easy, 7404s are easy as they are simply inverters, if the input pin is high then the output pin of that gate has to be low, and visa versa. By the same rationale if the input to one of the gates is highly active then the output should also be highly active, unless something upstream is jamming the line. Desoldering this chip and testing it off board proved it was bad, so a salvaged 74LS04 was soldered in and the power flicked on giving me this... | |||
<br> | |||
<br> | |||
[[File:Pcb repair defender 2 21.jpg]] | |||
<br> | |||
<br> | |||
...followed by attract mode. | |||
I now had two working ROM boards so ACMI could have a set back in their cab which would leave me with a known good ROM board to fix the now known bad CPU board. So I re-enabled the watchdog circuit, dropped into the city and installed the board set back in the cab... | |||
<br> | |||
<br> | |||
[[File:Pcb repair defender 2 22.jpg]] | |||
<br> | |||
<br> | |||
... flicked the power and after some faff with the vertical hold... | |||
<br> | |||
<br> | |||
[[File:Pcb repair defender 2 23.jpg]] | |||
<br> | |||
<br> | |||
A GLORIOUS SIGHT - it wasn't to last. | |||
This is only half the story - if someone can post a reply, anything will do, I will add the second half. If I try to reply to my own post it tries to add them together then complains its too long! | |||
Five days later I got an email saying it was dead again with this photo. | |||
<br> | |||
<br> | |||
[[File:Pcb repair defender 2 24.jpg]] | |||
<br> | |||
<br> | |||
I hadn't had a chance to fix the other CPU board so I grabed the B ROM board and swapped it with the A board in the cabinet. Luckily it fired right up - another ROM board fault. | |||
Now I had a known faulty CPU board and a newly faulty ROM board, not ideal as even when one is fixed the board still wouldn't boot so knowing that you had actually fixed anything is trickier. The photo from ACMI shows the board with crashed with an active watchdog barking, when the watchdog is disabled the pattern calms down a lot, and gave me this. | |||
<br> | |||
<br> | |||
[[File:Pcb repair defender 2 25.jpg]] | |||
<br> | |||
<br> | |||
Bored with ROM board faults I opted to look at the CPU board, and to make life easier hooked up the Fluke pod again... | |||
<br> | |||
<br> | |||
[[File:Pcb repair defender 2 26.jpg]] | |||
<br> | |||
<br> | |||
...instructing it to test the RAM between 0000 and BFFF again, which is the extent of the RAM on this board - 48KB. It came back with this... | |||
<br> | |||
<br> | |||
[[File:Pcb repair defender 2 27.jpg]] | |||
<br> | |||
<br> | |||
...bit 4 at location 200 was giving the wrong result. The 200 is hexadecimal for 512 and means the byte at 512 has bit 4 stuck. You can work out how the memory is mapped out on the board and locate which chip this fault is on. Having done that I pulled out the suspected 4116 chip, and one of its legs didn't come with it. A second similar result found another chip with a fractured pin, and a third whose pin was fractured but not yet fully snapped off, its the one sagging under its own weight here... | |||
<br> | |||
<br> | |||
[[File:Pcb repair defender 2 28.jpg]] | |||
<br> | |||
<br> | |||
With three less wrecked 4116s installed on the board the Fluke RAM tests completed successfully, I assumed at this stage that the CPU board was fixed, so moved onto the ROM board. Knowing that the Signetics chips had been so problematic I went straight to the remaining few and found a bad 7400. | |||
<br> | |||
<br> | |||
[[File:Pcb repair defender 2 29.jpg]] | |||
<br> | |||
<br> | |||
Replacing this with a salvaged 74LS00 was I assumed the last thing to do, so I disconnected the Fluke, installed the original 6809e CPU and flicked the power. | |||
<br> | |||
<br> | |||
[[File:Pcb repair defender 2 30.jpg]] | |||
<br> | |||
<br> | |||
Well this suggests that the ROM board was now OK as it can at least complete its tests. With the Fluke reconnected I ran another RAM test and it came back reporting full health. Reinstalling the main CPU it failed again but if I held the CPU down manually it would complete its tests and boot. The prime candidate was the CPU socket, a single wipe nasty. | |||
<br> | |||
<br> | |||
[[File:Pcb repair defender 2 31.jpg]] | |||
<br> | |||
<br> | |||
So this was removed and replaced with a new dual wipe socket, the CPU installed and the flakiness was gone. Just to create more work for myself I tried to introduce instability by poking the video ROM and CMOS RAM chip while the game was running, and I could cause the game to reset, again due to bad contacts within the sockets. | |||
<br> | |||
<br> | |||
[[File:Pcb repair defender 2 32.jpg]] | |||
<br> | |||
<br> | |||
There was also signs of an old bodge on the CMOS RAM socket where a track had been damaged and blob-soldered to a track on the upper side of the board that I wanted to tidy up. So these were removed, and machined pin sockets installed. These are the best sockets you can use for chips but they have a couple of disadvantages over dual wipes, firstly cost, secondly the shoulder of the pin means its hard to get them back off a board if the board turns out to be scrap, and thirdly it is much harder to get a Fluke pod to connect to a machined pin CPU socket, which is why the 6809e didn't get one. | |||
The busted track was fixed neatly with hookup wire and the chips were reinstalled, confident the board was now fixed I flipped the power and got this... | |||
<br> | |||
<br> | |||
[[File:Pcb repair defender 2 33.jpg]] | |||
<br> | |||
<br> | |||
WTF!? After a fair bit of triple checking and swearing I decided that my soldering was fine, the chips were fine, the PCB was fine, and the minor repair was fine, which didn't leave many options. It turns out that the use of an EPROM as the video decode ROM is a modification, originally the board would have used 7641 PROM but as these have died off the use of fast-enough EPROMs has become common. By desoldering the socket I had removed the mod and broken the video decoder system. Two pairs of pins in a row had to be soldered together into a bank of 4, after desoldering the old chip I was left with what the PCB tied together, two pairs of two, re-bridging this cleared the fault and the board booted normally. | |||
<br> | |||
<br> | |||
[[File:Pcb repair defender 2 34.jpg]] | |||
<br> | |||
<br> | |||
After a few days of sporadic soak testing I took the spare set back to ACMI and prepared myself to avoid Defender boards for the foreseeable future. | |||
This time it took over a week for it to fall over again, a site visit and a ROM board swap brought it back to life again. The A CPU board was now back with the A ROM board in the cabinet, and I had the B board set with a bad ROM board again in a box, much like on day one. The fault was, surprise surprise one of the remaining two Signetics 7432 chips, both were removed, binned and replaced with salvaged 74LS32s. The B board set works once again. All the Signetics 7432s are now resting in the bin and can trouble me no more. | |||
Once again - the glorious sight, same photo as before but who cares - Defender!!! | |||
<br> | |||
<br> | |||
[[File:Pcb repair defender 2 35.jpg]] | |||
<br> | |||
<br> | |||
It has been stable for 10 days now. Oh that's if you dont count the burnt up connector on the PSU board that rendered it unable to cope with any load on the 5V line, that shut the cabinet down for a bit. Thankfully they had a modern switch-mode PSU with the appropriate Williams harness standing by which brought it all back to life for the nth time, at least no more board faults. | |||
Sometimes I get the feeling that this stuff just wants to retire and be left in peace | |||
<br> | <br> | ||
[[PCB_Repair_Index|Back to PCB Repair Index]] | [[PCB_Repair_Index|Back to PCB Repair Index]] | ||
Revision as of 10:47, 6 September 2012
Defender
 |
|
| PCB Image | Defender PCB |
|---|---|
| Pin Out | Reserved |
Board 1
Repairer: GameDude
Forum Thread: Defender PCB Repair
Got this from a fellow AA member Gavin (jumpydoctor) amongst other boards this was listed as number one priority for repair.
Having never worked on this game before I can honestly say at the very least it was interesting unit to fix, I had plenty of theory and the schematics available on the web were crap but I had help from a JAMMA+ forum member from the UK who kindly sent me a very nice hi-res copy.
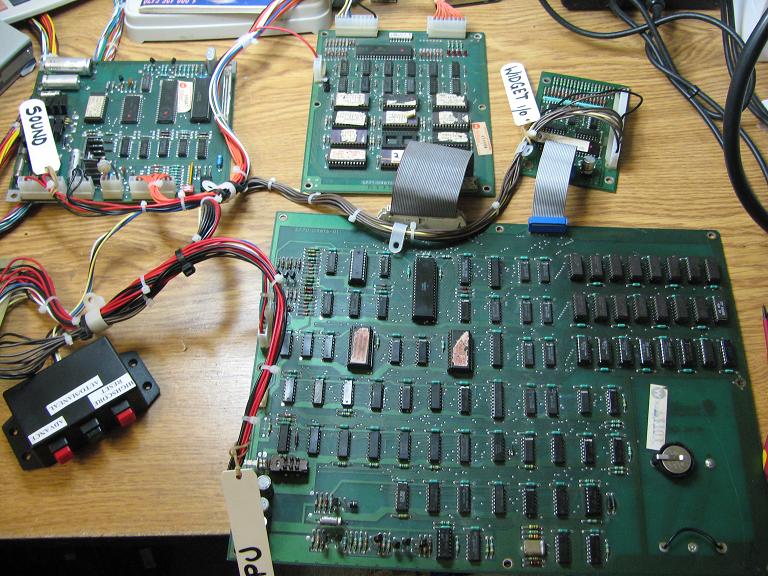
Anyway here we go as you can see in the first picture its all laid out, I have circled in red all the problem areas which were found and fixed during repair.
Starting top left is the ROM board, top right audio, bottom left is the IO widget board and bottom right is the main CPU board.
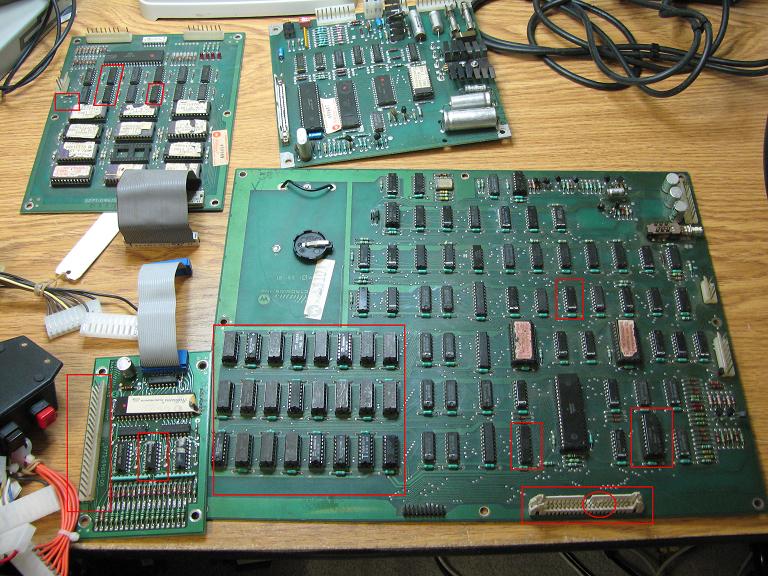
OK first thing on the list was a full inspection, Jumpy had already informed me of a bad ram socket that he had replaced and I also noticed a pin missing on the 40pin connector for the ROM board, apart from that it looked reasonable. Connect it all up and the screen was not exactly what I wanted to see, static vertical lines.
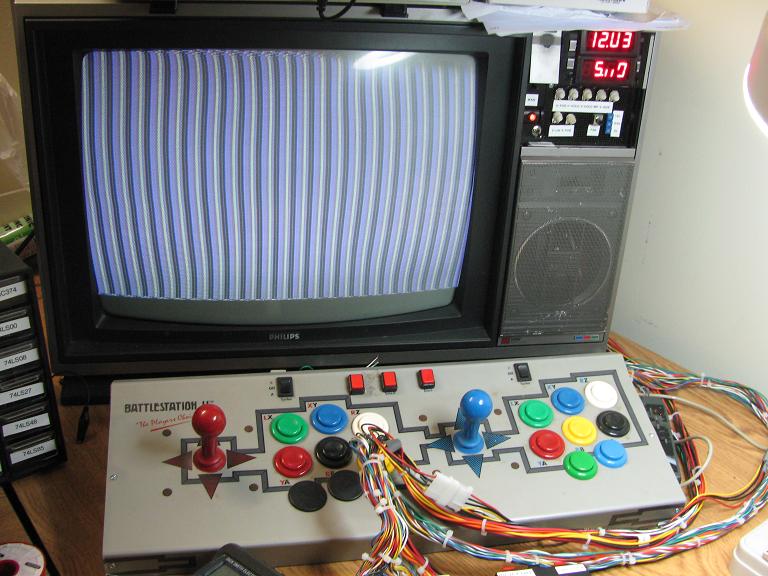
Using a logic probe it was easy to see that the watchdog was barking, at this stage I decided to repair the missing pin on the ROM board connector. I pulled a pin from a broken Capcom CPS1 A board which has exactly the right size pin needed to replace the broken one.
I then moved to the ram sockets, they didnt look good and had all sorts of ram installed so I decided to remove the ram first and this is what I found.
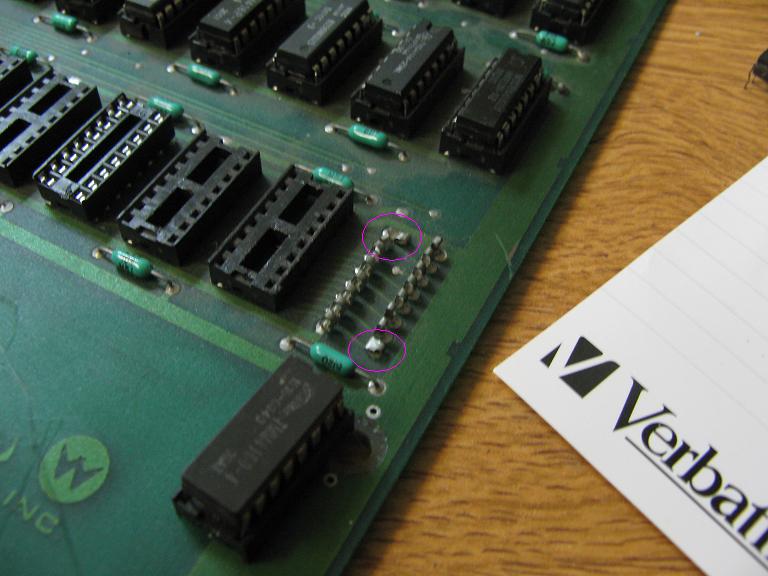
As you can see the pins were stuffed. At this point I decided to replace all ram sockets just to be sure (I later found two other bad sockets).
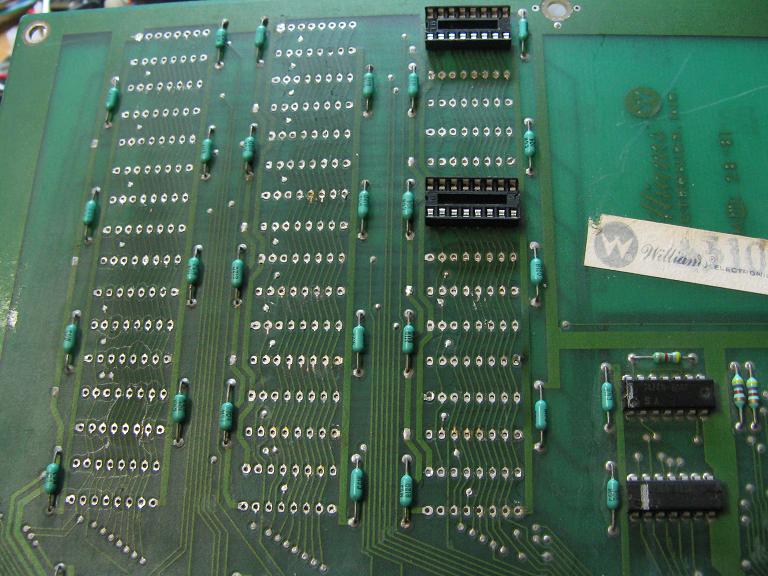
And then replaced them with nice new ones.
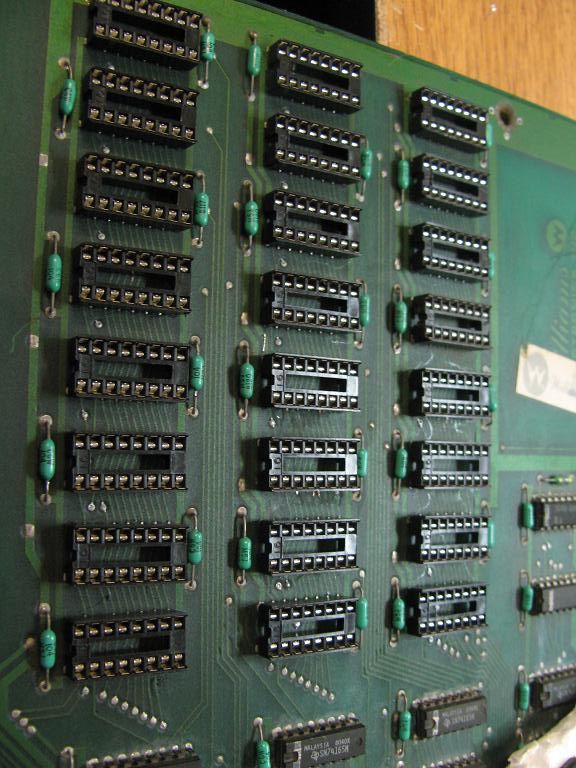
After this I tried to power the unit again. No go POO not even a small change. At this point I asked Jumpy where this set came from and what was the history. It ended up being a "worker" from EGAY and not even the one that was in the picture.
Great... I suspected there may be multiple faults from someone swapping out dead boards so I moved to the FLUKE to run CPU board tests. I disabled the watchdog and plugged in the FLUKE and ran a ram test. Instant fail everywhere ran a ROM test and all signatures came back the same crap.
OK so disconnected the ROM board for now so it was not interfering with anything on the bus and decided to work on the ram issue, there was one 74LS245 at 1K which did not look right and was the only buffer connecting the DATA BUS to the CPU. I replaced the 74LS245 and ran the RAM test again on the FLUKE.
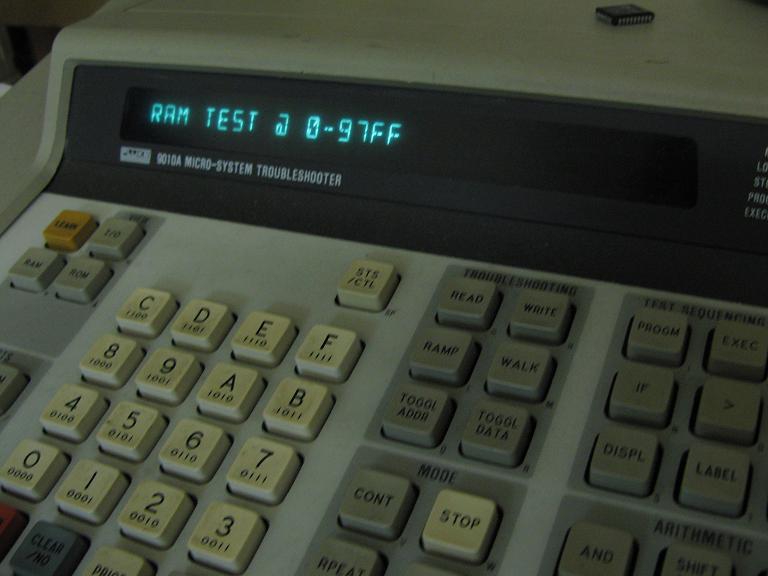
The scripts that are run on the fluke are real handy and are created from the QuarterArcade tech website, if anyone wants to know how to use the scripts PM me. It gives live feedback on test progress on a PCB without the need for video output on the game.
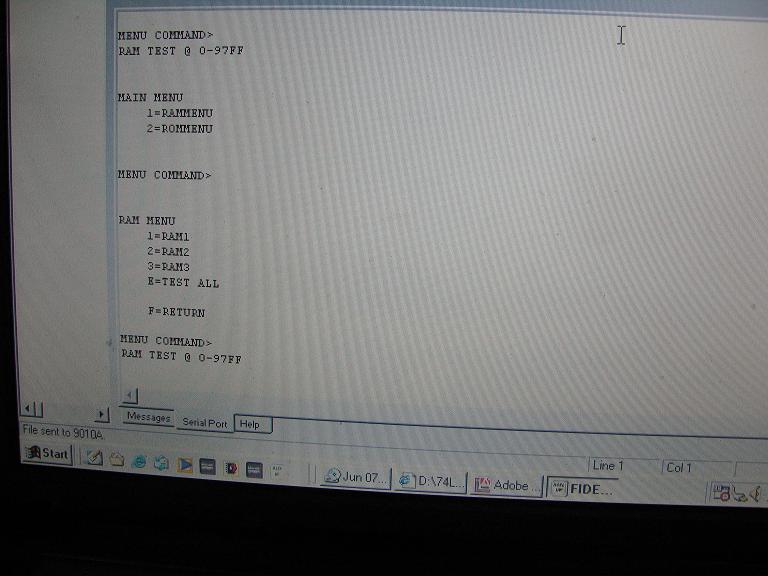
I was getting all excited as the ram test was going through. As can be seen on the screen when video memory is written to it changes the display.
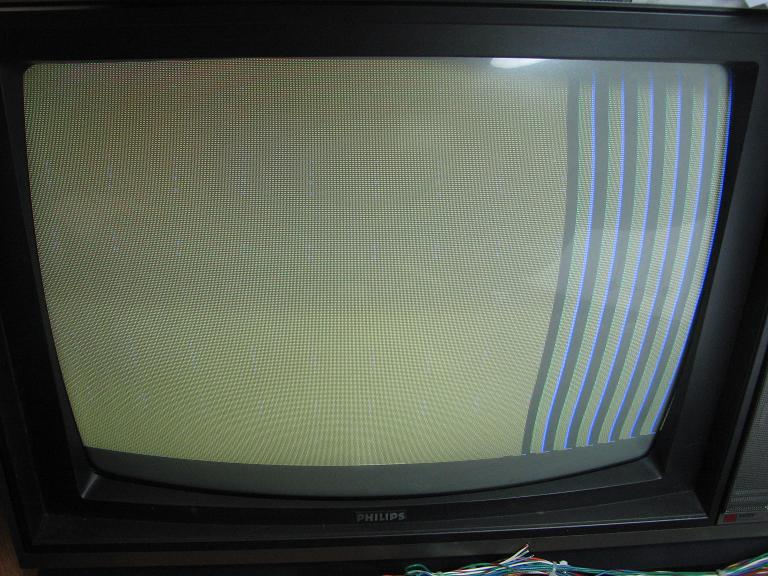
However halfway through the test (they are long) I started getting read/write errors. Setting the FLUKE on loop revealed that sometimes it would read OK then not again. Hmmmm....OK this took a little while to find but I eventually found the culprit. It was a 74153 (not the LS type) at 4H according to the schematics and I found it by using a method of cooling and heating the IC. When this was done I noted that the loop test almost always was OK when cold and went real bad when hot. I also noticed that at 4.8volts it took longer than at 5.2volts to produce a fault in this chip. It took me a while but I found a replacement and BINGO! ram test now pass!
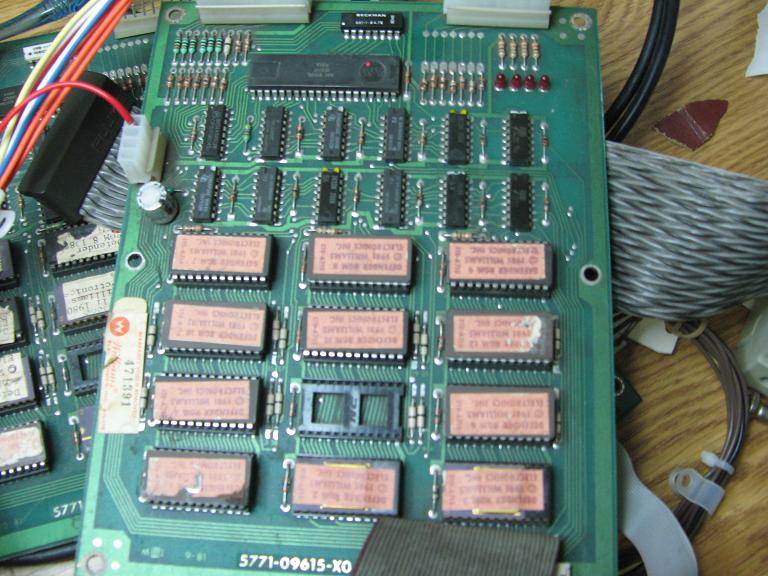
Moving on now to the ROM board and the FLUKE still could not ID the ROMS and when powered up I got a grayish rug pattern and still no boot but a hell of alot better than before. As luck would have it I had a spare ROM board (red label) and plugged it in.
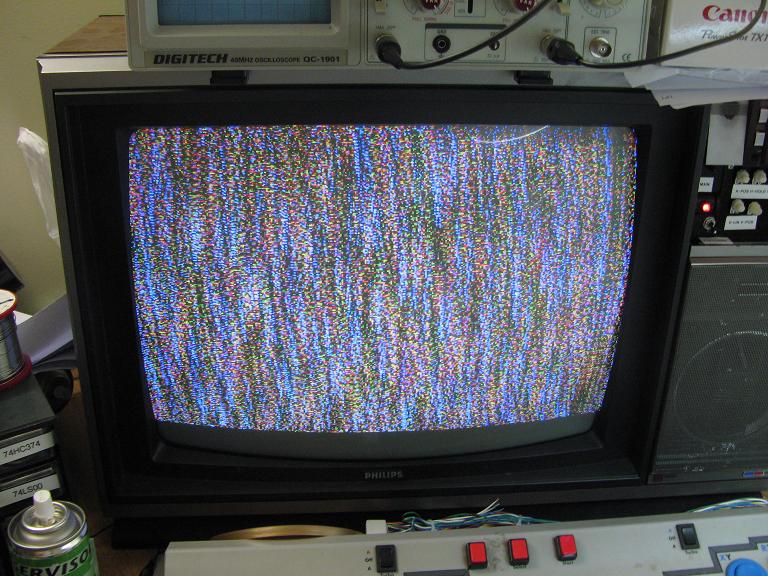
WoooHooo rug pattern! Thats good as thats the startup test the game does before play.
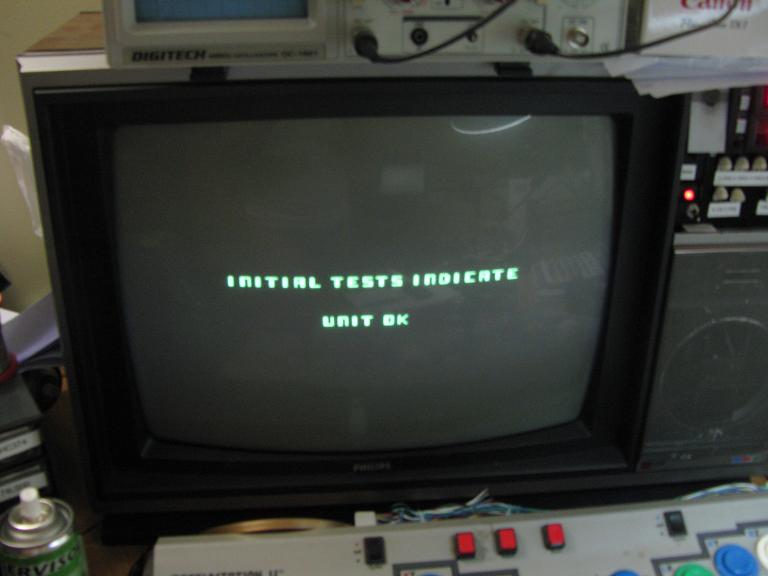
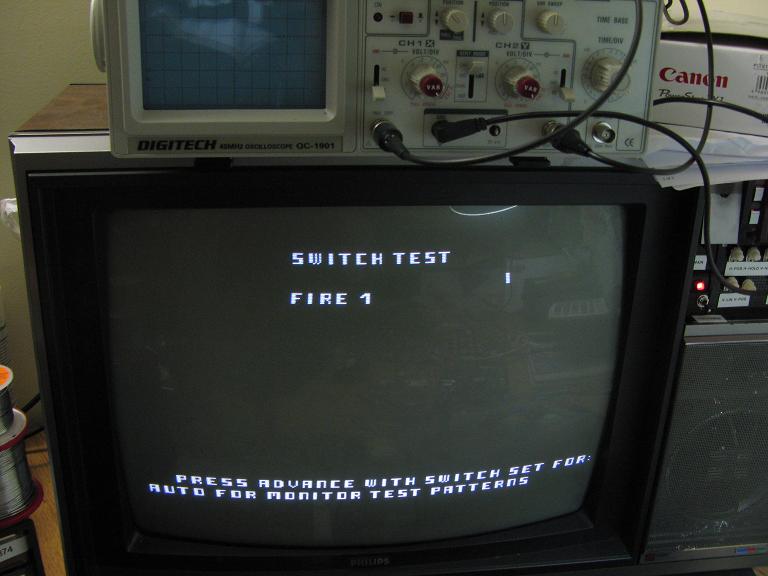
All was looking good however the game went into bookkeeping (a form of game data storage) which uses a battery to power a 5101 CMOS ram chip located at 1E.
I noted that some of the values stored were '?' and some were '0' clearly this was not right and upon saving the game would not exit.
John from Johns Arcade saved the day and sent me a shiny new 5101 to slot in (THANKS JOHN)
The game now saves and exits from bookkeeping and the game demo starts. I coined a game up but nothing happened. Random mashing of buttons proved that some signals were getting through but clearly not the way its supposed to be. Using the setup buttons I progressed to the input test.
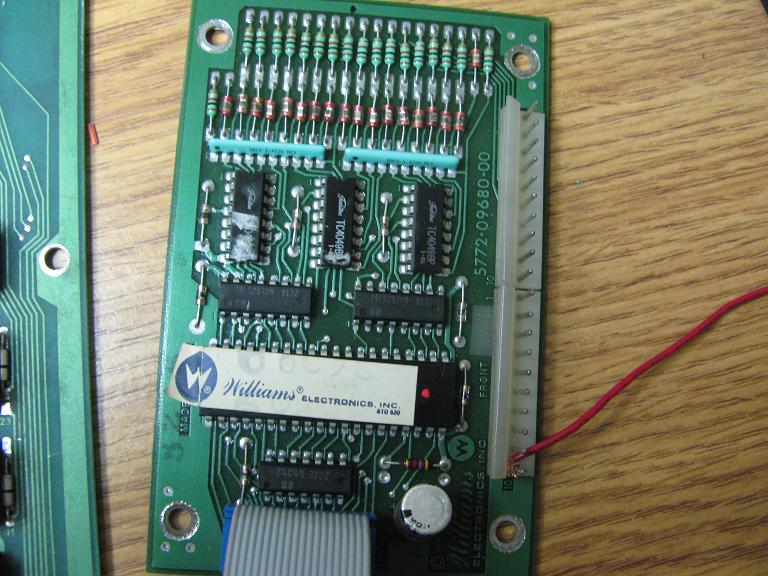
Clearly there was a stuck input BUT something else was wrong. Pressing each button cam up with the incorrect input. This had me stumped for 5minutes until I looked up some pictures of various IO boards for williams games and found out this board was not a defender IO but a Stargate/Robotron IO board. Essentially the same except for one important fact, Defender pin out is reversed compared to all other IO boards.
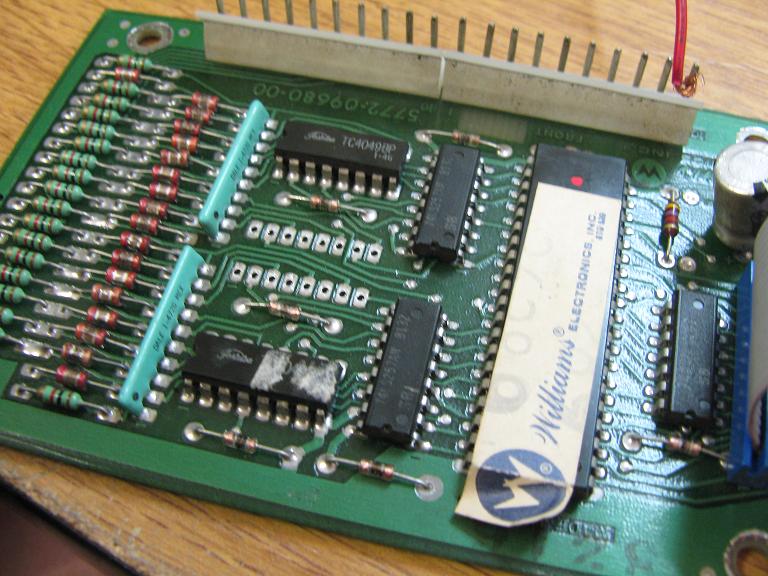
After rewiring the harness to match I made all buttons do what they should but the stuck input was still there. This turned out to be a bad 4049 CMOS Hex Inverter at IC3. I found it by tracing the signal back through the circuit until I found the good signal/bad signal.
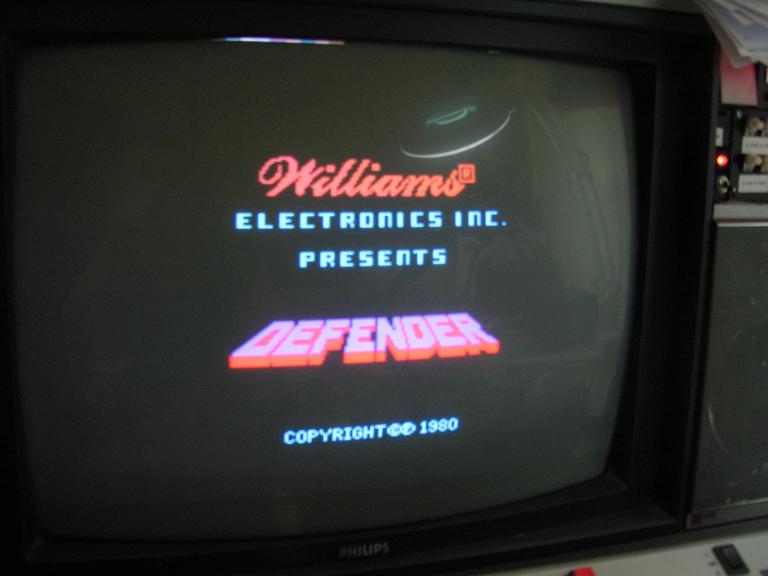
Replacing this fixed the input problem.
The ROM board turned out to be a real pig. Since all ROMS signatured the same I assumed it was something to do with the chip select signal. After checking all ROMS had good sockets and replacing a missing filter cap I used a logic comparator to compare IC's a bad 74LS139 was found and replaced but still problems. Checking the schematics I followed the chain for chip select and noticed data goes through IC 17 74LS395 and then is split by an 7442, using the logic probe showed dead outputs on all four pins of the 74LS395 and good inputs. Replacing this then showed changes but still no game.
OK checking the 7442 with the logic comparator revealed pin 1 compared badly and when verified against the working unit it was confirmed bad. Replacing this FINALLY got the ROM board working.
I am happy to say we now have a WORKING DEFENDER!! YaY!
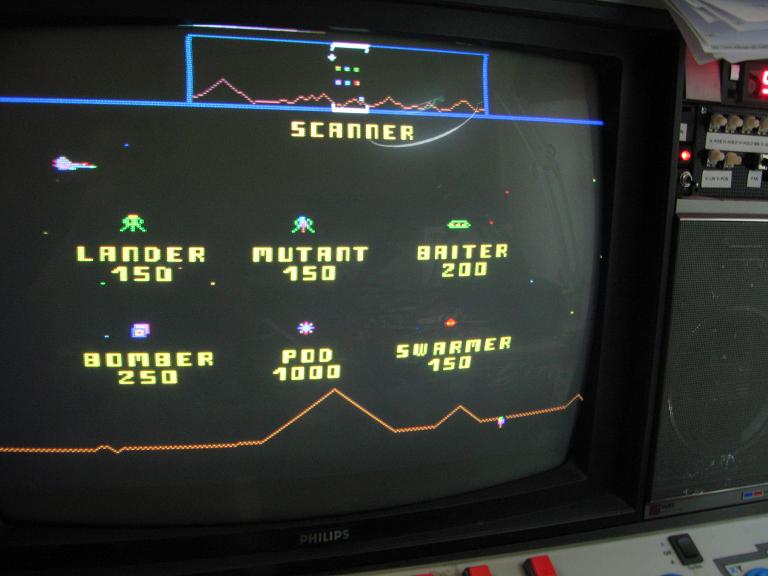
Notes: Arcade King
To add to what Gamedude has said 95% of the problems with these boards are the 4116 and their crappy sockets. another common problem is the interconnect header pins between the rom and I/O boards.
On my stargate I've done a mod to do away with those shitty 4116 rams which require 12, 5 and -5 volts to work with 41256 or 4164 rams which only use 5. Rams run much cooler and will guarantee long life, also modified the sound board to take 2732's instead of those hard to get 2532s.
Its always best to have a working set along side, saves so much time and worry, Stargate, Joust and Robotron probably me fav games.
Good Work on the repair.
Board 2
Repairer: Womble
Forum Thread: Defender PCB Repair
Brace yourselves, this ones a bit of a monster....
Anyone observant visiting the ACMI Game Masters exhibition in its first month may have noticed the lack of the Williams Defender cabinet that this displays mentioned. It was briefly on the floor next to the Robotron but it shat its board before it the doors opened to the public. Most cabinets on the floor have spare board sets waiting on a shelf to step in when the inevitable failures occur but this cab ate both boards within days. To avoid having dead games on opening day it was wheeled into the stores and there it sat...
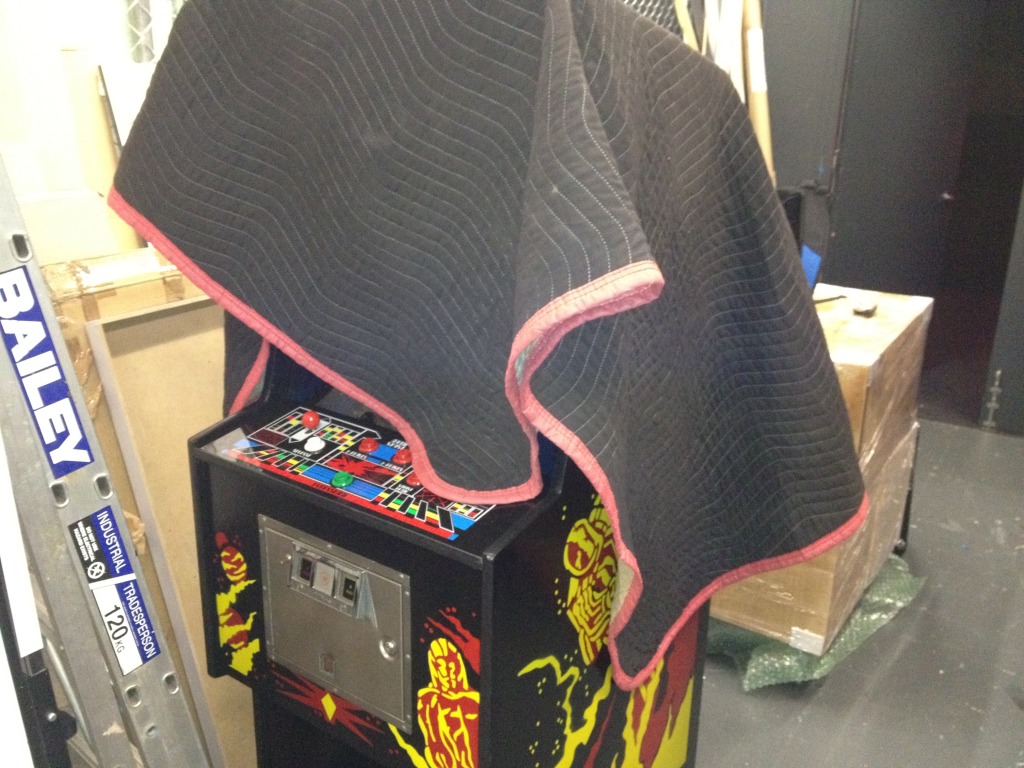
... and I was presented with a box containing two CPU boards, one ROM board, and spare sound and IO boards.
The first problem was firing the board up, although the cabinet has 4 PCBs inside you only actually need two to boot the game up, the main CPU board and the ROM board. As my work bench is wired for JAMMA I had to build a harness that provided power and video outputs to the CPU board and power to the ROM board. Its common when firing up boards to only wire up the bare minimum to get it going, which is usually +5v, ground and video, but with stuff this early you need to be careful.
Boards of this era have tri power DRAM chips eg 4116's, these take +5v, -5V and +12v, if one or more are missing at best it won't work, at worst you will destroy the RAM, all of it, instantly, which on this board is 24 chips giving a full 48KBs worth. There is an specific order to applying and removing the power feeds safely, if you lose the 5V rail or the 12V you will destroy them, this is the reason that plugging an interface into the back of an old ZX Spectrum blows the RAM if it causes the 5V rail to sag.
With a harness made up I hit the first problem, video sync! The board sets I had were the "early" version of Defender that has some shortcomings, the main one is that it gives separate H and V Sync. My bench monitor wanted composite sync, you can kinda get comp sync by just joining the H and the V together but my monitor hated that, so I had to bodge in a 74LS86 chip...
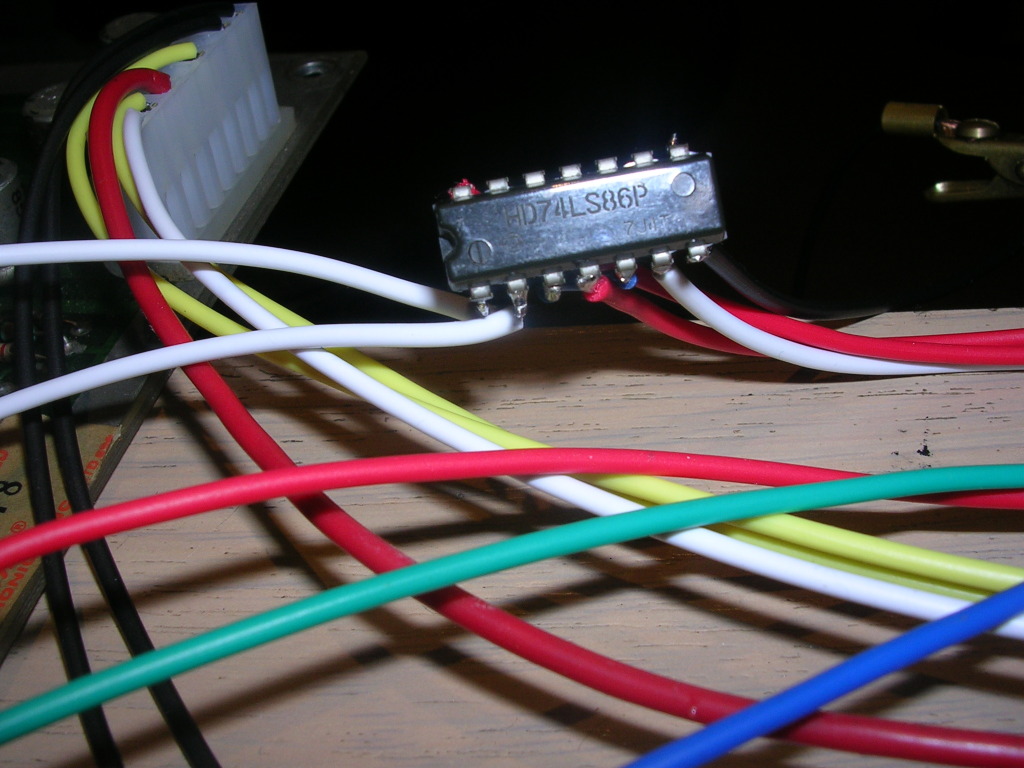
..to give me comp sync properly, even then the monitor is still slightly unhappy with the signal but I could at least see something.
Hooking up one of the CPU boards to the only ROM board I had got me this...
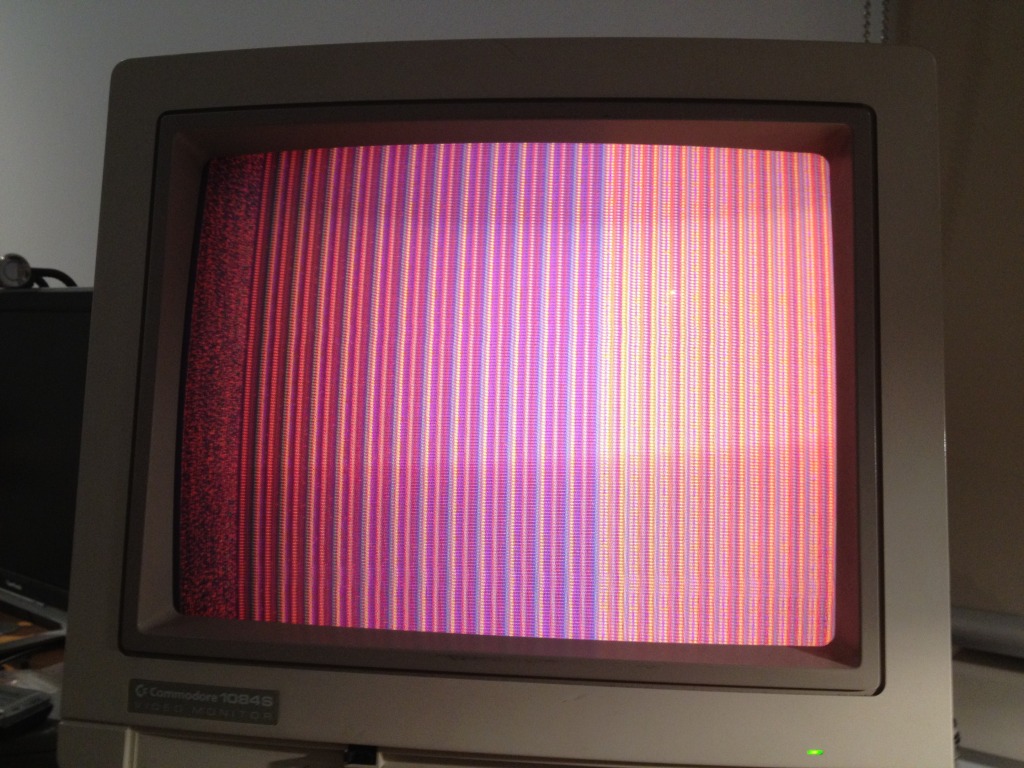
...a frozen screen of crap, not even a frozen "rug". A healthy defender board does a RAM, ROM and CMOS RAM test on power up during which it displays a dark red speckled screen that is called the "rug", a band should sweep across the screen twice from left to right, followed by a brief pause and the results of the test.
This board looked like it was starting the process on the left side of the screen but failing instantly. The first point of call was to check if the CPU was getting clock. Defender uses a Motorola 6809e CPU which takes a clock feed from an external crystal (unlike the non-E version), a quick poke with the scope showed I was getting clock so no fault there. Next was the /RESET line, this should start low, go high, and stay high. It was pulsing so the board was watch dogging. Arcade boards usually have a watchdog circuit to stop the board spending hours in a cabinet in a crashed state. Not only would it burn an image into the CRT it would not take any money, so a watchdog circuit watches the CPU buses for activity, if nothing is going on then it yanks the /RESET line low, then releases it. If the board has simply crashed it will reboot, but in a fault condition the watchdog will bark constantly and the board will stay dead. Often you can hear a regular ticking on the audio of a board in this state, but without the audio board connected I had silence.
In theory the fault could simply be within the watchdog circuit but I have never seen it, the fault is usually real and elsewhere, and on late 70s/early 80s boards there are a tonne of culprits.
The build quality on early 80s gear is bad, really bad. Am not sure if this was just standard for the era, or if everything was done on the cheap. Boards 3 or 4 years younger are much better made. The problem is basically connectors, any joint on a conductor that is not soldered and relies on two bits of metal bring pressed together is a connector. So this means ribbon cables connectors, PCB edge connectors as well as IC sockets, all introduce points of weakness into a system and provide literally hundreds of possible points of failure on busy boards. Add in the early 80s fetish for having multiple boards and you have to have some way of connecting them all together. Defender has 4 boards, the CPU board that contains the CPU, the DRAM and the video generation circuitry. The ROM board that holds the game ROMs, the ROM paging logic and a controller that interfaces with the Audio board which has its own CPU, RAM, ROMs and amplifier. Then finally there is the I/O board which holds the logic and connection points for the controls and cabinet switches. All connected together with ribbons cables and peppered with sockets.Probably the biggest issue on these old boards are the sockets which in the early 80s means single wipe sockets. The contacts within the socket only press on one side of the IC leg, usually outwards trying to splay the legs of the chip. Over time these spring contacts either lose their spring or they end up pushing the chip legs apart to the point that the contact is only held together weakly. Modern sockets push on both the inner and outer sides of the chip leg, make better contact and prevent leg creep.
Anyway - its far harder to troubleshoot a board with a barking watchdog circuit that is resetting everything twice a second than it is to troubleshoot a board that has quietly crashed so the watchdog had to be muzzled. On Defender early boards there is a pad on the solder side of the board in the shape of an hourglass.
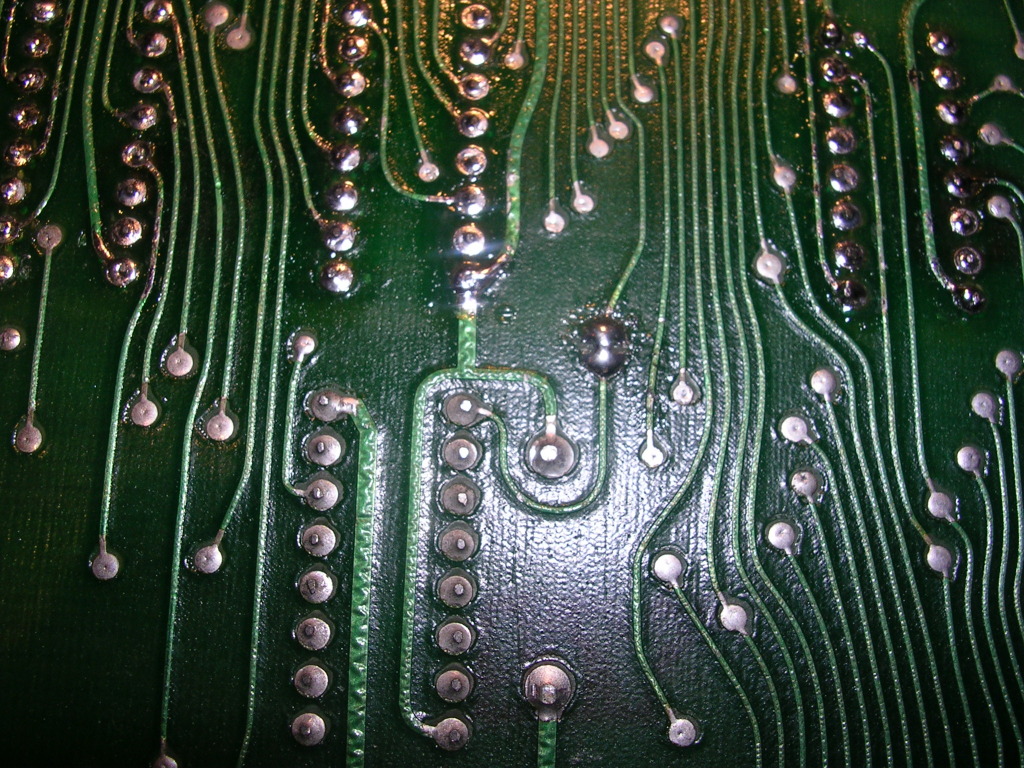
This needs to be cut in half and the upper side of it tied to ground to stop the barking, once that was done the board quietened down, the image on the screen didn't change tho.
The most likely culprit on any board that locks up on boot is the RAM, this is pretty much true on any board from any era so its a good place to start. Defender has 48KB of DRAM provided by 24 4116 tri-power DRAM chips. As mentioned, the loss of a power connection on any chip from a crappy socket can destroy that chip, or the loss of an entire power rail to the whole board can destroy all the chips.
Ideally I would hook up a Fluke 9010 6809e pod to the CPU socket and tell it to test the RAM in the address range 0h000-0hBFFF, but I didnt have a 6809e pod, but I did have a few Sinclair Spectrums handy. These take eight 4116 DRAM chips to provide the lower 16KB of RAM, on 16KB machines that is the only RAM in the system, the upper 32KB on machines with have 48KB is provided by another type of DRAM but the lower 16KB is critical to the machines ability to boot. These DRAMs are single bit chips, ie they have 2048 memory locations but can only hold a single bit in each one, ie either a 0 or a 1. These chips are usually ranged in rows of 8 where each row member contributes a single bit to the byte. So a quick test was to swap the 4116s into a Spectrum and see if it is able to boot. Any bad chip will blow a hole in every single byte in the lower 16KB of RAM and break the ability of the machine to even boot.
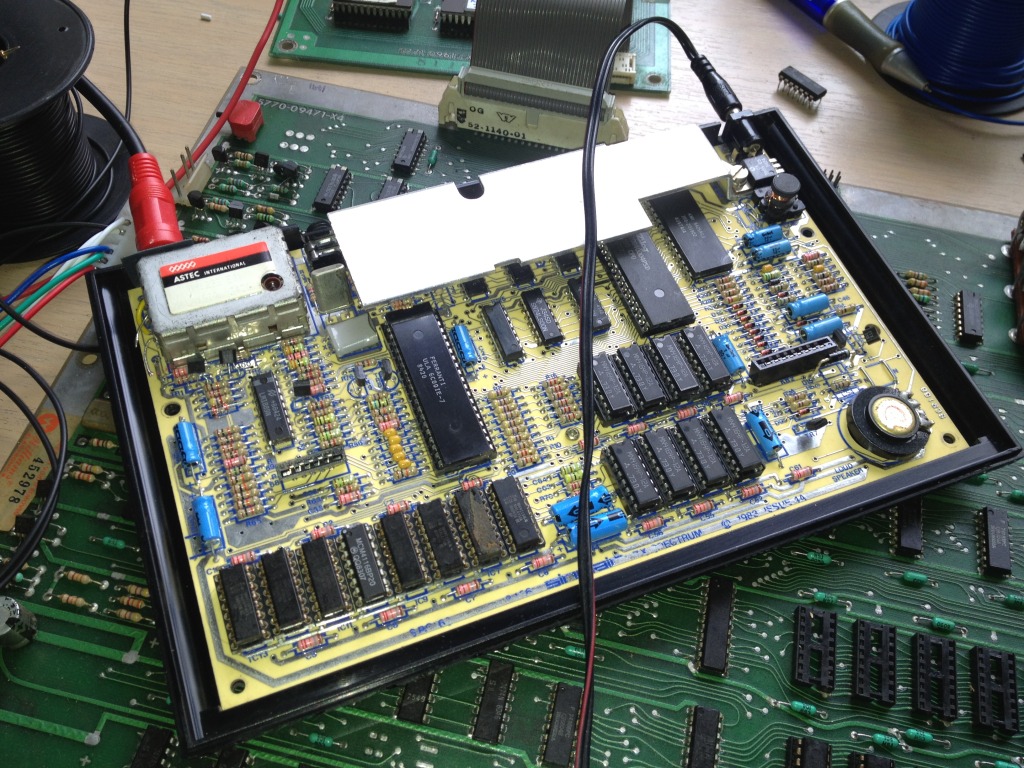
So each of the three rows of eight was swapped in and in every case the spectrum was able to boot to its 1982 Sinclair Research prompt, therefore all the RAM was good despite a lot of pin corrosion.
This didn't mean that the sockets on the Defender board are ok, just that any bad connection isn't likely to be on a power pin, but a single data pin with bad contact could still be causing the fault. The same applies to the CPU socket, the RAM sockets, and the video decode ROM socket, or the ribbon cables.
To rule out a software issue I put the 11 ROMs through my reader and 2 did come back as bad. To be honest some of the EPROMs were in such a bad state I wasn't surprised, a couple had legs in the last stages of metal fatigue. My Wellon VP280 claims to support 27C16s and I had bought a batch of 12 on eBay, when it came to programming them it struggled. It does a very good impression of completely locking up with the progress indicator stuck at zero, after fighting with it and adjusting the programming voltage parameter for a while I kinda gave up and left it in its jammed state. After about 3 minutes of no activity the app woke up and gave a "programming error" and crashed to the desktop. On firing it up again I found that the chip it claimed it couldn't program had actually been programmed correctly as it verified fine. So it can program 27c16s but its a slow process and you have to ignore all the bad signs. After slotting in the two new ROMs nothing changed so I continued poking around with the scope.
The outputs on the 74ls367A buffer chips that carry the address bus to the ROM board looked pretty nasty and I did briefly annoy the fault and get this output.
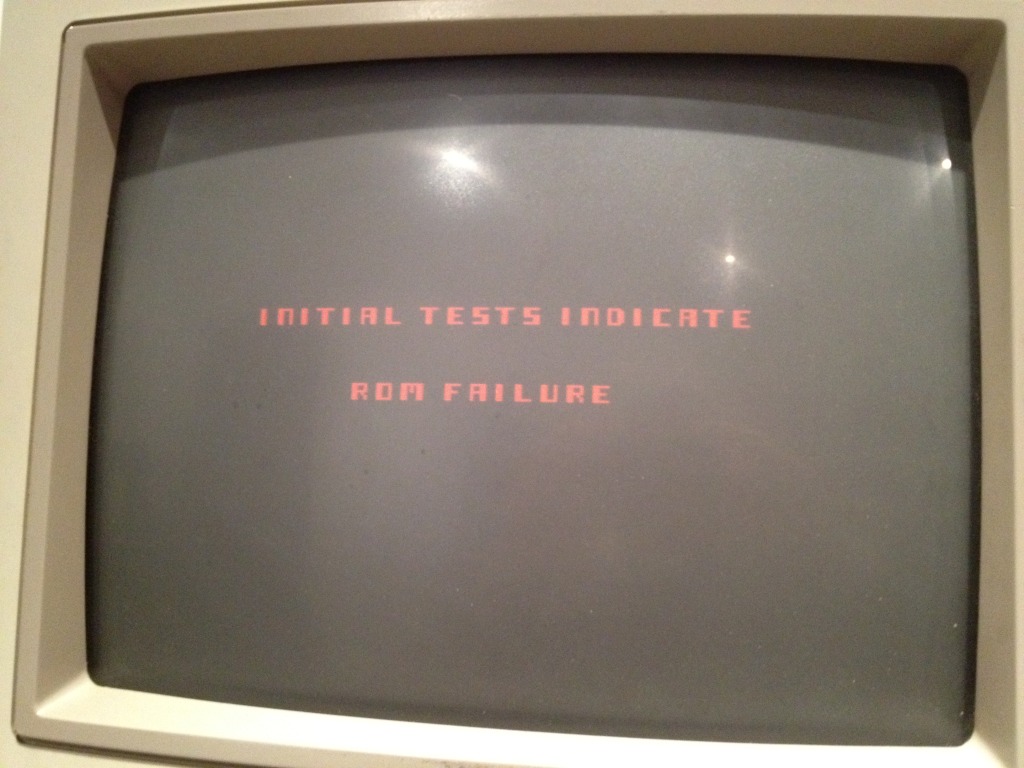
But on reset it went back to the original faulty screen and I couldn't trigger it again.
So I was faced with either a RAM or a ROM fault, possibly ROM paging. The CPU can only see 64KB of address space, and 48KB of this is DRAM which is always connected, this only leaves 16KB for the game ROMs. The board has eleven 27c16 EPROMs giving a total of 22KB for the game code, graphics and sound data. The ROM paging system swaps in ROMs or banks of ROMs into the address space, while disconnecting others allowing the game to access all the ROMs, as long as the game executable correctly controls the paging system.
At this stage I swapped the second CPU board onto the bench and fired it up, and got a similar fault.
I had been assured that the ROM board was in perfect condition (it was the unused ACMI spare), but it looked more likely that the ROM board I had was bad. The second ROM board was still bolted into the Defender cabinet and was also thought to be 100% as the cabinet had worked fine following the first CPU board failure when the spare CPU board was installed. After the second failure there was no real way to know whether the CPU board or the ROM board was the cause of that, but both CPU boards did roughly the same thing when plugged into the ROM board I had, which was assumed to be 100% working. After a night poking around on the CPU board and finding nothing wrong I dropped into ACMI and plugged the motherboard into the cabinet, primarily to test that the original fault hadn't just been caused by flaky connections in the RAM sockets that were behaving again. It failed to boot so I recovered the ROM board in the cabinet and brought the CPU board back home again.
This repair rapidly gets harder to follow as I now had two CPU boards and two ROM boards. I paired the scruffy CPU board with the scruffy ROM board and the neater pair together also. Am going to have to refer to these as board sets A (neat) and set B (scruffy), or more specifically CPU board A, ROM board B etc etc.
Anyway, still labouring under the misapprehension that the ROM boards were fine I opted to work on the neater pair, so hooking up CPU board A with the recently retrieved ROM board A got me the same fault.
Going over the board with a scope showed a few possibilities, as a rule I hate removing parts to test them without a fair chance that they are bad so I decided to stop working blind and dropped some coin on a 6809e Pod for the Fluke 9010 trouble-shooter I had.
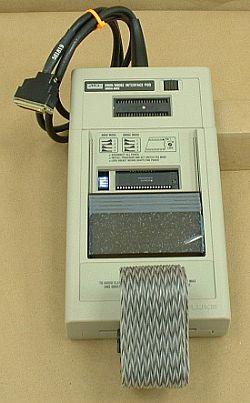
I already had the Z80 and 68000 pod and on troublesome boards they had been insanely useful. The 6809/6809e pod is apparently the most sought after one these days, it probably wasn't a major seller when it was new as the 6809 CPUs were released very late in the 8 bit era and most people were moving onto using 16bit chips in their systems. The majority of pods are now virtually worthless, and the only real market for the 6809 pod now is the arcade and pinball repair community.
This pod is somewhat unusual in the range in that it doesn't have a built in CPU, this one has a ZIF socket you install a known good CPU into and some dip-switches to set it up for a plain 6809 or a 6809e CPU.
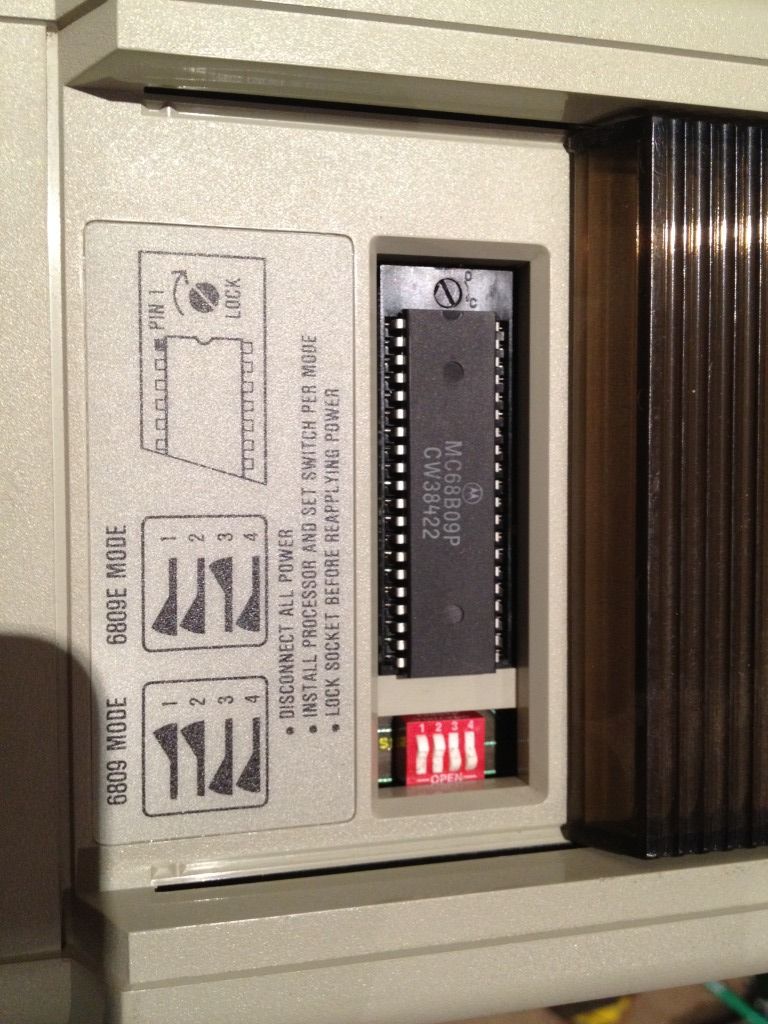
The main 9010A unit allows you to run tests on the board as it drives the CPU in the pod. It takes its instructions from the 9010 master unit rather than the ROMs on the board under test. So on a totally wedged board you get to play CPU and see what a normal CPU would see, without it being impacted by the fault itself. There is a button "Run UUT" that allows you to run the board using the CPU in the pod, the master unit steps out of the way and lets the CPU do what a CPU on the board would do, either crash or successfully run the board.
In terms of testing you can thrash test RAM, read ROMs and check the drive-ability of the system control lines, very very useful, if you know the memory map. Thankfully the MAME drivers provide all you need to know buried in its depths.
With the 9010 connected to the board...
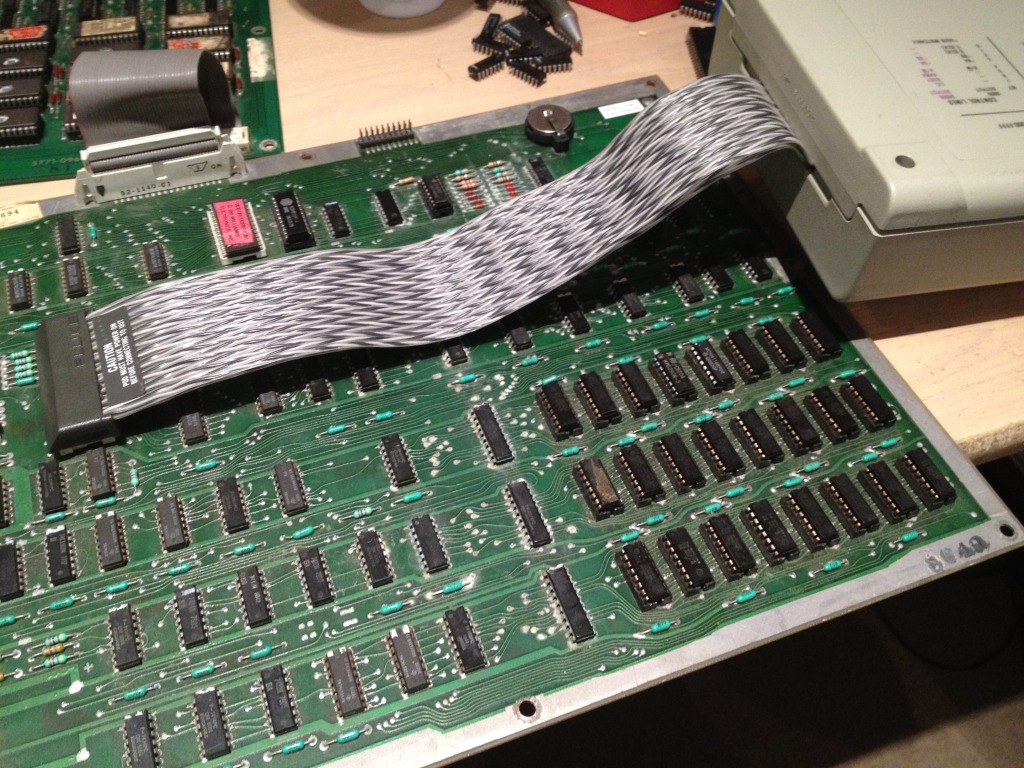
I got it to test the system buses, to confirm that all the lines were able to be driven high and low. Next came the RAM between 0h0000 and 0hBFFF which is the 3 banks of 8 4116 DRAMs, this test passed.
As the video output was working correctly these tests had proven about 90% of the CPU board, so the fault was likely to be on the ROM board.
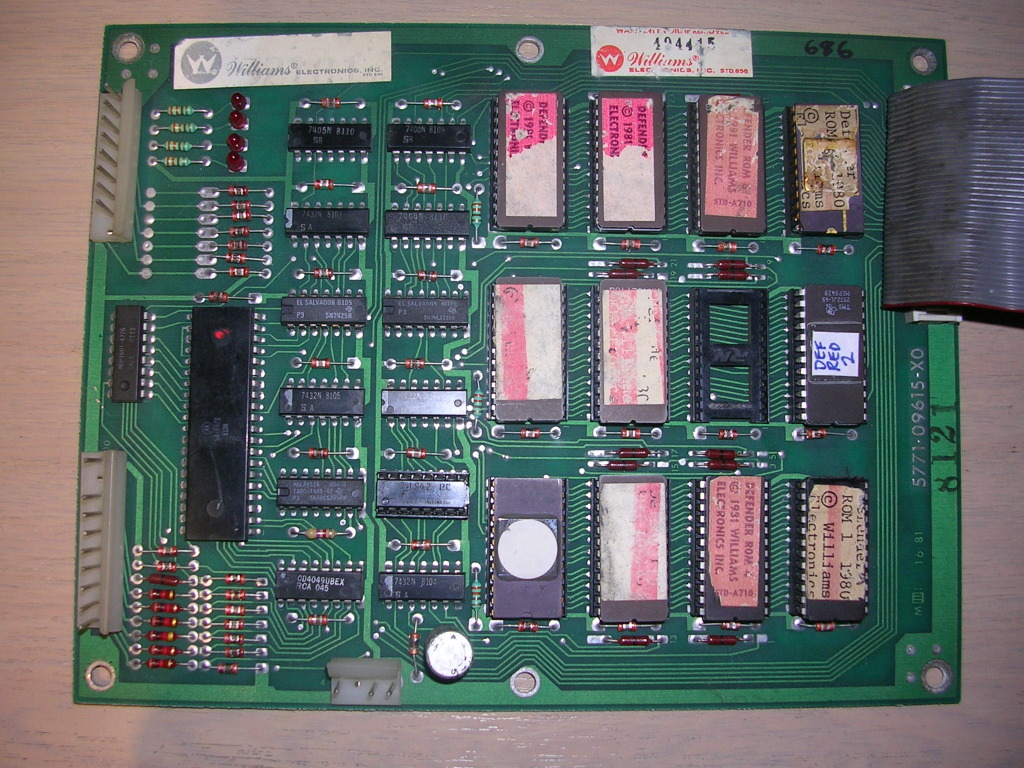
A quick eyeball check of the board found this...
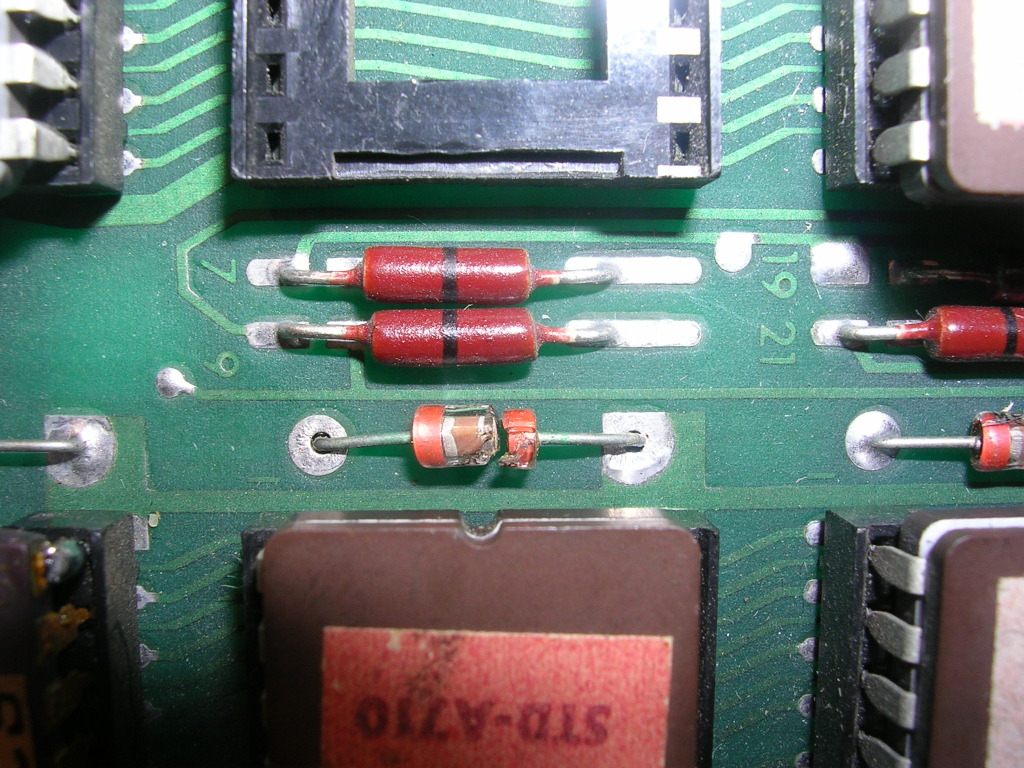
... a smashed capacitor that looks like a diode. Its unlikely to cause any issues as its just there to provide some stability to the power feed local to the ROM it is next too. I replaced it with a 104K ceramic capacitor anyway, but it didn't change anything.
Using the Fluke and memory map from the MAME driver I was able to get correct checksums back for ROMs 1 through to 4, but beyond that the ROMs require the CPU to control the paging system for them to appear on the bus. So this system was the last major system suspected, digging through the schematics the enable signal for these comes from a 7442 binary to decimal converter chip. Its outputs were suspiciously quiet, all held high, so I removed it and tested it in my EPROM reader - it failed. Fitting a 7442 borrowed from the faulty Missile Command board I have (also from ACMI) I got it to "rug"
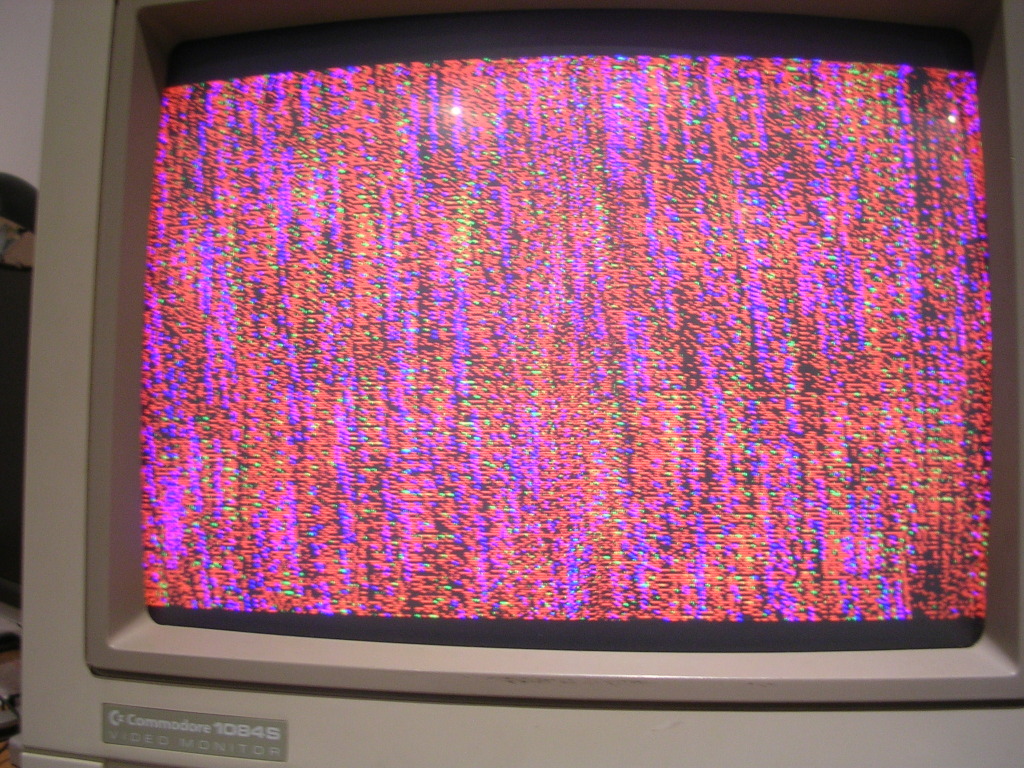
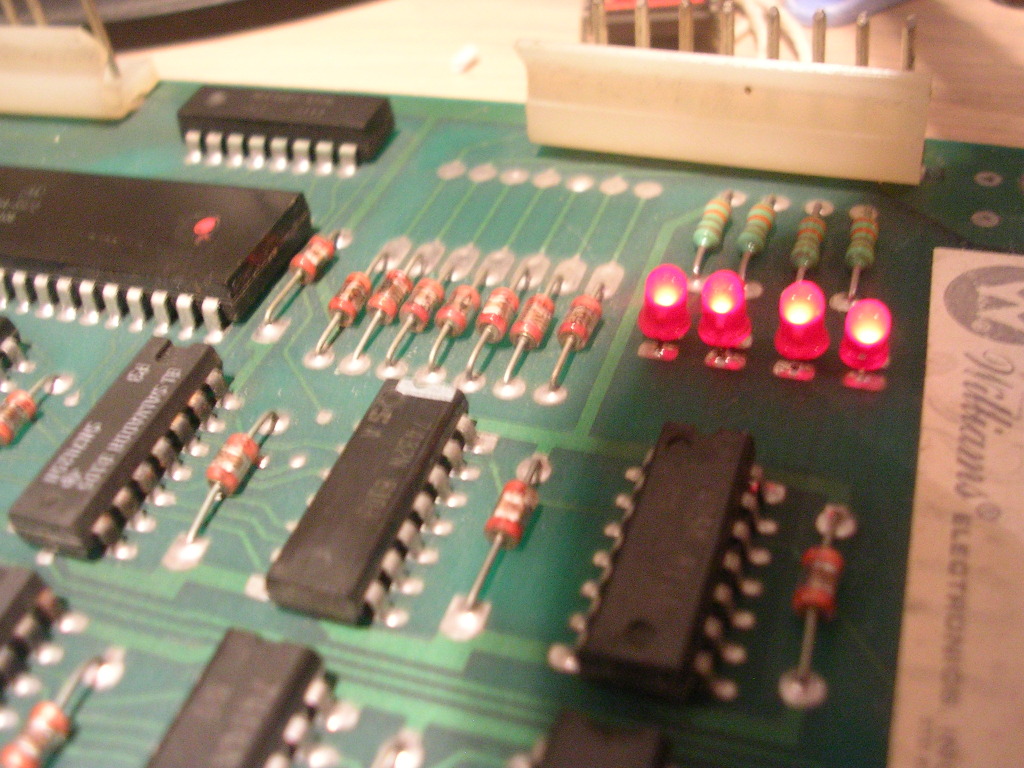
The problem was it would just "rug" over and over again getting nowhere, sometimes falling over and giving this screen...
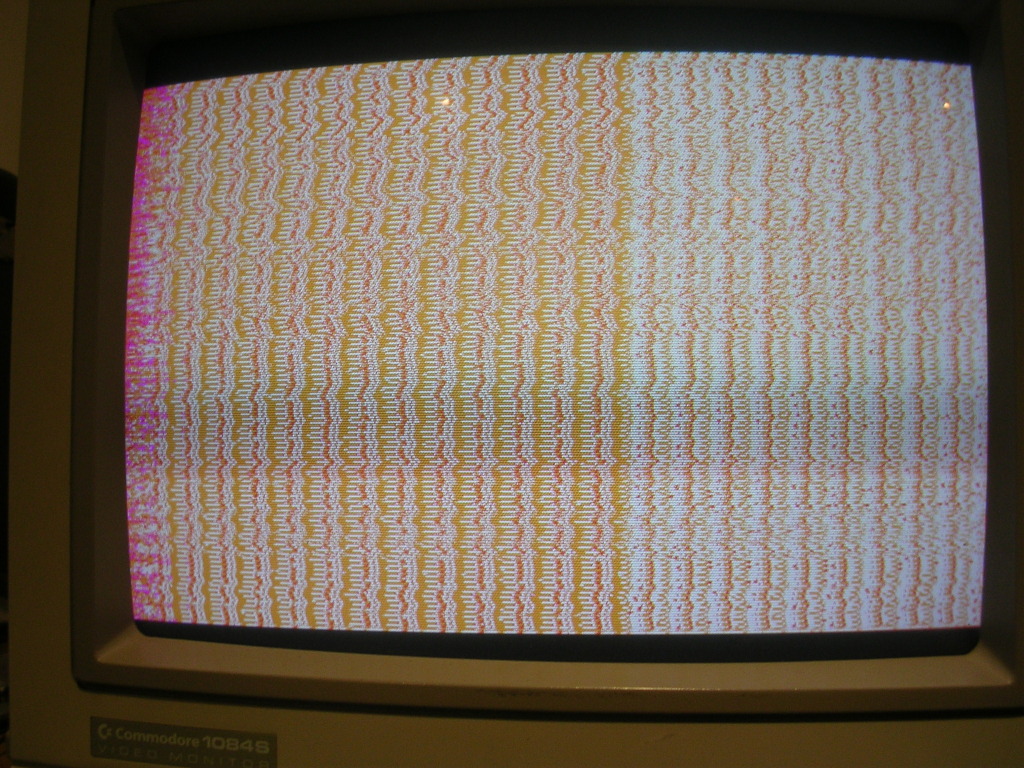
..with all 4 ROM board LEDs lit.
Having dealt with boards this old before I have met a few that are very voltage sensitive so I poked the multimeter at the 5V rail and went for a ride on the voltage adjust knob. Amazingly enough at the very lowest point the board would actually work, giving this after completing its "rug"
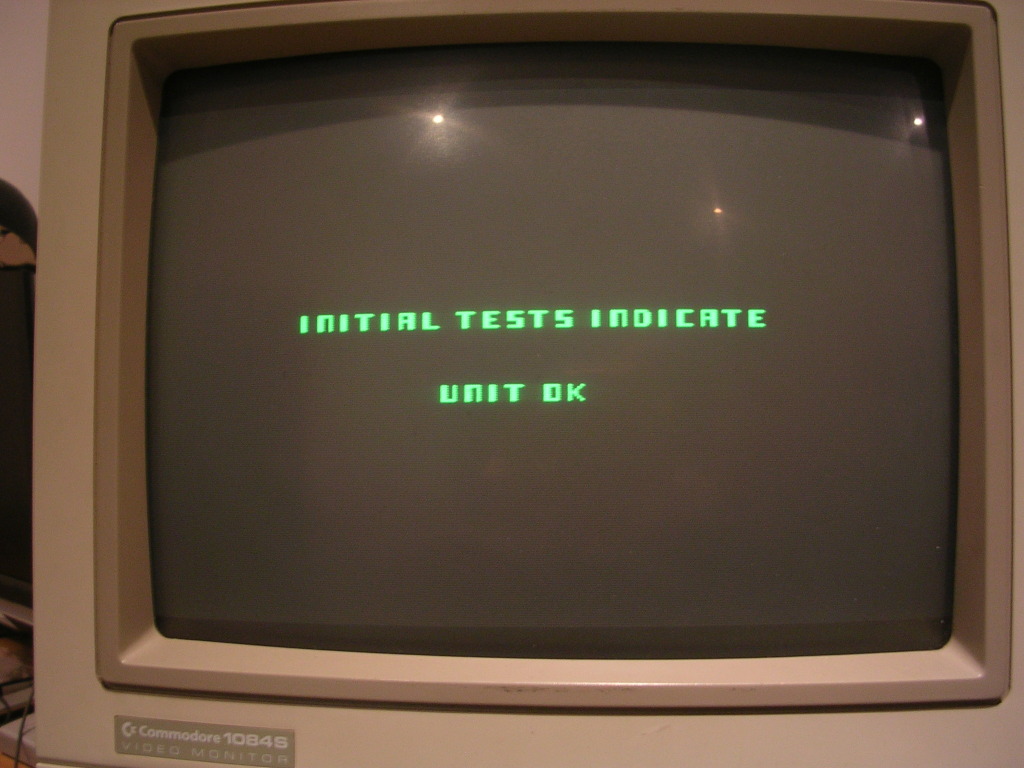
...and attract mode. All this at the 4.58volts..
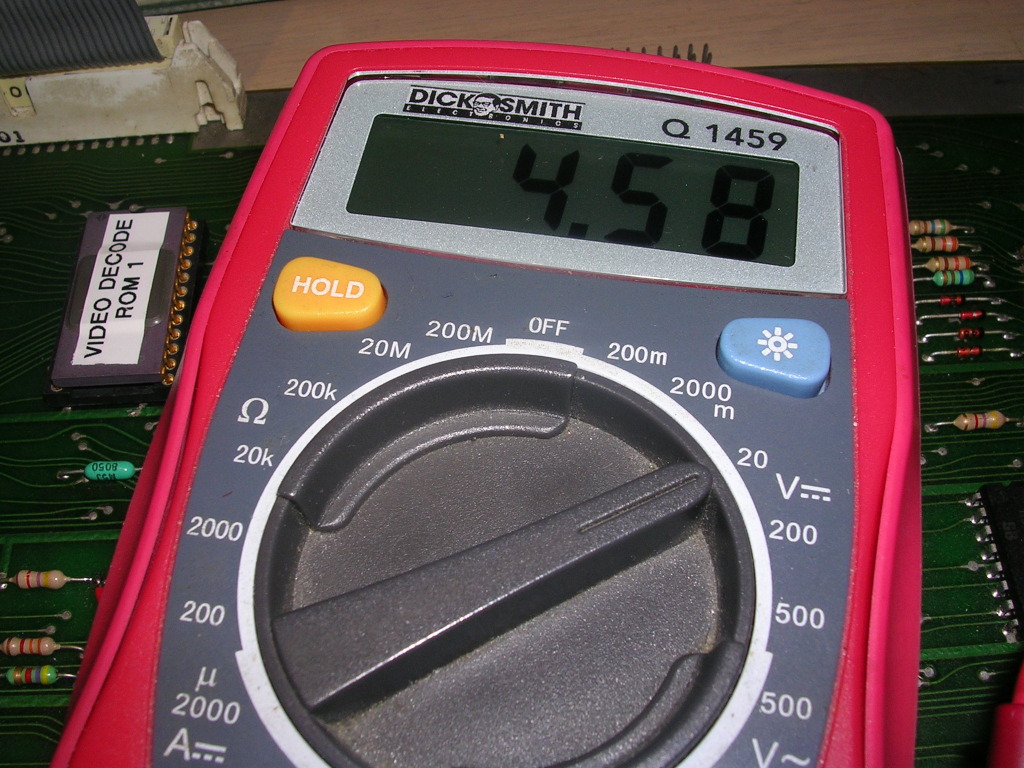
...which is right at the lowest edge of the happy zone for TTL. I wouldn't trust the board to be stable long term at that voltage so I needed to find which chip was struggling at normal voltages. At this stage I was fairly confident the issue would be on the ROM board. I went over the board with the logic comparator clip but it didn't find anything, and as there were only 11 chips left as options I went on a desoldering mission and tested them off board in my tester, it didn't take long to find a bad 7432. After soldering in a salvaged 74LS32 the voltage sensitivity was gone and the board was finally able to run at 5V. On the second ROM board two of the four original 7432s had been replaced so as I had take most of the 7432s off this board before hitting the bad one I chose not to put them back, all four were replaced with tested 74LS32s from a scrap board.
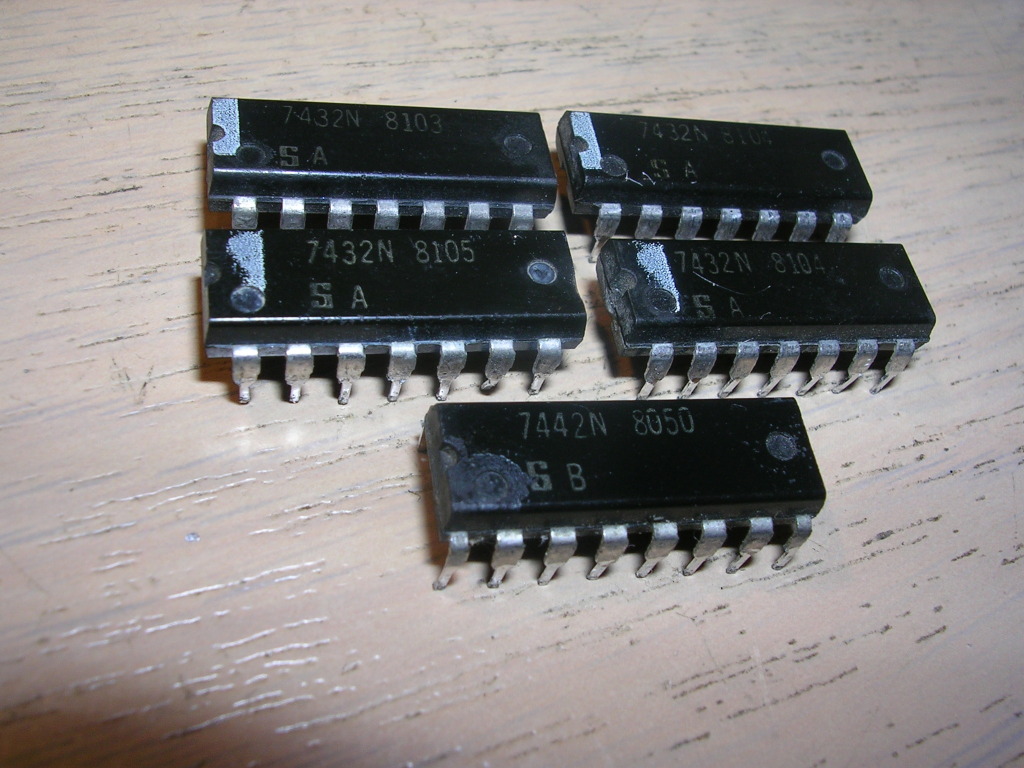
...I finally had a working Defender set - Set A. All Signetics brand ICs - hmmmm, hold that thought!
With a working CPU and ROM board I could now use them to work out which boards in the B set were bad, as it turned out both of them were.
Faced with another CPU board awash with single wipe sockets I opted to sort out the B ROM board first,
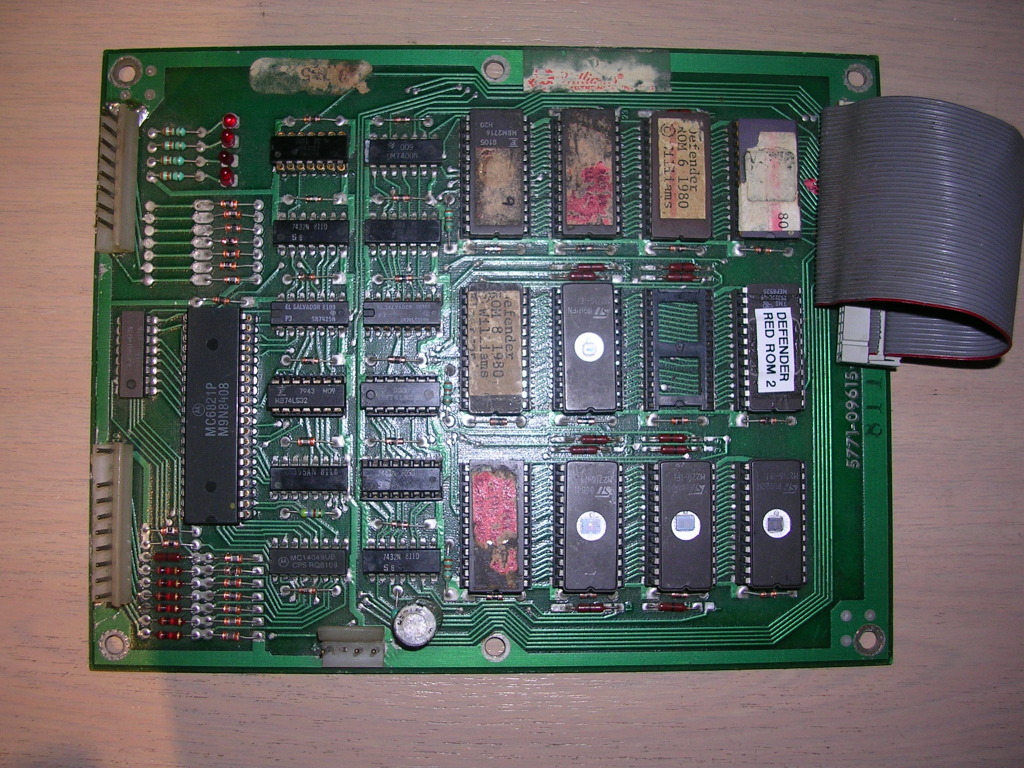
...plugging the B ROM board into the now confirmed working A board got me this...
File:Pcb repair defender 2 20.jpg
... so I hooked up the Fluke pod and repeated the ROM tests, again I could get good reads from ROMS 1 to 4, but beyond always gave the same wrong checksum, another paging fault. This was the ROM board with two of the original 7432s already replaced so I went over those first, with a scope and with a comparator, they seemed fine. However the Fairchild 7404 next door however had a stuck output pin on one of its gates. Some TTLs are tricky to debug with a scope or logic probe, others are easy, 7404s are easy as they are simply inverters, if the input pin is high then the output pin of that gate has to be low, and visa versa. By the same rationale if the input to one of the gates is highly active then the output should also be highly active, unless something upstream is jamming the line. Desoldering this chip and testing it off board proved it was bad, so a salvaged 74LS04 was soldered in and the power flicked on giving me this...
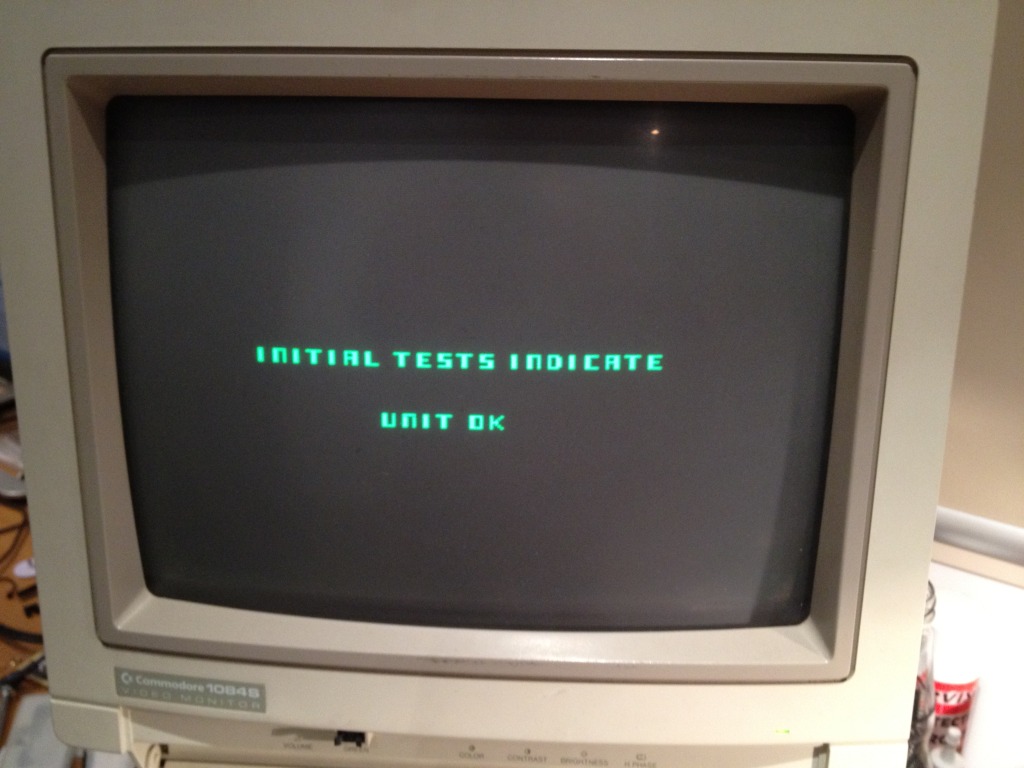
...followed by attract mode.
I now had two working ROM boards so ACMI could have a set back in their cab which would leave me with a known good ROM board to fix the now known bad CPU board. So I re-enabled the watchdog circuit, dropped into the city and installed the board set back in the cab...
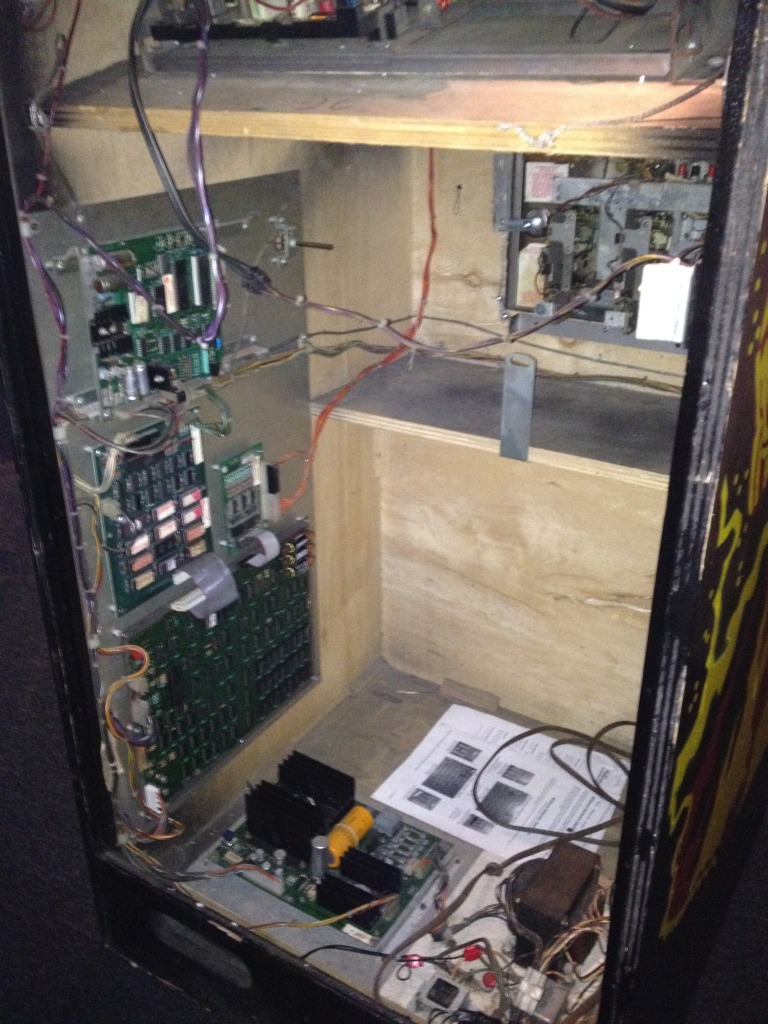
... flicked the power and after some faff with the vertical hold...
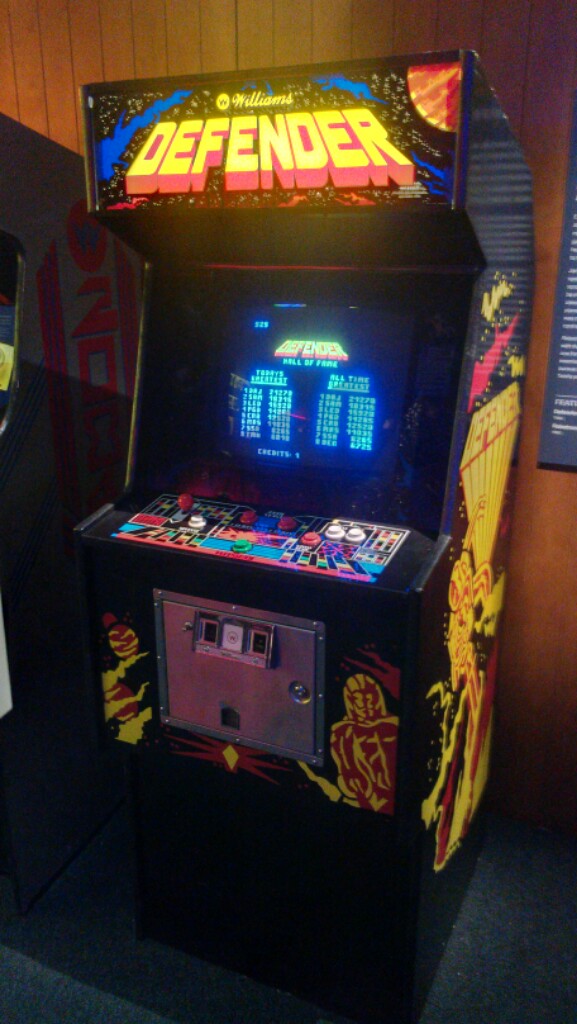
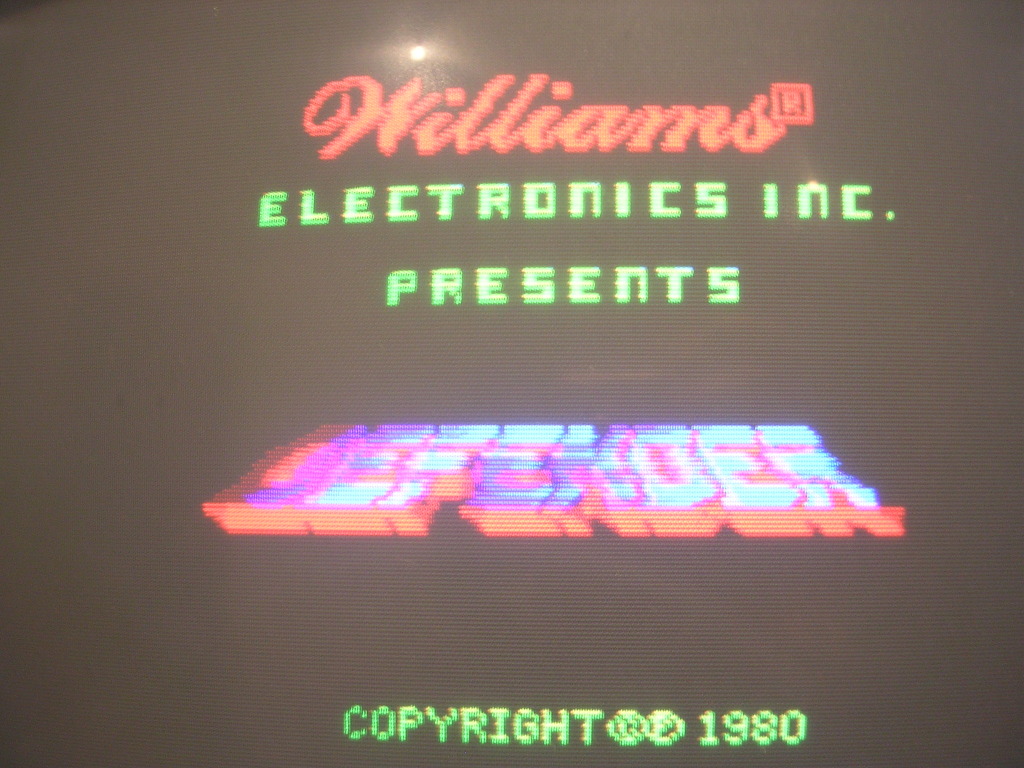
A GLORIOUS SIGHT - it wasn't to last.
This is only half the story - if someone can post a reply, anything will do, I will add the second half. If I try to reply to my own post it tries to add them together then complains its too long!
Five days later I got an email saying it was dead again with this photo.
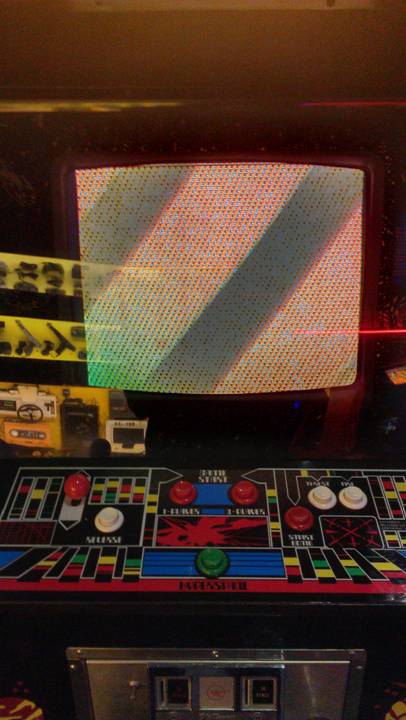
I hadn't had a chance to fix the other CPU board so I grabed the B ROM board and swapped it with the A board in the cabinet. Luckily it fired right up - another ROM board fault.
Now I had a known faulty CPU board and a newly faulty ROM board, not ideal as even when one is fixed the board still wouldn't boot so knowing that you had actually fixed anything is trickier. The photo from ACMI shows the board with crashed with an active watchdog barking, when the watchdog is disabled the pattern calms down a lot, and gave me this.
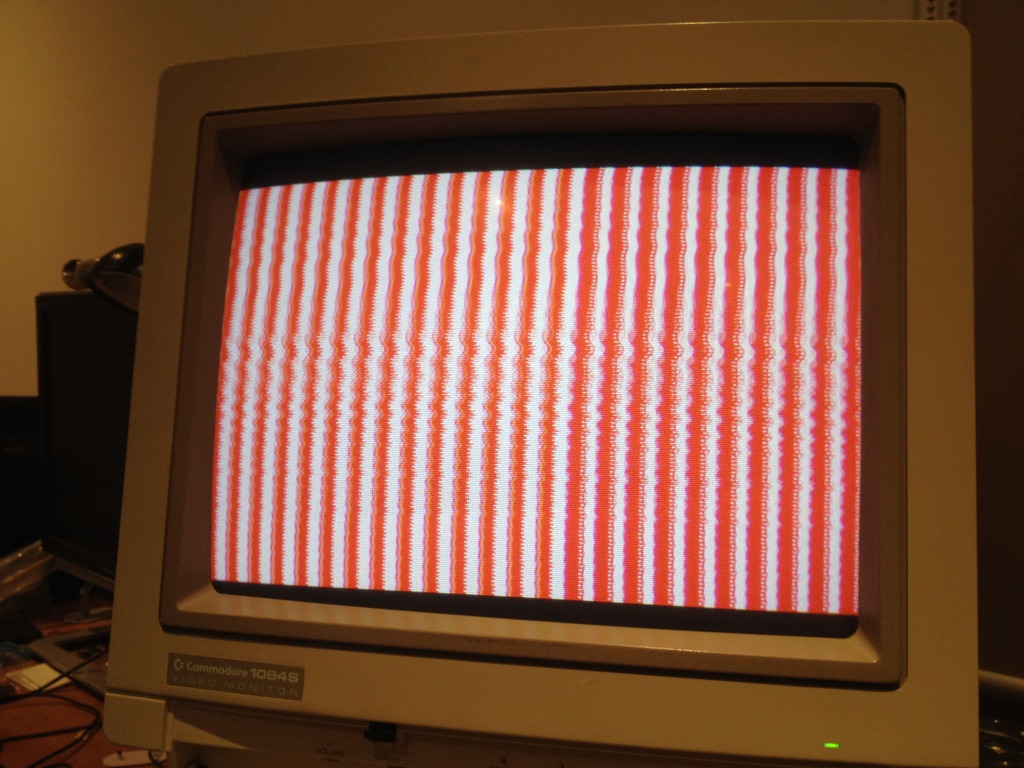
Bored with ROM board faults I opted to look at the CPU board, and to make life easier hooked up the Fluke pod again...
File:Pcb repair defender 2 26.jpg
...instructing it to test the RAM between 0000 and BFFF again, which is the extent of the RAM on this board - 48KB. It came back with this...
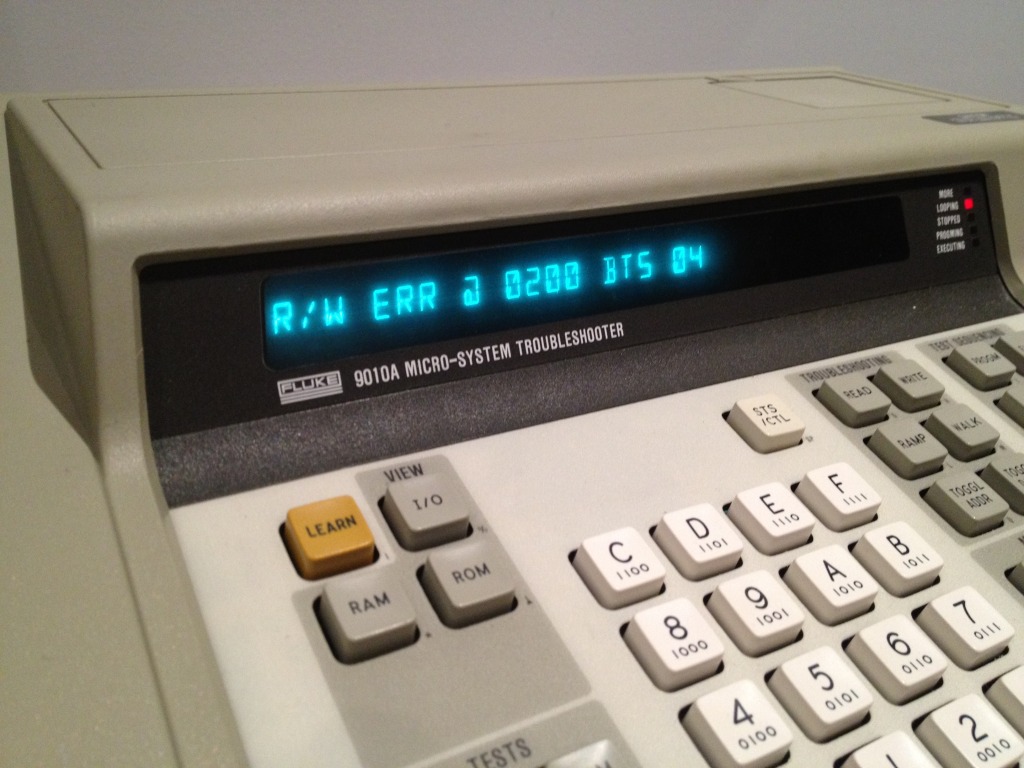
...bit 4 at location 200 was giving the wrong result. The 200 is hexadecimal for 512 and means the byte at 512 has bit 4 stuck. You can work out how the memory is mapped out on the board and locate which chip this fault is on. Having done that I pulled out the suspected 4116 chip, and one of its legs didn't come with it. A second similar result found another chip with a fractured pin, and a third whose pin was fractured but not yet fully snapped off, its the one sagging under its own weight here...
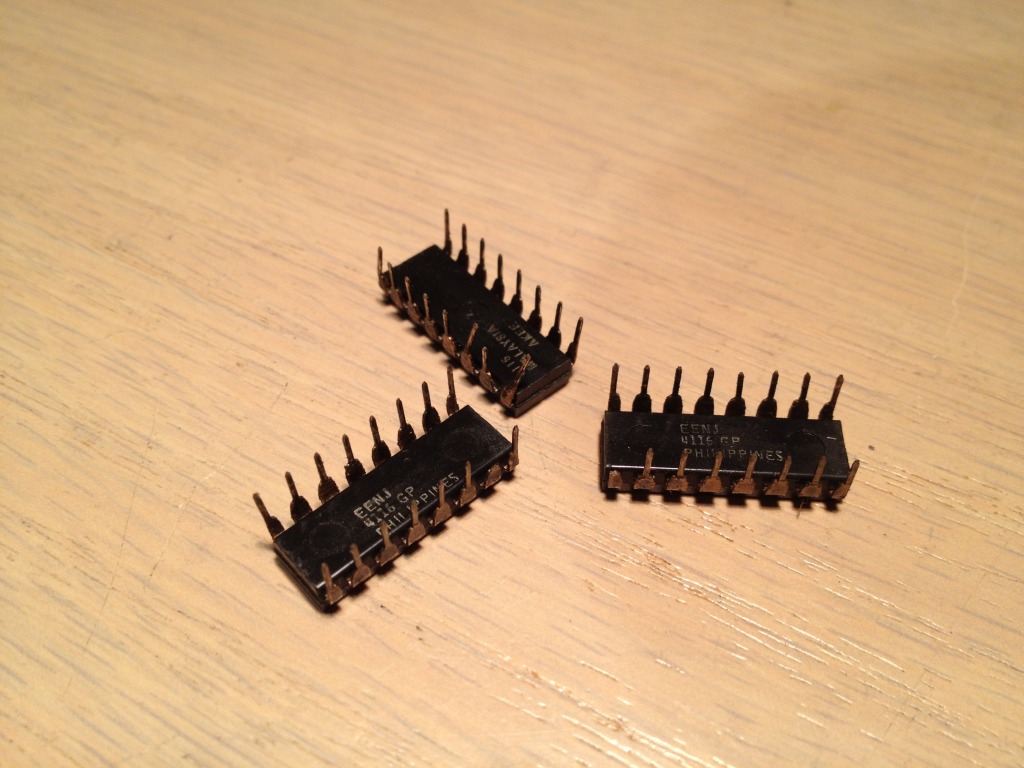
With three less wrecked 4116s installed on the board the Fluke RAM tests completed successfully, I assumed at this stage that the CPU board was fixed, so moved onto the ROM board. Knowing that the Signetics chips had been so problematic I went straight to the remaining few and found a bad 7400.
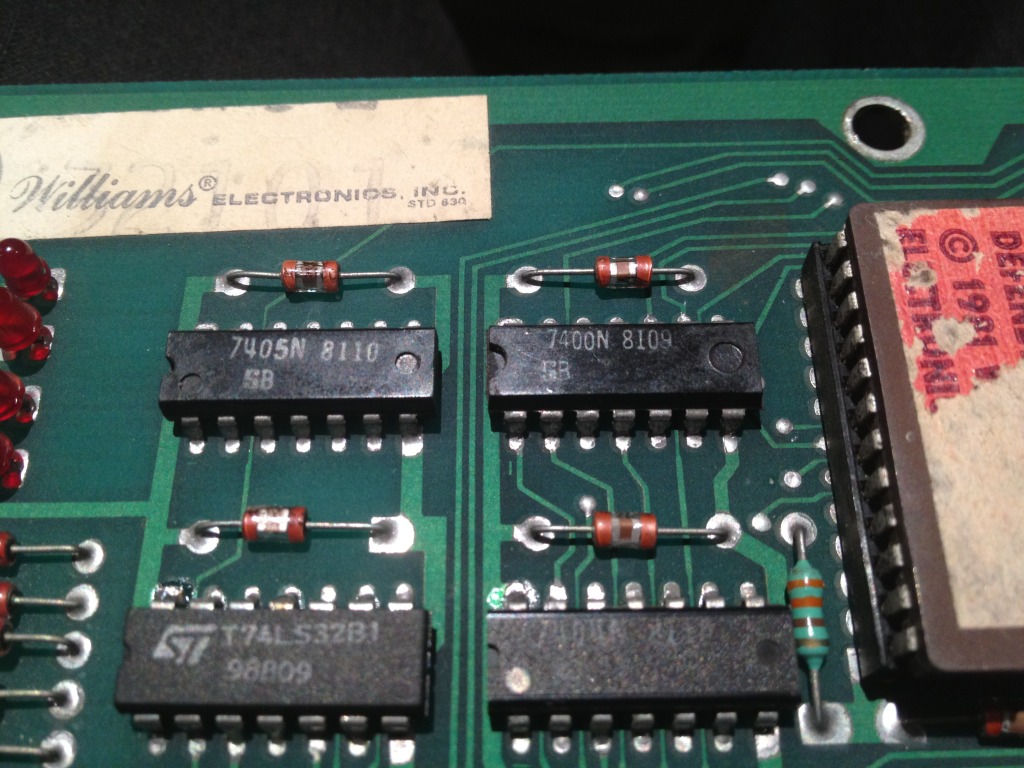
Replacing this with a salvaged 74LS00 was I assumed the last thing to do, so I disconnected the Fluke, installed the original 6809e CPU and flicked the power.
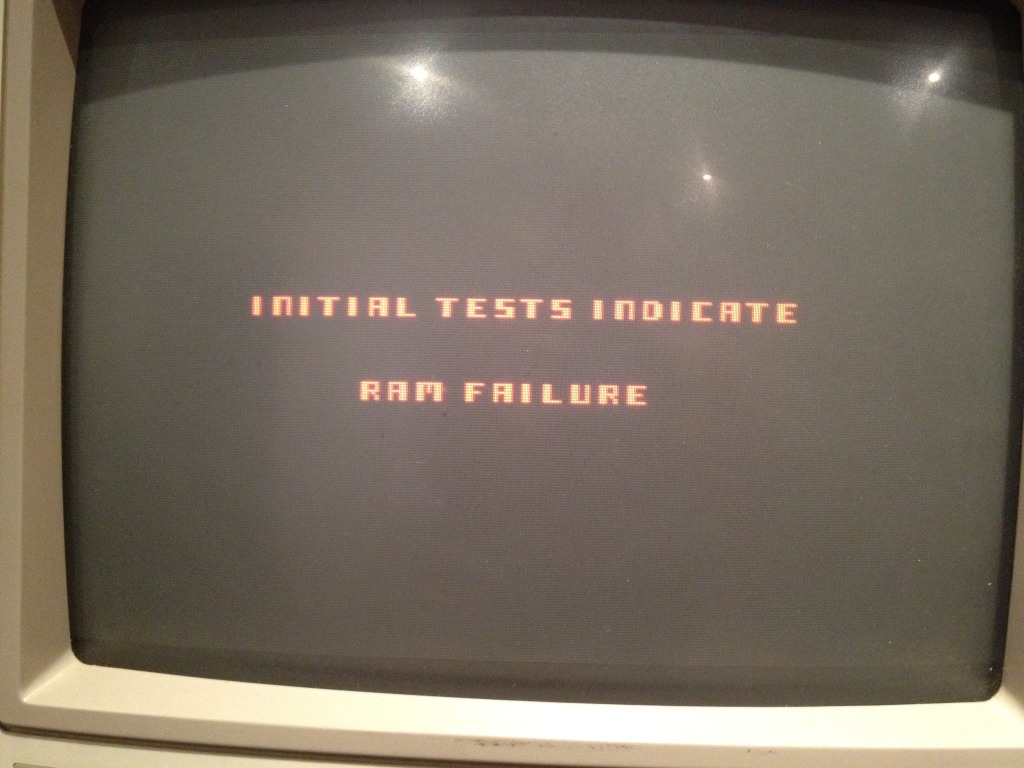
Well this suggests that the ROM board was now OK as it can at least complete its tests. With the Fluke reconnected I ran another RAM test and it came back reporting full health. Reinstalling the main CPU it failed again but if I held the CPU down manually it would complete its tests and boot. The prime candidate was the CPU socket, a single wipe nasty.
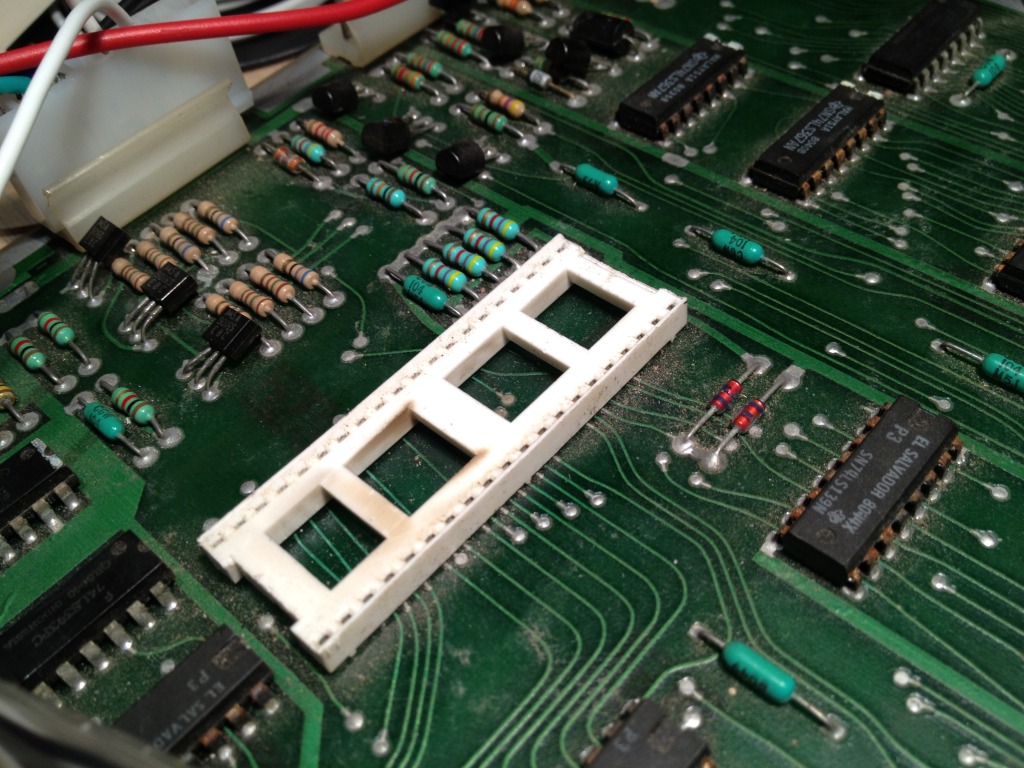
So this was removed and replaced with a new dual wipe socket, the CPU installed and the flakiness was gone. Just to create more work for myself I tried to introduce instability by poking the video ROM and CMOS RAM chip while the game was running, and I could cause the game to reset, again due to bad contacts within the sockets.
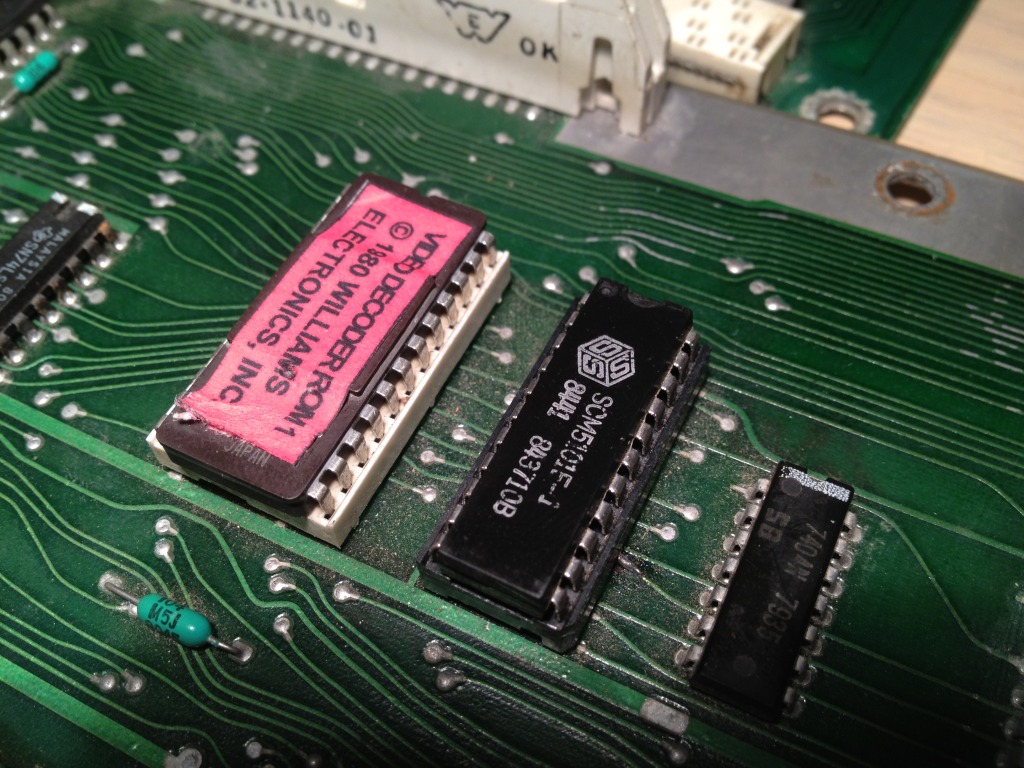
There was also signs of an old bodge on the CMOS RAM socket where a track had been damaged and blob-soldered to a track on the upper side of the board that I wanted to tidy up. So these were removed, and machined pin sockets installed. These are the best sockets you can use for chips but they have a couple of disadvantages over dual wipes, firstly cost, secondly the shoulder of the pin means its hard to get them back off a board if the board turns out to be scrap, and thirdly it is much harder to get a Fluke pod to connect to a machined pin CPU socket, which is why the 6809e didn't get one.
The busted track was fixed neatly with hookup wire and the chips were reinstalled, confident the board was now fixed I flipped the power and got this...
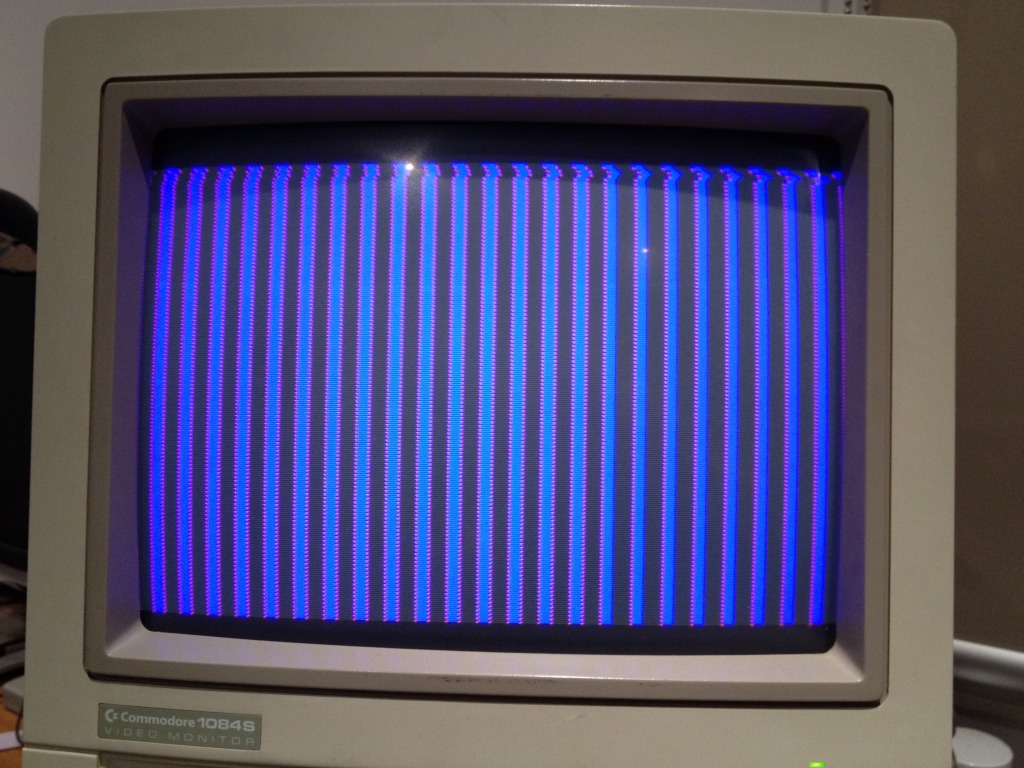
WTF!? After a fair bit of triple checking and swearing I decided that my soldering was fine, the chips were fine, the PCB was fine, and the minor repair was fine, which didn't leave many options. It turns out that the use of an EPROM as the video decode ROM is a modification, originally the board would have used 7641 PROM but as these have died off the use of fast-enough EPROMs has become common. By desoldering the socket I had removed the mod and broken the video decoder system. Two pairs of pins in a row had to be soldered together into a bank of 4, after desoldering the old chip I was left with what the PCB tied together, two pairs of two, re-bridging this cleared the fault and the board booted normally.
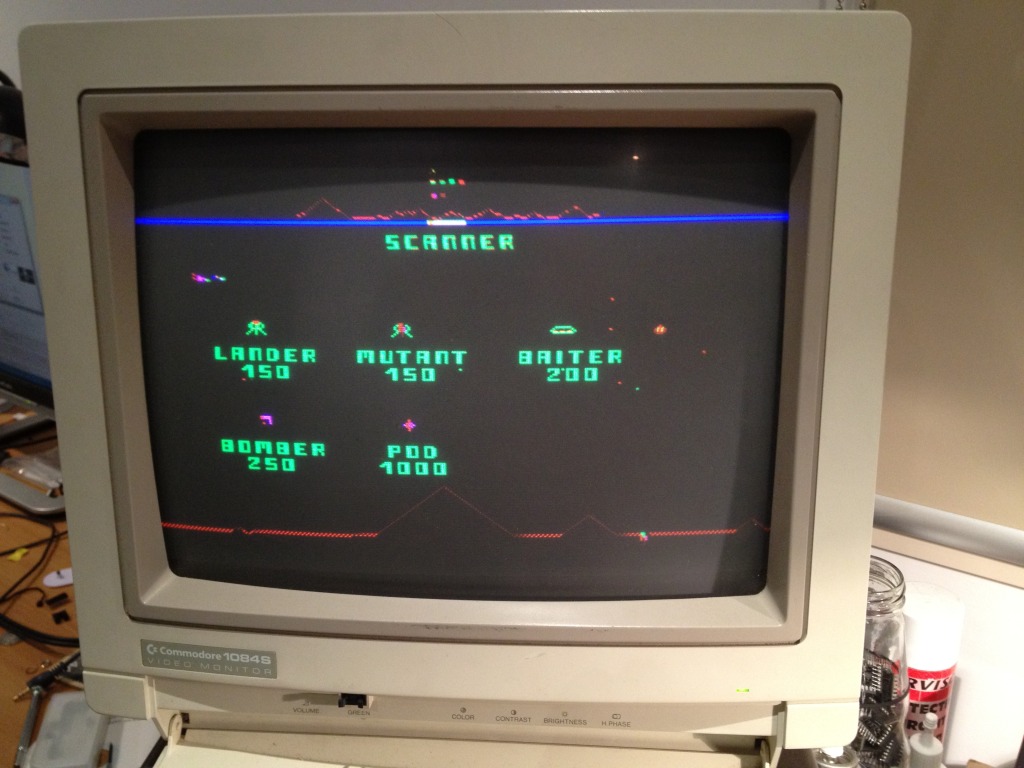
After a few days of sporadic soak testing I took the spare set back to ACMI and prepared myself to avoid Defender boards for the foreseeable future.
This time it took over a week for it to fall over again, a site visit and a ROM board swap brought it back to life again. The A CPU board was now back with the A ROM board in the cabinet, and I had the B board set with a bad ROM board again in a box, much like on day one. The fault was, surprise surprise one of the remaining two Signetics 7432 chips, both were removed, binned and replaced with salvaged 74LS32s. The B board set works once again. All the Signetics 7432s are now resting in the bin and can trouble me no more.
Once again - the glorious sight, same photo as before but who cares - Defender!!!
File:Pcb repair defender 2 35.jpg
It has been stable for 10 days now. Oh that's if you dont count the burnt up connector on the PSU board that rendered it unable to cope with any load on the 5V line, that shut the cabinet down for a bit. Thankfully they had a modern switch-mode PSU with the appropriate Williams harness standing by which brought it all back to life for the nth time, at least no more board faults.
Sometimes I get the feeling that this stuff just wants to retire and be left in peace
Back to PCB Repair Index
