PCB Repair Logs 1942: Difference between revisions
mNo edit summary |
mNo edit summary |
||
| Line 8: | Line 8: | ||
<tr class=""> | <tr class=""> | ||
<th scope="row" style="text-align:left; white-space: nowrap;">PCB Image</th> | <th scope="row" style="text-align:left; white-space: nowrap;">PCB Image</th> | ||
<td class="" style="">[File: | <td class="" style="">[http://wiki.aussiearcade.com.au/index.php/File:Pcb_repair_1942_2_1.JPG 1942 PCB] | ||
</td> | </td> | ||
</tr> | </tr> | ||
Revision as of 10:05, 31 August 2012
1942
 |
|
| PCB Image | 1942 PCB |
|---|---|
| Pin Out | Reserved |
Board 1
Repairer: VectorGlow
Forum Thread: 1942 PCB Repair
Symptom: Background graphics corrupted – tiles are being duplicated vertically in approx. 1 inch rows
Cure: Pin 11 of LS86 at 10J stuck low (on the lower board) - replaced
Symptom: board is ‘dead’, garbage *briefly* on screen on power on but then screen goes blank. Setting Test Mode on gives a static screen of garbage but won’t run any tests.
Diagnosis: Checked all EPROMs – okay. Checked all RAM – okay. Used a logic probe on the 74LS138 at 10L and found that pin 10 was floating and pins 11, 12 and 13 were all High (should be Pulsing). Tried piggy-backing a 74LS138 onto the same IC at 10L, and the board fired right up.
Cure: Socketed and replaced 74LS138 at 10L
Symptom: When board was cold, on power up the ‘bar’ near the bottom of the screen would sometimes glitch with garbage characters appearing over it. This stopped glitching after a few seconds, and during gameplay there were hardly any noticeable glitches.
Diagnosis: Determined that the two 2114’s at 9H and 10H on board 2 were responsible for the onscreen sprites, so tried piggy-backing good 2114’s onto them one at a time. Found that the 2114 at 10H was suspect
Cure: Socketed and replaced 2114 at 10H
Symptom: Board booting up but won’t coin up, etc and resets when trying to run attract mode
Cure: Bad 6116/TMM2016 at location A9 ? (chip nearest ROMs) on CPU board
Symptom: Sprites replaced by random bits of other sprites
Cure: Bad 2114 RAM at location H10 on video board
Symptom: Sprites mis-positioned and broken up
Cure: Bad 2114 RAM at location H9 on video board
Symptom: No background displayed
Cure: Bad LS138 at E11 (near edge connector on top board) where pin 14 goes to pin 1 of the Ls377 at location A8 (just below the 6 (or 3) background graphics EPROMs on the lower board
Symptom: Dotted lines across parts of the screen
Cure: Bad 2148/6148 at location F2
Symptom: Boardset powers on and plays okay, all graphics okay BUT random garbage text present in many areas
Cure: Bad LS367 at location H1 on the CPU board
Symptom: No sound, just a hiss. No input to sound amp (Capcom original, top board)
Cure: Bad outputs on LS138 at E9 – replaced
Problem: Text corrupting, appearing in the wrong places, etc (Capcom original top board)
Cure: All outputs on the LS157 at E1 stuck low – replaced
Symptom: All sprites extremely blocky and unrecognisable
Diagnosis: Checked the 6 sprite EPROMs on the lower board and then the chips around them – found that pin 9 on the four LS194’s was ‘dead’. Traced this back to the top board where it was found that all the outputs on the LS74 at location K8 were dead
Cure: Replaced faulty LS74 at location K8
Board 2
Repairer: kane
Forum Thread: [hhttp://www.aussiearcade.com.au/showthread.php/34997-1942-Capcom-Repair-Log 1942 PCB Repair]
I finally got stuck into fixing some boards recently, first up was a genuine Capcom 1942 i've had on my to do list for a while.
The board's physical condition was very good, one of the cleanest I have, showing no signs of it's old age.
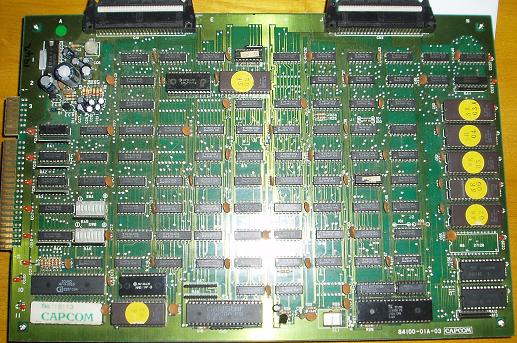
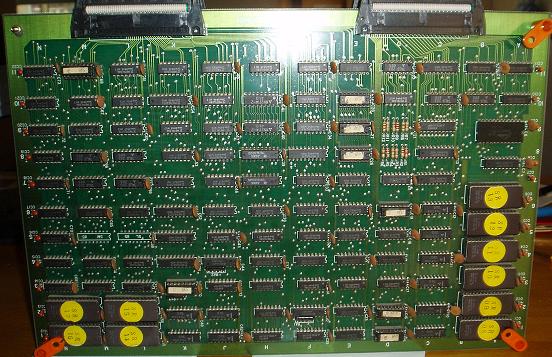
Plugged it in for a test, and board would not boot, just displayed coloured sqaures on screen with no activity. After being plugged in for a few minutes, some ROMs on the video board were getting very hot, so testing the roms seemed like a good starting point.
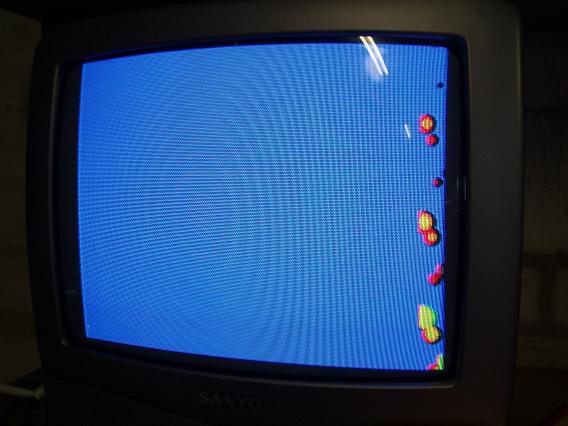
Pulled and read the ROMs, and _every_ single ROM of the 17 on board was bad. Some of the ROMs were reading random garbage, but most would not read at all, the EPROM reader complaining of just about everything from missing Vcc pins to "check this device is not inserted backwards"?? All Fujitsu branded ROMs by the way. I managed to scrape enough replacements together off of scrap boards to burn a new set, plugged them in, but the board would still not boot, but now had a static screen of graphics tiles. Mostly blue sea with a few explosions.
I tried the video pcb with another 1942 bootleg board I have here and it worked fine, so it was time to dig into the CPU board to see what was going on. There were a few ICs that had been socketed like the z80s and all the RAM and a LS374 and LS138 right above the main z80. I swapped them all out but no change, a quick probe around didn't show anything obvious, everything seemed to be running OK. Looking closer at the 374 and 138 sockets with the chips removed I could see that some tracks had been repaired probably stuffing them when trying to pull the chips, the soldering job was not great either. Checked all the continuity using my bootleg board as a guide, but everything was going where it should.
Apart from these socketed chips there was only one other on the CPU board that was a non-original, a 245 at location N2, above all the program ROMs. It too had correctly repaired tracks, but piggybacking it brought the board back to life. I carefully removed the chip, revealing a missing via at pin 13 that I would have to re-repair.
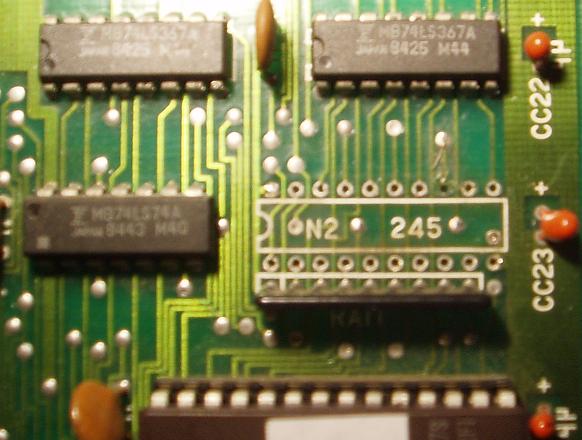
Testing this 245 in the EPROM reader revealed that it was indeed dead, strange considering it was the only replaced chip soldered into the board , I just hope it wasn't dead when they put it in! Not wanting to ever have to desolder the chip again, I fitted a socket and repaired the track as before and with the replacement chip inserted, the board ran perfect...
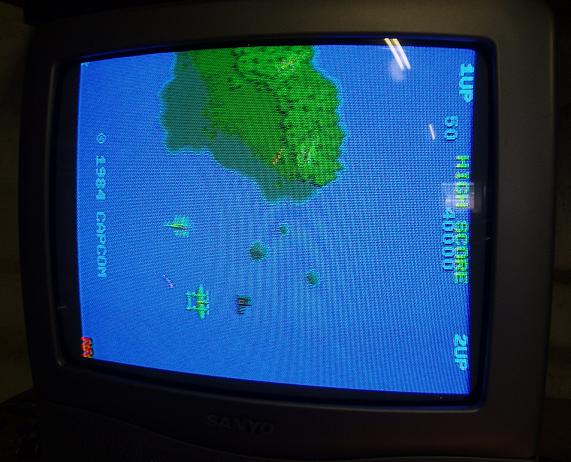
...except for no sound. The sound system consisted of a 27128 ROM, z80 and a 6116 RAM going to a pair of AY-3-8910s each with 3 analogue outputs heading up to the amp. I could get static through the speaker whilst touching the amp pins and the 8910 outputs, so I was pretty sure the analogue section was good, but it was a real pain trying to get the rest working.
Probing around the sound system and comparing to the bootleg board, everything seemed to be behaving the same, the 8910s seemed to have activity on the inputs but nothing on the outputs, so I pulled all 80 pins of the 8910s but they tested fine on my Crazy Kong board. With the z80, RAM and ROM already socketed and tested, and the tracks confirmed good, it was pretty much down to a TTL somewhere in the mix. My guess was a problem with the chip selecting/enabling, but all the pins seemed to be acting the same as the bootleg board. By shorting pin 18 (the chip select) of the 6116 to ground, I finally got some sound out of the speaker. Each time the pin was shorted it would play a random sound from the game in full, although 90% of the time it was the "getting powerup" sound, sometimes you'd get a music track that would play continuously. This confirmed that the sound system was capable, but didn't really help much in finding the problem.
I spent many hours going though everything sound realted, but in the end I found a dead TTL just getting lucky piggybacking. Was one of the pair of LS374s that handle the data lines at location D8. Probably would have been easy to find with a scope but it showed no signs of being dead with just a logic probe that I could see. Oh well. Pulled and replaced the 374 and the board was back to 100%