PCB Repair Logs Pacman (Bootleg: Difference between revisions
mNo edit summary |
mNo edit summary |
||
| Line 1: | Line 1: | ||
==Pacman (Bootleg== | ==Pacman (Bootleg)== | ||
<p><table class="infobox vevent" style="width:22em;" cellspacing="5"> | <p><table class="infobox vevent" style="width:22em;" cellspacing="5"> | ||
Latest revision as of 13:54, 6 February 2013
Pacman (Bootleg)
 |
|
| PCB Image | Pacman PCB |
|---|---|
| Pin Out | Pacman Pinout |
Repairer: Arcade King
Forum Thread: Pacman (Bootleg) PCB Repair
SBC= Sync Bus Controller (285)
VRA= VRAM Addresser
This board I bought for $100 originally to fix my first pac bootleg. Luckily I picked up another crap board for $15 thanks Gavin and managed to salvage the parts I needed to fix board 1 and put the proms back on board 2.
This board is almost identical except it uses a rider boards for the SBC and VRA like the original pacman.
I've never seen another one of these boards on any site and has a very similar pinout to the "Pac 3" board shown on Mowermans site. Unfortunately the pinout wasnt exactly the same and I had to work some of the controls out myself. The pinout is located to the right of this page.
Where to start I guess?
First glance at the board I noticed it had missing parts namely the SBC under the Z80 and a 74ls174 at 1H.
There are no markings on this board what so ever so I had to use board 1 as reference.
I never had any real interest in this board until I read somewhere that you can use Gallag SBC on Pacman and vise versa. Well I made up a quick harness with the basics ground, 5 volt, 12 volt, sound and video plugged her in and nothing. There was no sync but there would appear to be something there in the fuzz.
I usually start by socketing all the rams on the board, none of them were bad however.
Problem: No sync
Fix: Bad 74ls368 @ 8B and 74ls74 @ 3N
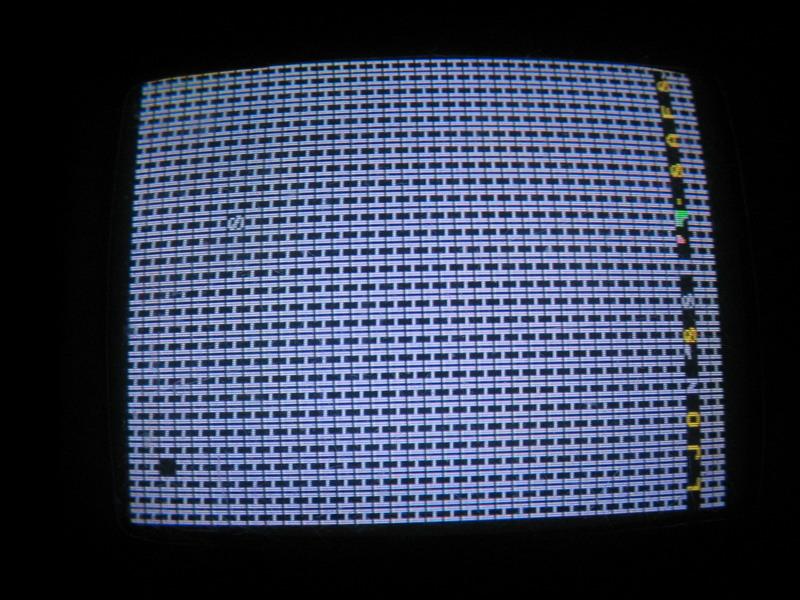
Ok we now had sync but a load of garbage on the screen.

Replacing the missing 74ls174 resulted in this.

This is basically what you get when there is no SBC plugged in. The SBC I tried from the Gallag board did not work. I later found out that SBC was dead anyway. I ordered a new SBC from Mikes Arcade. when it arrived I tried it on the board only to get no change.
I noticed wiggling it around would give me some H's on the screen. I decided to replace the sockets for the SBC and VRA. Something I almost forgot to mention is I used one of the E-proms from this board on board 1. Not having enough E-proms I decided to do the 2 in 1 hack on the board which basically uses 2 modern Eproms to replace the 6 Eproms on the top and 4 on the bottom and at a flick of the switch you can change between games.
I only did the top half of the board as I had all the roms on the bottom board anyway. This actually worked out well because the new SBC had very short legs and would not plug in while the board was populated by the regular set of 2532's.
Another thing that really annoyed me is the VRA had very long legs and kept falling out of its socket. Some bright spark tried to solder this into the original socket. I decided to cut the legs by half so the board sat just above the IC's, this proved to work nicely. You can even pick the entire board up by the VRA. Ok now I had new sockets I fired her up again.

Well at least something is happening now...Screen is full of H's with some random garbage at the bottom of the screen flashing. Naturally believing this was a program fault I started poking around the chips with my logic probe.
There was normal clock to the CPU however the reset line was alternating from high to low, for that matter so was most of the chips. To cut a even longer story short a good tip is to unhook the bottom board to see if there is any change in chip activity. After doing this the top board started pulsing normally pffft bottom board fault after all.
Most of the chips on the bottom board were behaving normally. After much poking around I found a few chips in the same row behaving badly. A good trick is to piggy back a good chip on top of a bad one and it didn't fail me here.
The outputs on this 74ls245 @ 4h were all low with some dribble coming out. Piggy backing a good chip on top gave me flashing white dots. I replaced this chip and board fired straight up. Funny because it was running Pacman with Ms Pacman Character roms. I completed the hack to the bottom board and hey presto another Pacman saved from the scrap heap.
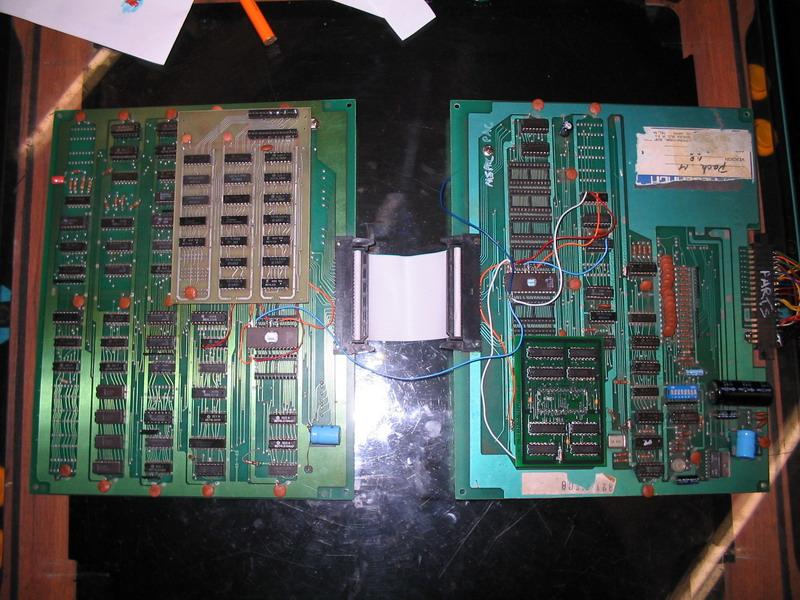
Next step was to complete the harness, the game ran PERFECT! however not all of the dip switches were working. Changing the nasty old dip switch fixed that. Pictured below is the almost complete board, as you can see I drilled a hole for the switch to make it nice and tidy.

Things to do.
- Id like to tidy up/replace a lot of the resistors on the board. I don't like it when they are soldered on the board sticking up.
- Replace the crappy looking Caps.
- Need to get some spacers and legs for it.
Ramblings:
DONT USE MITSUBISHI M5L27128K'S FOR THE BOTTOM BOARD, YOU WILL GET GRAPHIC GLITCHES WHEN YOU TURN THE VOLTAGE UP. I tried differant chips, one chip would work ok at 4.7-4.8 volts another I tried would flake out at 4.10 volts. The F branded chips were fine at 5 Volts.